


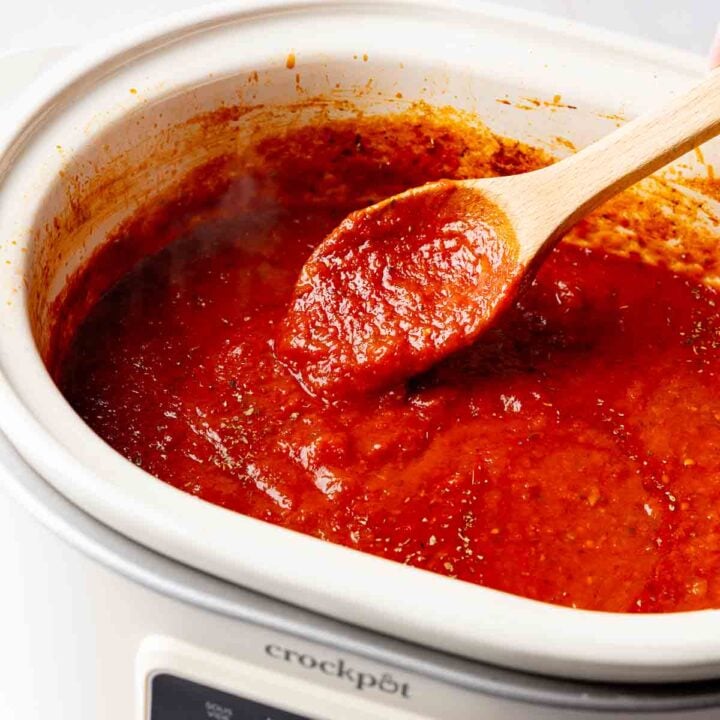
If the thought of making homemade gluten-free gravy intimidates you, fear not! Making gravy is actually quite easy... yes, even gluten-free! It only takes about 5 minutes and three main ingredients! This flexible gravy recipe is perfect for all of your gravy needs from Thanksgiving turkey to weeknight mashed potatoes and everything in between!

If you ask me, gravy is essential on Thanksgiving... or with any meal involving mashed potatoes! I make our favorite Instant Pot Mashed Potatoes somewhat regularly because my daughter LOVES mashed potatoes! She also loves, as I fondly refer to it now, "that soup stuff that goes on top." AKA, gravy!
Now listen, just because they sell those little gravy packets at the store, doesn't mean you actually need one to make a delicious gravy! In fact, you can make a better gravy without it!
Making gravy is a simple two-step process:
- Making a roux and
- Adding liquid to the roux to make, ta-da!... a gravy!
That doesn't sound so bad, right? I know what you're thinking... "but you already used a fancy word!" Here's the thing though, a roux is not that fancy...
What's a Roux?
A roux is nothing more than a simple mixture of flour and fat that is cooked together to make a thick paste. That's it! Yes, it's a fancy word, but a roux in of itself isn't complicated.
Ingredients & Substitutions
So now let's talk about what ingredients you need to make a simple gravy! A good gravy only requires three components: fat, flour, and liquid. The type of fat and liquid you choose, determines the type of gravy you make, i.e. chicken, turkey, or beef.

- Fat: This can be butter or pan drippings from your chicken or turkey. Or the fat rendered from cooking breakfast sausage! You can also use dairy-free butter if needed.
- Flour: I prefer sweet rice flour! It really makes a great gravy! Plain white rice flour or brown rice flour can also be used, but you may need to decrease the amount of liquid you use. You can also use a gluten-free flour blend or cornstarch as a gravy thickener but I find sweet rice flour to be the easiest and most fool-proof.
- Liquid: Use the broth or stock that matches your protein! So either turkey, chicken, or beef in most cases. You can even use milk for a creamy, sawmill-style gravy!
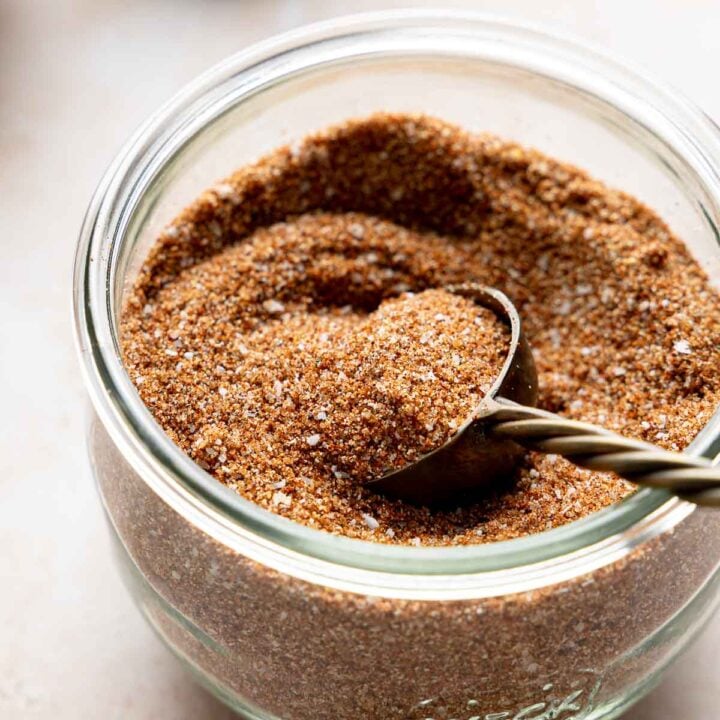
- Seasoning: Salt, pepper, & herbs! Add these to taste! If you want a plain gravy, just add salt and pepper. Be careful when adding salt if you're using pan drippings, you might not need a lot. If you want to be fancy, add a few fresh herbs! If you're going for sawmill gravy, add a lot of fresh cracked pepper!
The Gravy Ratio
As you may have gleaned so far, gravy isn't so much a recipe but a method! To that end, all you need to know to make gravy is a simple ratio! This means you can make as much or as little gravy as you need if you can just remember the formula!
This ratio is also why it's so easy to change what type of gravy you make based on the types of fat and liquid you use!
The formula is for every 1 cup of liquid, you use 1 Tablespoon of fat and 1 Tablespoon of flour:
Save This Recipe!
1 Tablespoon Fat + 1 Tablespoon Flour + 1 Cup Liquid
So if you need two cups of gravy, just increase the amounts to 2 Tablespoons fat, 2 Tablespoons flour, and 2 cups of liquid, and so on.
Pro-tip: This formula works best with sweet rice flour. If you're using other rice flours such as brown rice or white rice, that's fine, but you may need to cook the gravy for 15 minutes or so to get to your desired consistency.
Make Gluten-free Gravy in Four Easy Steps
- Melt butter in a pan and whisk in the rice flour. Season with a little salt and pepper. Let cook and bubble for 2 minutes. Be sure to whisk the whole time! (This is the Roux!)
- Slowly whisk in your liquid (broth, stock, or milk) a little a time. (Also, add fresh herbs at this step if desired!)
- Allow to simmer on low and continue to whisk occasionally until the gravy thickens.
- Taste the gravy and add seasonings as desired. Add more stock to thin if needed.

Tips for Perfect Gravy
Even though gravy is pretty easy to make, you still might need a few tips to help you along!
- To avoid lumpy gravy, use room temperature or warmer liquid! Adding cold broth or milk to the warm roux will cause clumping.
- Whisk in only a splash of broth at a time, making sure it is fully whisked in before adding any more. Continue like this until all of the liquid has been added. This also helps avoid lumps!
- You can keep the gravy warm on the stove-top. Remember to stir occasionally so it doesn't burn to the bottom. Give it a whisk before serving and check the thickness. Add a little more liquid if the gravy becomes too thick.
- If the gravy is too thick, add more stock.
- If gravy is too thin, continue to simmer, uncovered, until you reach the desired consistency.
Making Ahead & Storing
Believe it or not, you can actually make gravy ahead! Yes, that's right! This is very helpful, especially for Thanksgiving prep!
If you make gravy ahead, you can store it in the refrigerator for 1-3 days.
To reheat, microwave the gravy in a microwave-safe dish or reheat in a pan on the stovetop! Have some extra broth or milk to thin out the gravy in case it becomes too thick during storage.

By now you should know pretty much everything you need to know in order to make a delicious gluten-free gravy! So tell me, after all this info, will you still be buying those packets or do you now have the confidence to make your own gravy from scratch?
If you're looking for more gluten-free Thanksgiving recipes, check out my Gluten-free Stuffing and my Gluten-free Sweet Potato Casserole! This Thanksgiving slaw recipe is a refreshing addition as well!
Recipe

Gluten-free Gravy
Ingredients
- 2 Tablespoons butter or pan drippings, (or other fat such as non-dairy butter)
- 2 Tablespoons sweet rice flour
- 2 cups chicken stock or broth, (or turkey or beef stock/broth, or milk. )
- Salt, pepper, fresh herbs, (to taste, if desired.)
Instructions
- Melt the butter in a pan over low-medium heat.
- Whisk in the sweet rice flour and season with a little salt and pepper. Let this roux cook and bubble for 2 minutes. Be sure to whisk the whole time so it doesn't burn.
- Add a splash of your liquid (broth, stock, or milk) and whisk until incorporated. Continue adding a splash of liquid and whisking until all of the liquid has been incorporated. (Also, add fresh herbs at this step if desired!)
- Allow the gravy to simmer on low, whisking occasionally, until the gravy thickens. About 15 minutes. Continue to simmer until desired consistency is reached.
- Taste the gravy and add seasonings as desired. Keep the gravy on low/warm, whisking occasionally until serving, adding more stock to thin if the gravy becomes too thick.
Notes
- Gravy can be made ahead and stored in the refrigerator for 1-3 days.
- To reheat, microwave the gravy in a microwave-safe dish or reheat in a pan on the stovetop! Have some extra broth or milk to thin out the gravy in case it becomes too thick during storage.
Save This Recipe!
Estimated Nutrition
* Nutritional information is provided as a courtesy and should be used as an estimate only. See the nutrition policy for more information.


Kathy says
Great post! And easy to remember. I think I’ll make some of that soup stuff that goes on top tonight! ?