

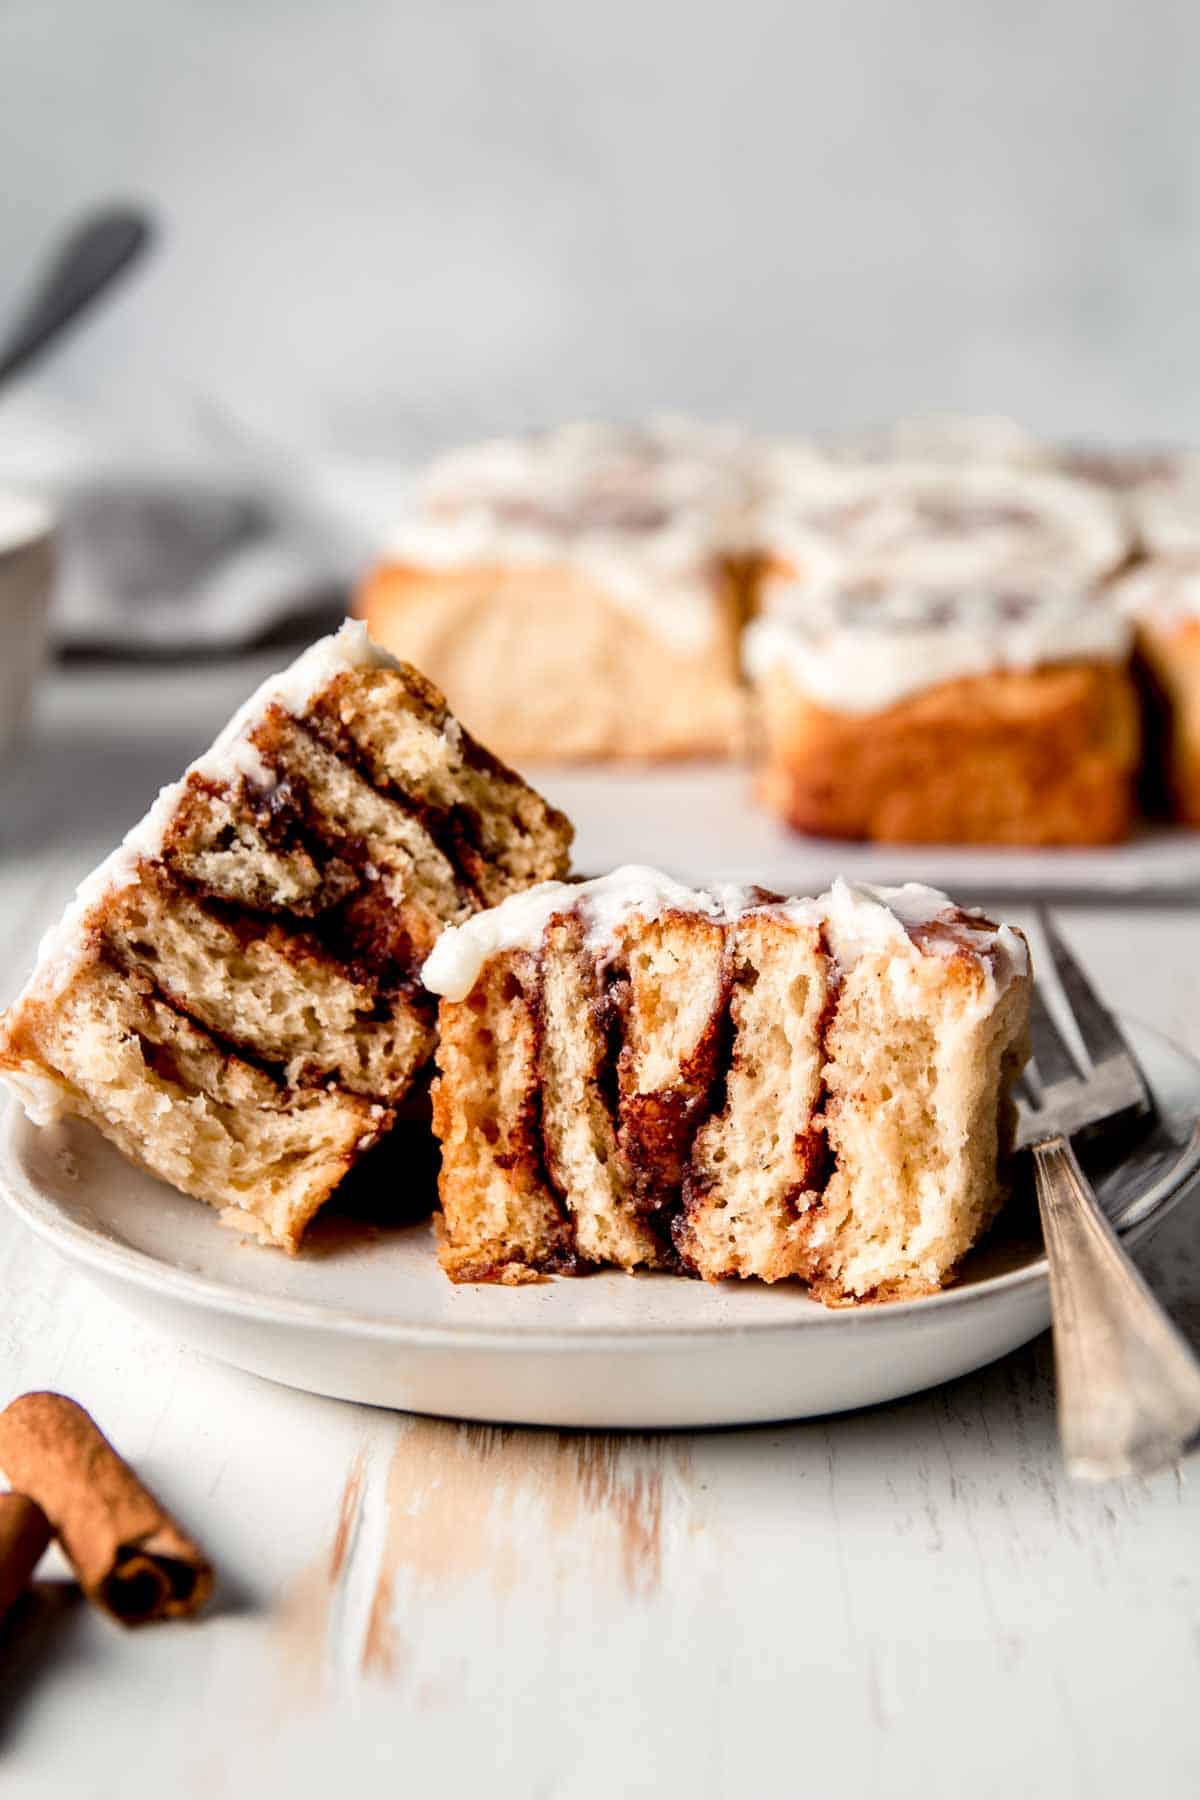
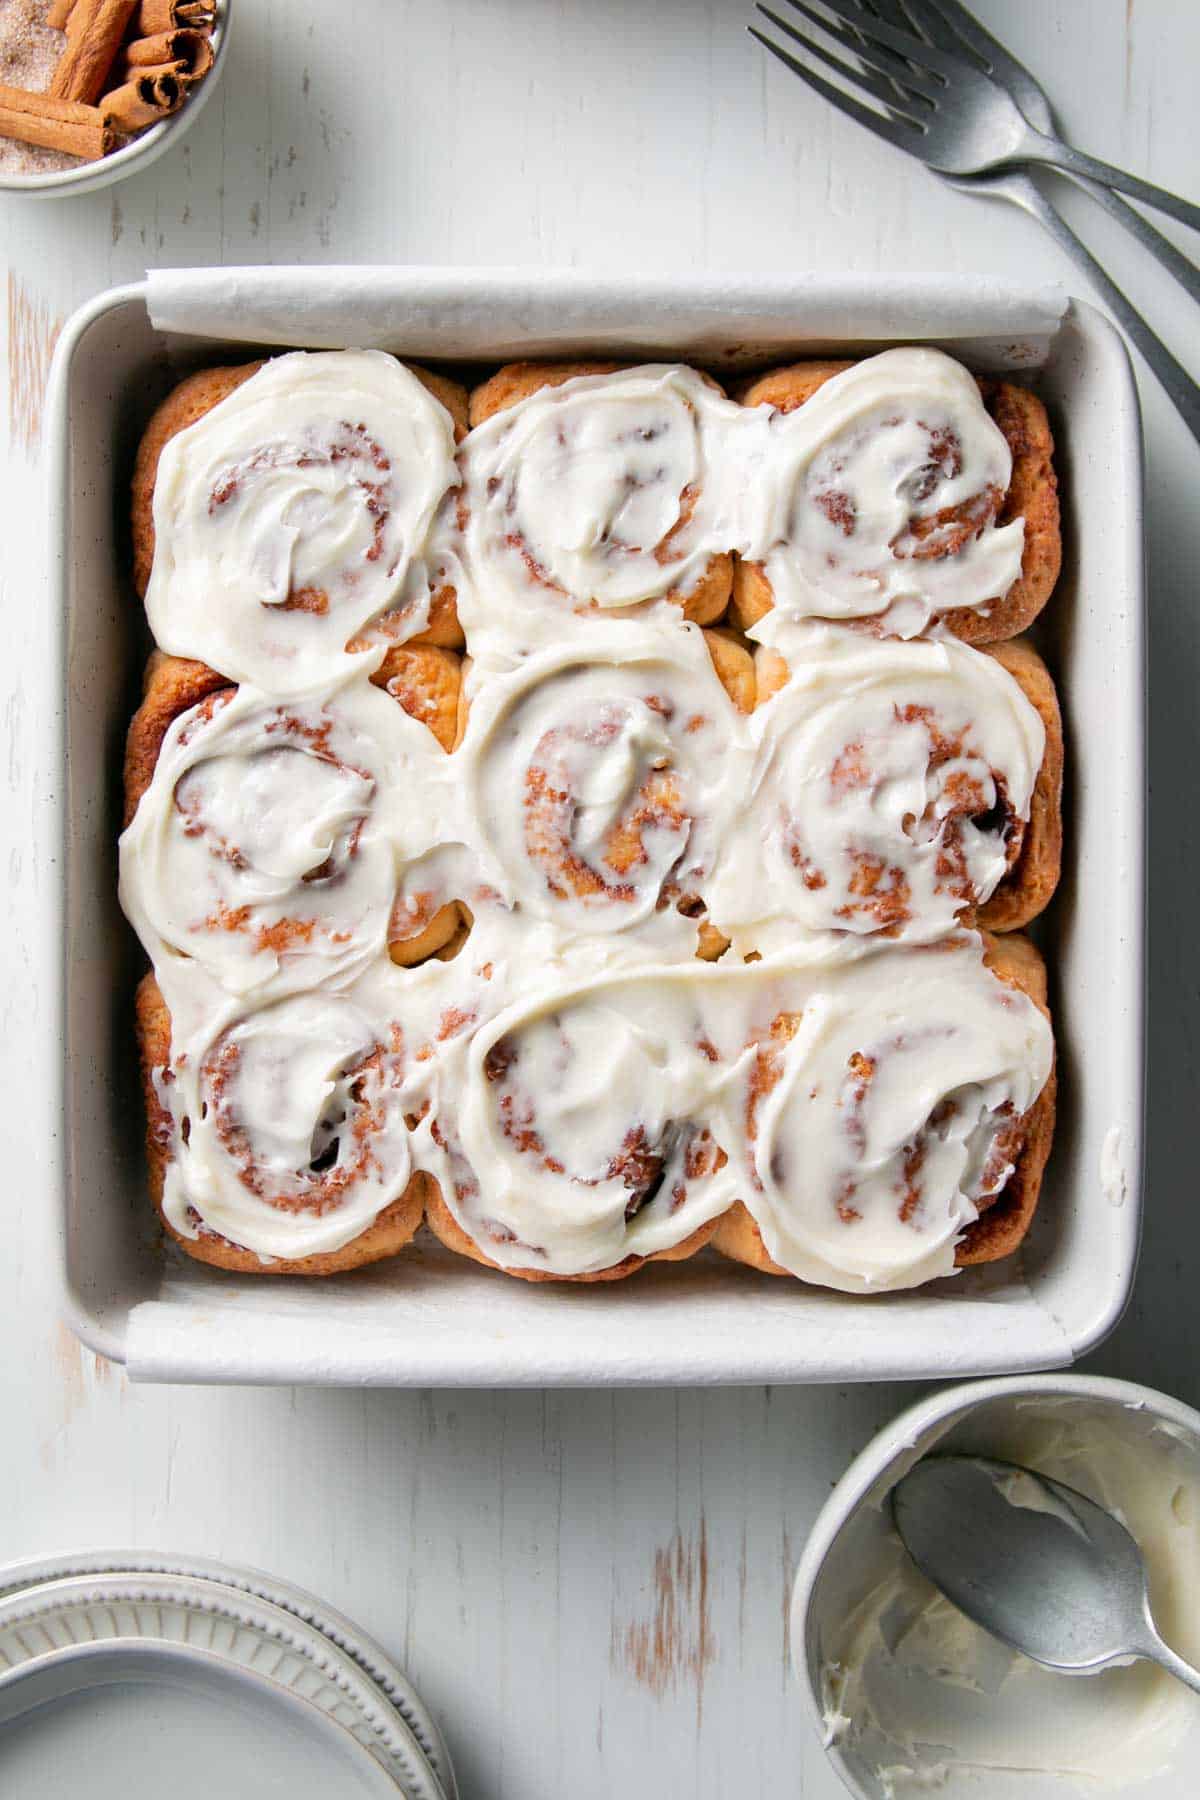
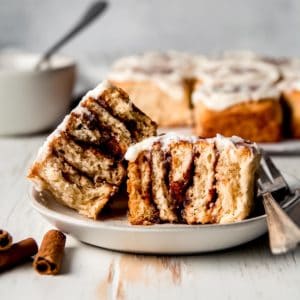
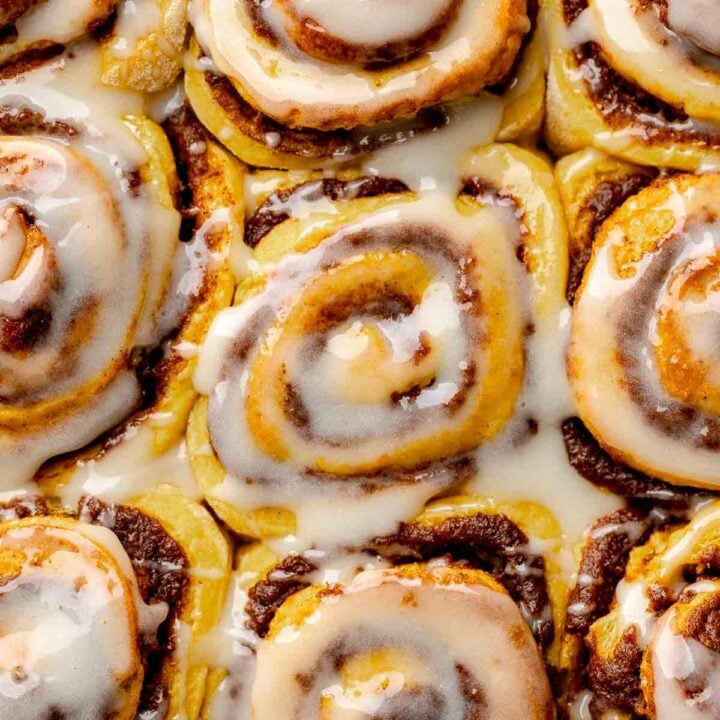
This is the ultimate gluten-free cinnamon rolls recipe! Made with Caputo Fioreglut gluten-free flour, this recipe creates the best, most delicious cinnamon rolls that are actually soft and fluffy! Topped with tangy cream cheese frosting, these rolls are amazing!
Jump to:
Why You'll Love This Recipe
Have you been dreaming of the best homemade gluten-free cinnamon rolls recipe? One that is soft and fluffy, full of gooey filling, topped with luscious cream cheese frosting? How about a recipe that is simple to make from scratch yet amazingly delicious? If all this sounds good to you, it's time to make your dreams a reality!
This recipe is that good! It may just be the last cinnamon roll recipe you'll ever need! And it doesn't stop there! There is even more to love!
- This recipe is yeast-based, just like a traditional cinnamon roll!
- The dough only requires one rise, which makes this the quickest yeasted cinnamon roll you can make!
- This recipe is flexible! Make and bake the rolls all on the same day or refrigerate overnight and bake the next day. Perfect for a make-ahead breakfast on Christmas morning!
Why This Recipe Works
For years, I loved making cinnamon rolls every Christmas morning but since going gluten-free due to celiac disease, I've found that yeast breads like gluten-free pizza and gluten-free dinner rolls have been much harder to replicate to be close to their regular counterpart. Cinnamon rolls were no exception! It has taken quite some time and a lot of trial and error to create a cinnamon roll recipe that rivals their regular version and worthy of a spot on this blog!
Creating a delicious gluten free cinnamon roll is not as simple as swapping out any gluten free flour into your old favorite recipe. That may work for some recipes but not this one.
I've been working my way through some other gluten-free yeast bread recipes, and with each one I feel more confident in my skills. I learn new tricks and techniques to apply to future recipes.
As such, the dough for this recipe was adapted from my gluten-free brioche bread recipe. Using that as a starting point, I tweaked this recipe until I made the ultimate gluten-free cinnamon buns with just the right amount of gooey-ness and that soft and fluffy texture we all crave! If you love these, be sure to try my gluten-free pumpkin cinnamon rolls or gluten-free prune sticky buns!
If you need a break from the more complicated recipes, try this super easy gluten-free cheese danish recipe or these gluten-free cinnamon raisin biscuits!
Ingredient Notes and Substitutions
The other goal I had in mind for this recipe was a list of ingredients that was within reason. I tested with a few different "special" ingredients but was able to simplify this recipe into the easiest possible version that still produced great results!
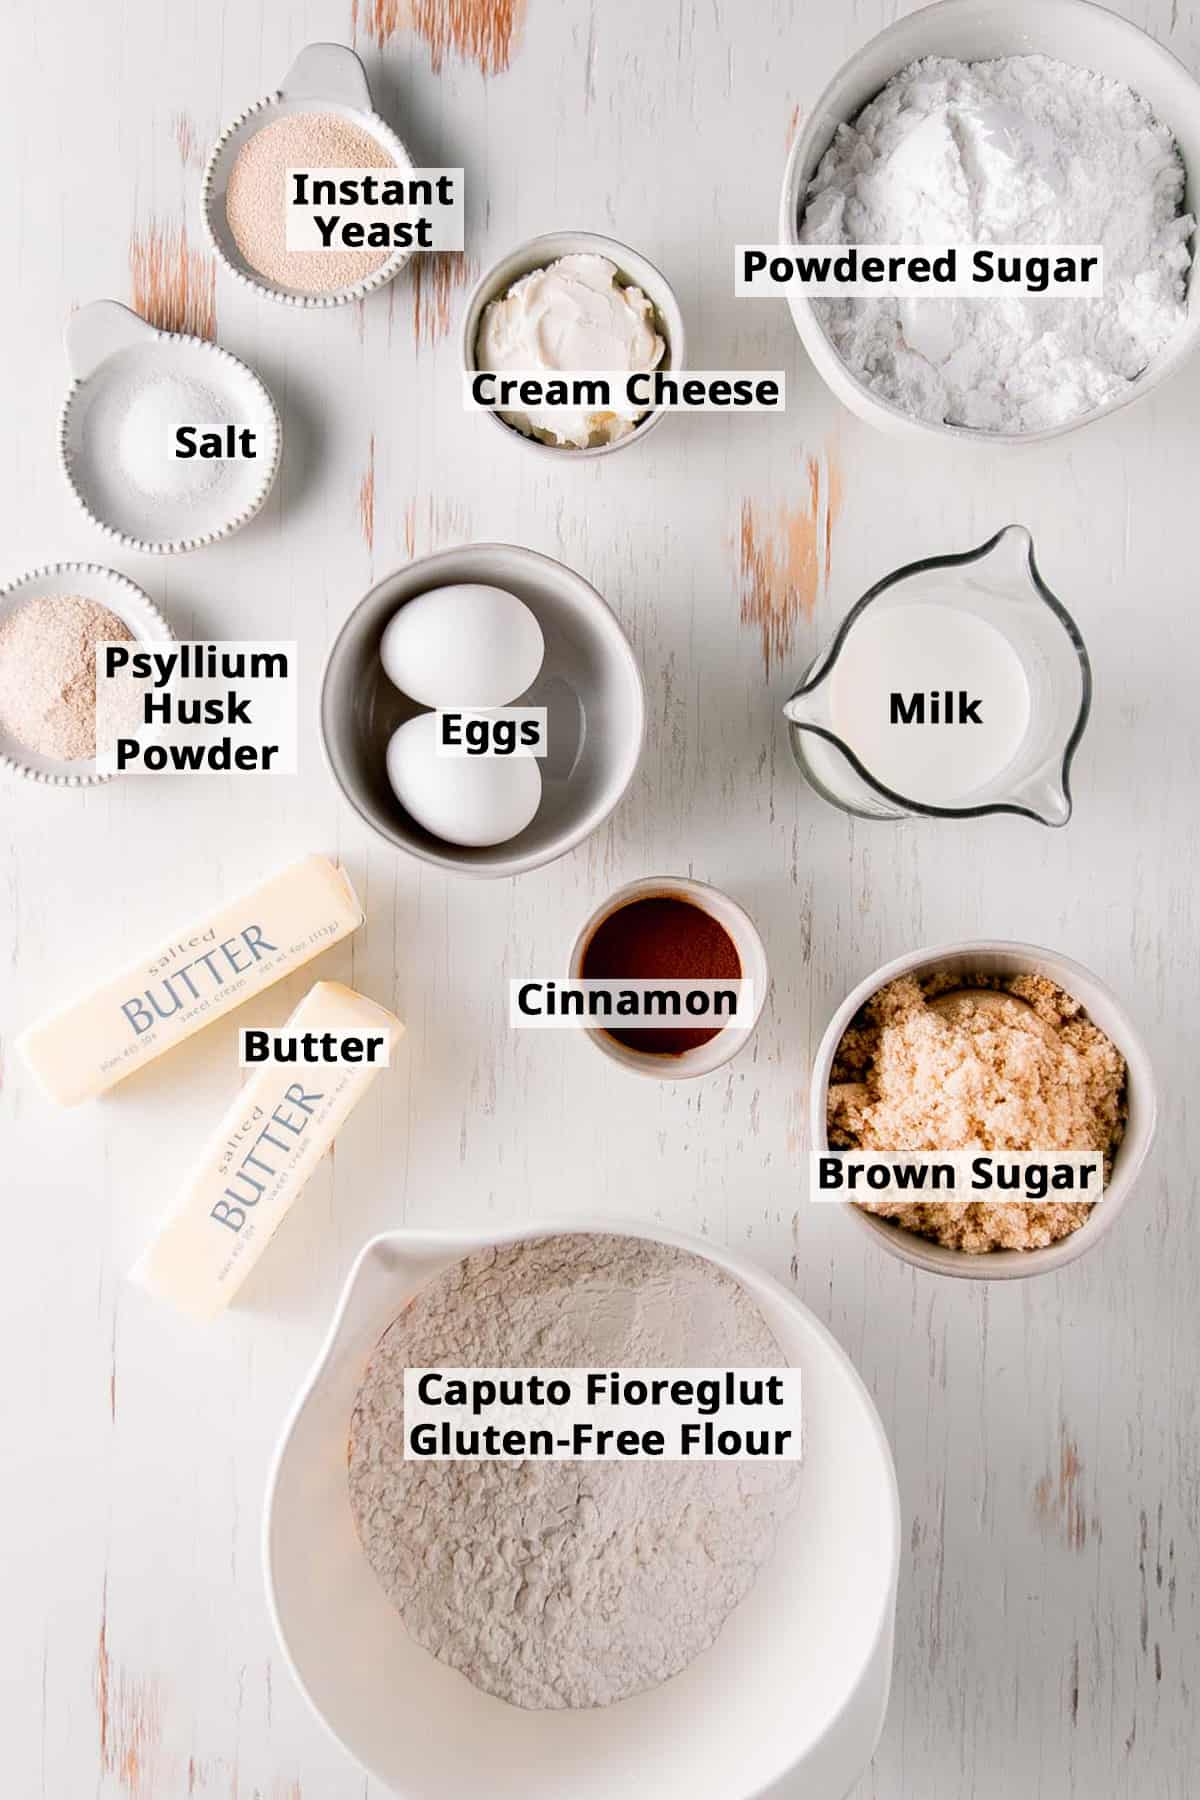
- Gluten-free Flour Blend: There is only one flour blend I can recommend for this recipe and it is Caputo Fioreglut.
It is far superior to any other blend on the market for yeast breads. If you have a brand you'd like me to try in my recipes, let me know in the comments, but as of right now this is the only flour that will work in this recipe.
Also please note, the flour does contain gluten-free wheat starch, which is what aids in producing a texture that rivals regular bread. This flour is certified gluten-free and tested to contain <20ppm gluten, which means it is safe for someone with Celiac Disease, but take note that this flour is not suitable for someone with a wheat allergy.
I urge you to read the article I wrote about gluten-free wheat starch if you are curious to learn more. - Yeast: This recipe calls for rapid rise yeast. It may also be labeled as instant yeast or bread machine yeast.
The benefit to this type of yeast is that it is a bit easier to work with. You don't have to dissolve it in liquid first. Instead you will mix it right in with the dry ingredients. If you only have regular yeast, you will need to dissolve the yeast in the warm milk first before adding it to the recipe.
Always make sure your yeast is fresh! Keep unused yeast tightly sealed and refrigerated. Use it within six months. - Psyllium Husk Powder: A while back I read about psyllium husk in gluten-free baking and gave it a try in one of my recipes. I was impressed! It really does make a world of difference in the structure of the bread and ease of working with the dough, especially in recipes that require shaping. I encourage you to give it a try! It's a relatively inexpensive ingredient and you'll be able to use it for quite some time!
This recipe calls for the powdered version, not the rough husk. If you have rough husk, you'll need to increase the amount used in the recipe by about 15% because powdered psyllium husk forms a stronger gel.
If you are allergic, I found that you can omit it in my brioche recipe but I have not specifically tested that here. Furthermore, the flour blend also contains psyllium so keep that in mind if you don't tolerate it. - Milk and Butter: These ingredients are important to the texture and richness of the dough, you can substitute dairy-free alternatives such as almond milk and earth balance vegan buttery sticks if needed.
- Eggs: To date, I have not tested nor do I have recommendations for making this recipe without eggs.
- Cream Cheese: These rolls are topped with cream cheese icing. Cream cheese is gluten-free. If you prefer you can also make a simple powdered sugar icing instead.
- Cinnamon: Cinnamon is naturally gluten-free.

Get the Goods!
Caputo Fioreglut
I recommend you buy Caputo Fioreglut from Brick Oven Baker. They have great prices and you can use code: KATIE for 10% off your first order!
Equipment
- A sturdy stand mixer is definitely helpful for this recipe. While I think you could mix it by hand, I would recommend using a stand mixer if possible. Do not use a hand mixer! The dough is too thick.
- A digital kitchen scale is also a must for this recipe. It is the only way to accurately measure this flour. A scale comes in handy quite often for gluten-free baking and you can usually find one for around $10. It is well worth the investment.
- Rolling pin
- Parchment paper
- 9-inch square or round cake pan or pie plate
- Dental floss
How to Make Gluten-free Cinnamon Rolls
This recipe is somewhat more involved than a typical baking recipe. While I worked to make this recipe as easy as possible to make, you may still be nervous about it if you're new to making yeast breads or making cinnamon rolls. Here you can see the entire process from start to finish. Other than taking some time, the process is actually fairly easy.
Save This Recipe!
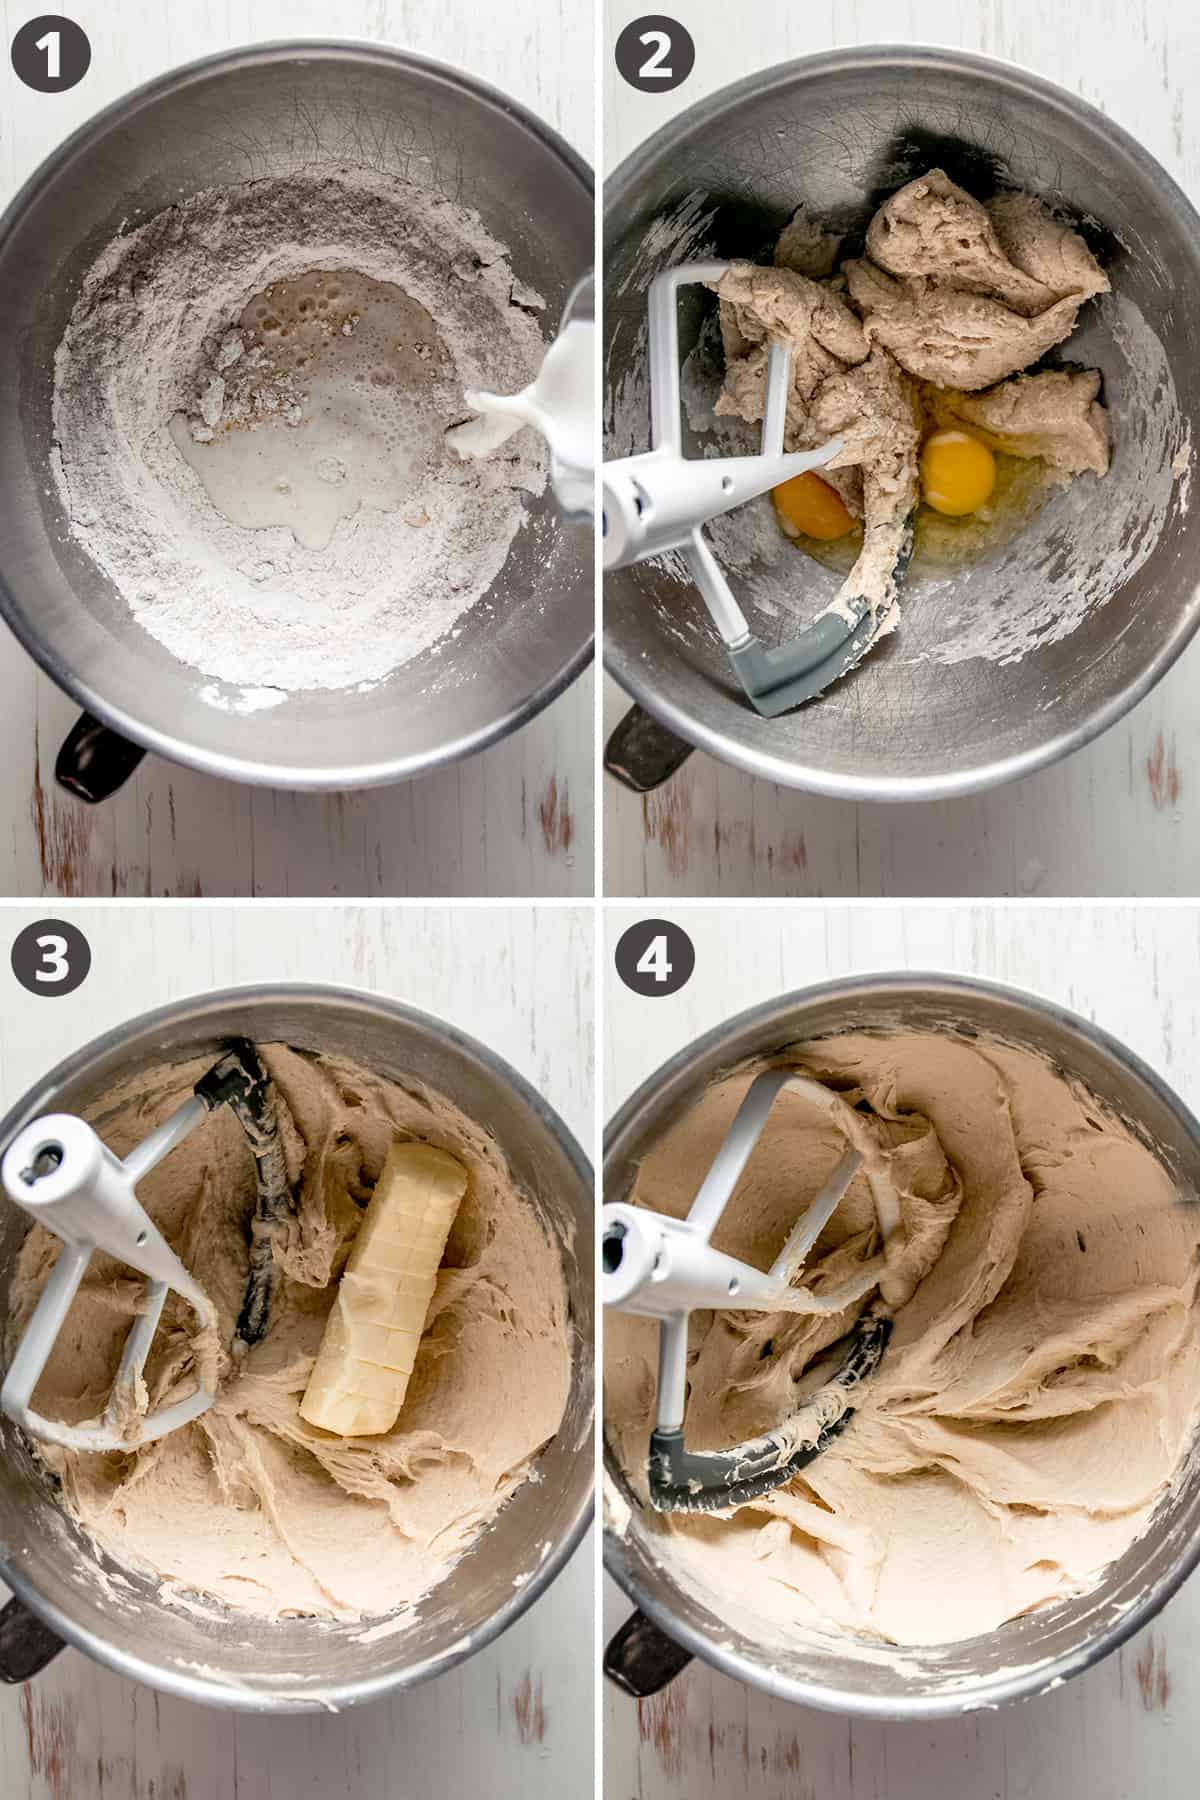
- Step 1: In the bowl of a stand mixer, whisk the dry ingredients. Then pour in the milk that is warmed between 120-130°F.
- Step 2: Blend that together until well combined. Then add in the eggs. Mix this on medium speed for 1-2 minutes or until the eggs are combined.
- Step 3: Add in the softened butter. Blend again for 2 more minutes.
- Step 4: The mixture should appear smooth and thick!

- Step 5: Find a good spot in your kitchen to roll out the dough. Place a piece of parchment paper down and sprinkle it with gluten-free flour. (This does not have to be Caputo Fioreglut. Feel free to use any gluten-free flour blend you have on hand, preferably your most inexpensive one!) Then place the dough on top.
- Step 6: Sprinkle the surface of the dough and your rolling pin with more flour. Gently roll out the dough, adding more flour if needed.
- Step 7: Roll the dough out into a rectangle roughly a little more than ¼-inch thick and about 11-inches by 13-inches. You can use a bench scraper or spatula to square up the edges if you'd like.
- Step 8: Spread a thin layer of softened butter over the surface of the dough. Then sprinkle with the brown sugar and cinnamon mixture. Leave about one inch exposed so you can seal the end.
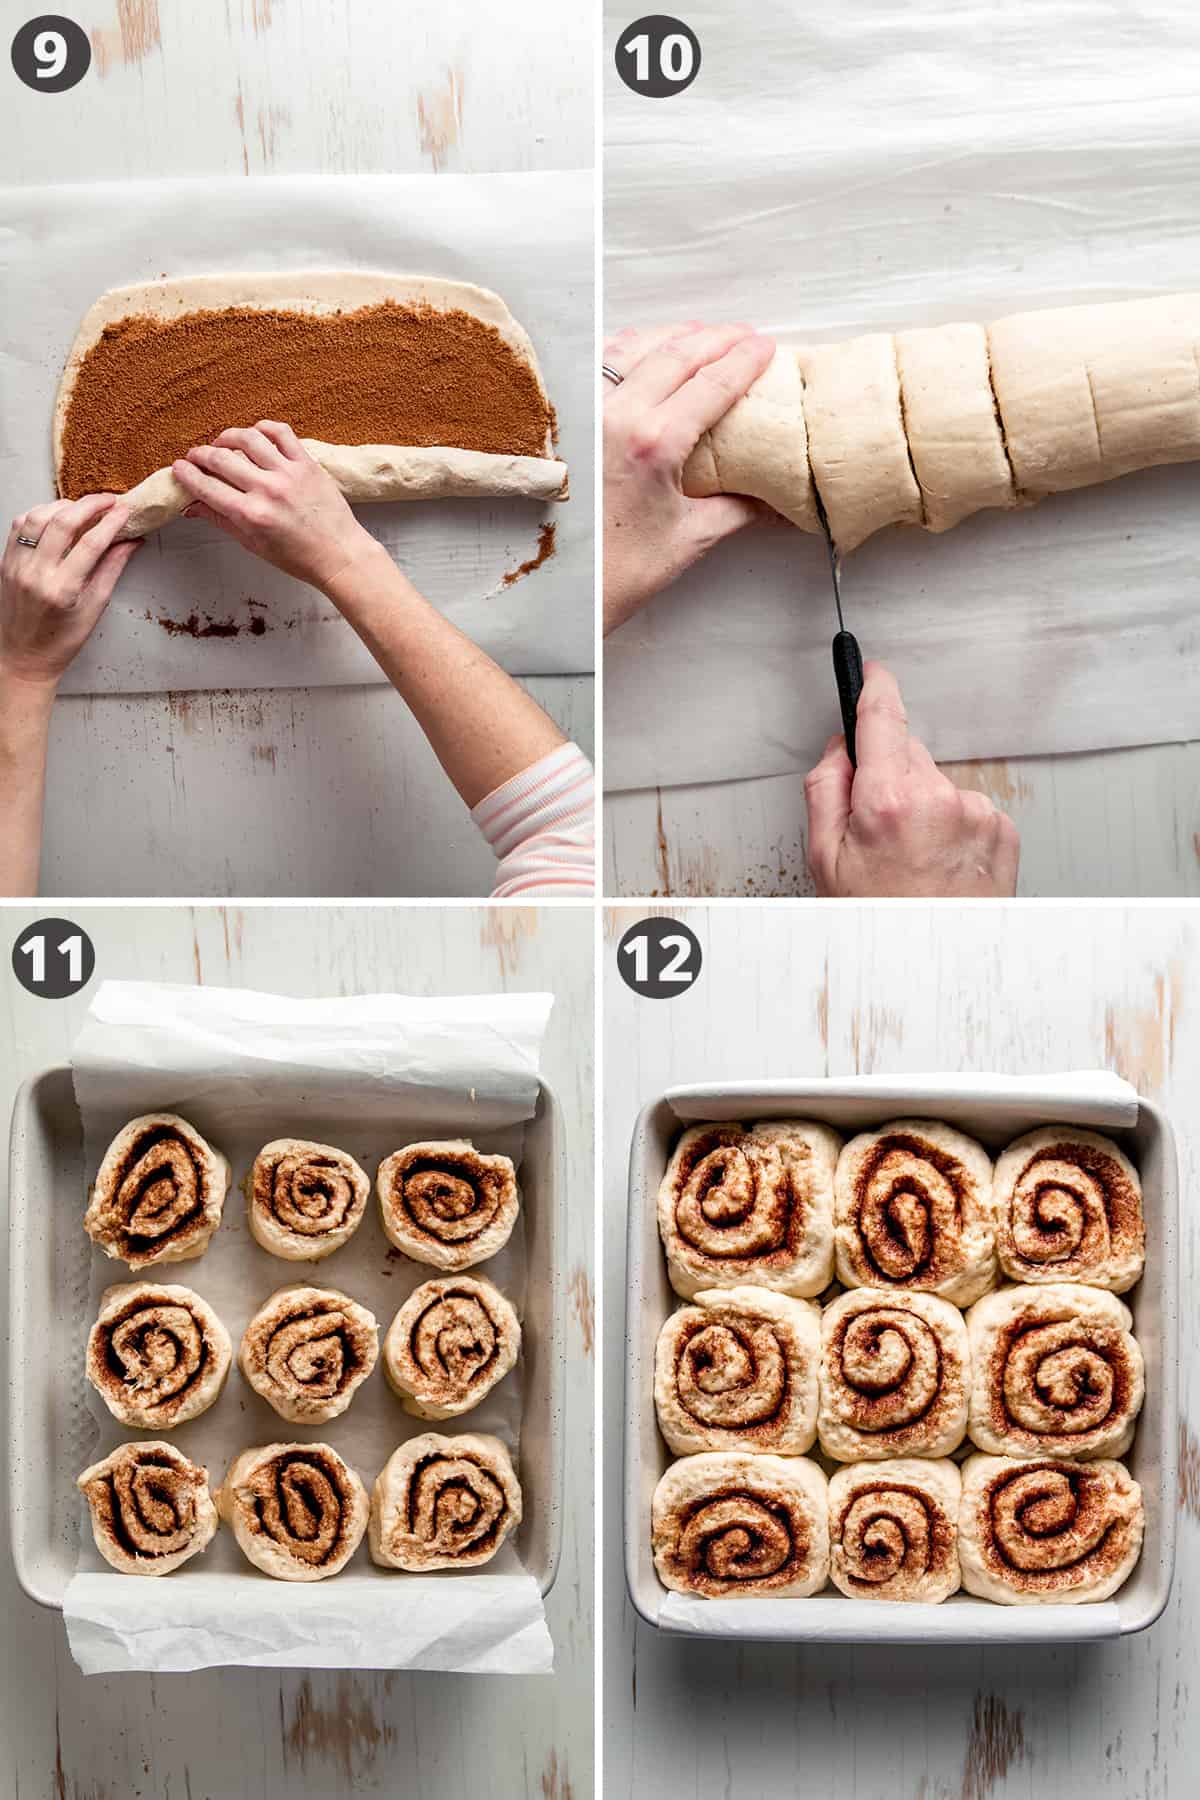
- Step 9: Now roll the dough up into a log. Use a pastry brush to brush away any excess flour as you go. Try to keep this tight, but be gentle. You can lift the parchment to aid in the rolling process.
- Step 10: Grab a length of dental floss and use it to slice the log into 1 ½-inch slices.
Using this dental floss hack to slice the rolls has proven to be the best way to slice them. To do this, slide dental floss under the log of dough, criss-cross the floss over the top, and pull it in opposite directions to make a slice.
You can also use a serrated knife and a gentle sawing motion to cut each slice. Wipe the knife clean after each slice. If the dough pulls a little, that's ok. You can gently reshape them a bit when you place them in the pan. As long as they are still rolled up, they will rise into shape.
- Step 11: In a greased pan or a pan lined with parchment paper, place the rolls about 1 inch apart. The rolls should not be touching but be close enough end up touching after they have risen. You also don't want them so crowded that they can't rise properly. Nine rolls fit perfectly in a 9-inch square pan. Use more than one pan if needed for the rolls to fit properly. (Sometimes when I roll them out I end up with more than 9 rolls. I don't see the point in wasting any, so I'll just grab another small pan to place the remaining rolls.)
- Step 12: Cover with plastic wrap and let the rolls rise in a warm spot until about doubled in size, about 1 to 1 ½ hours.
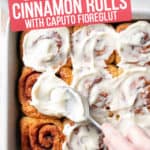
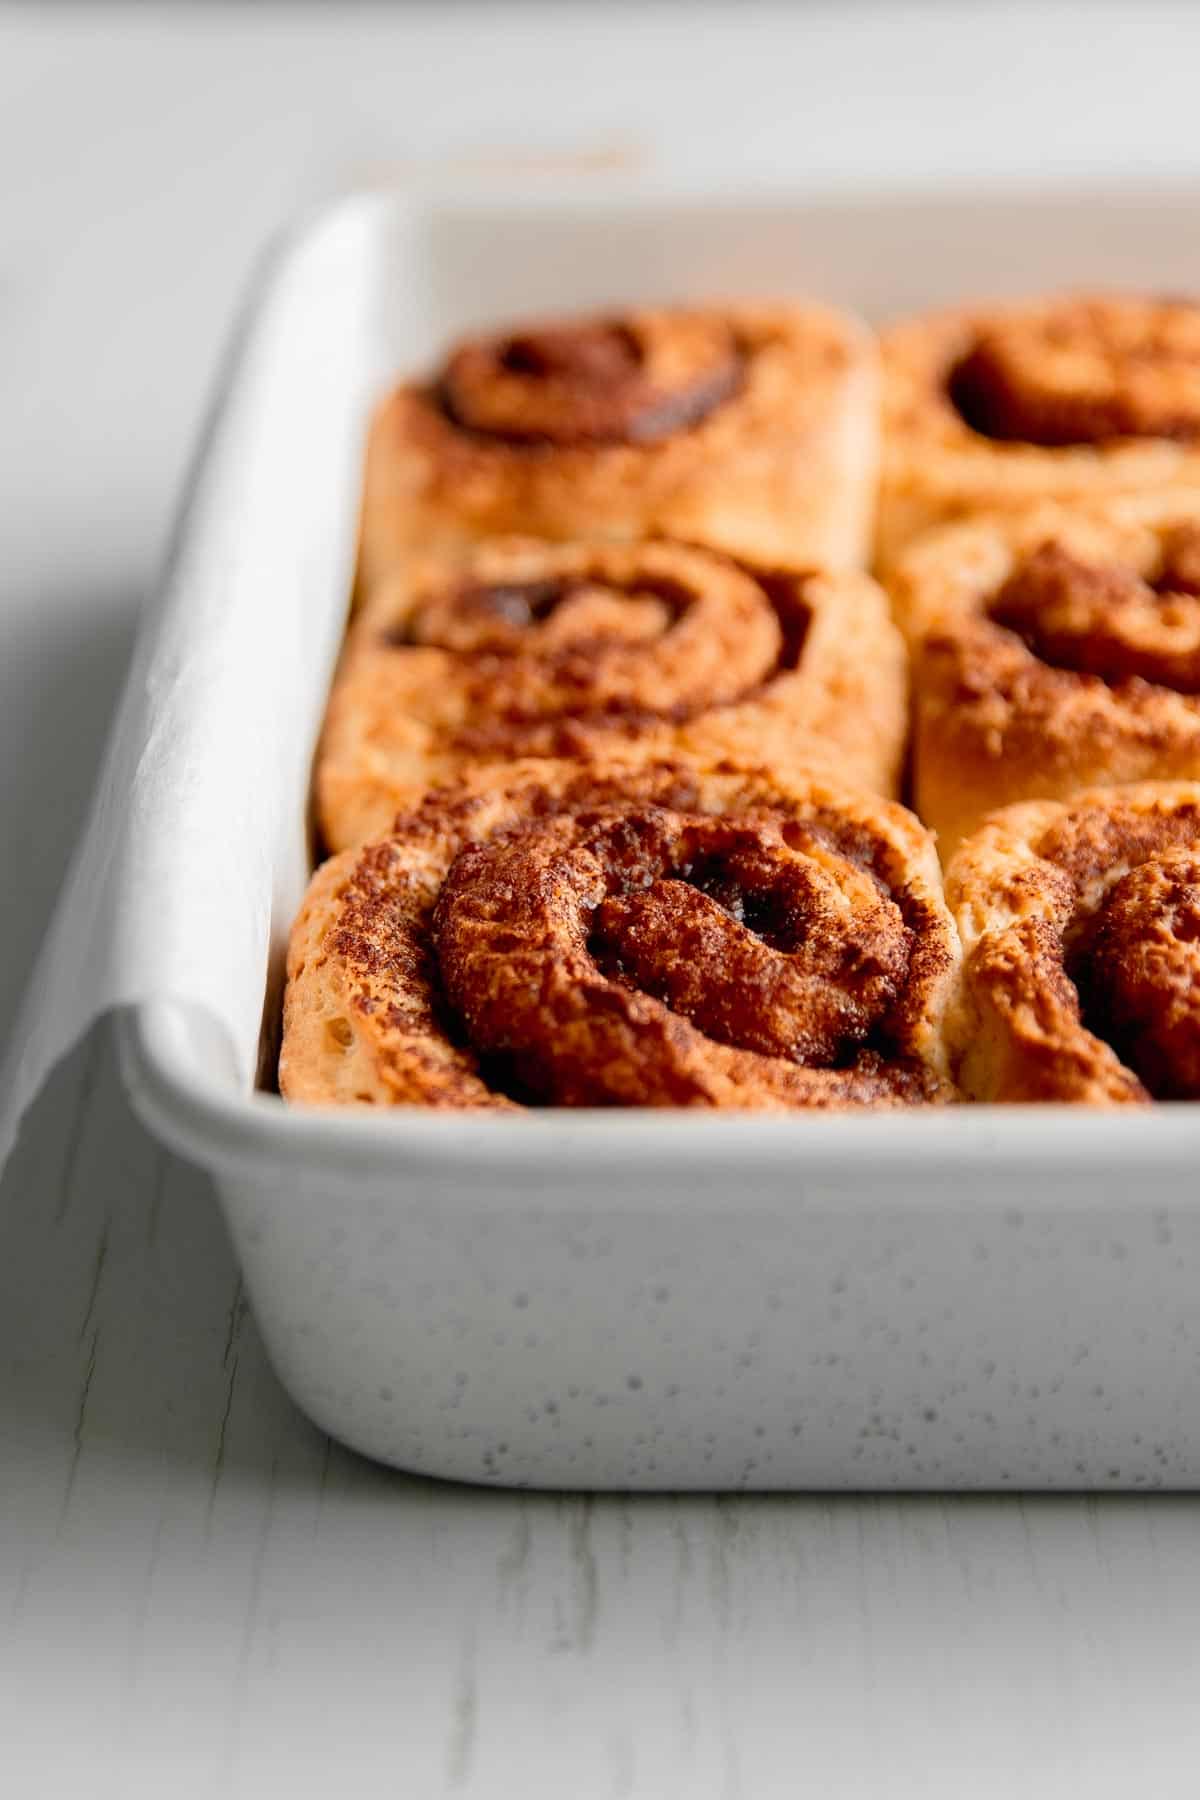
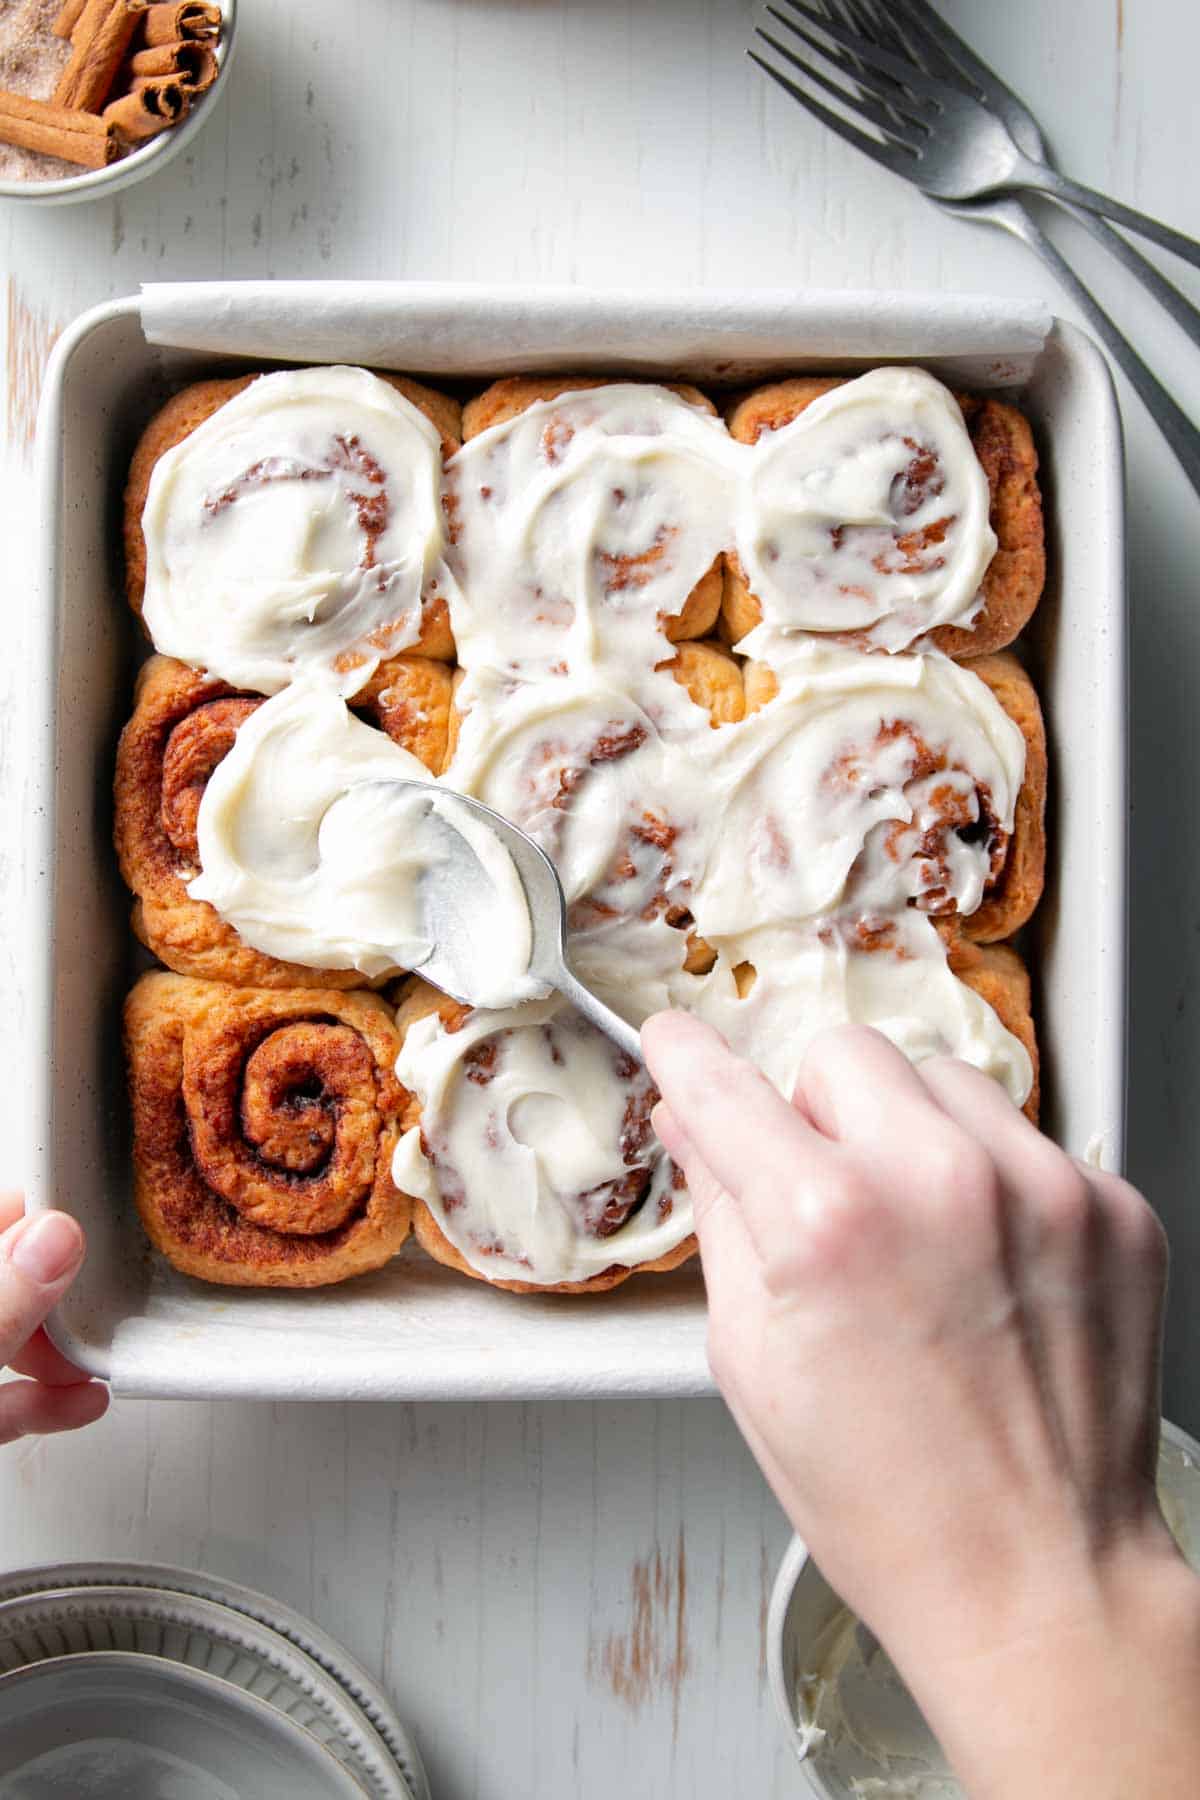
- Step 13: After the rolls have risen, it's time to bake until golden brown. Make the frosting while the rolls bake. Then, frost the rolls while they are still warm.
Make Ahead Instructions
This recipe is actually quite flexible! You can make and bake the rolls all in the same day or refrigerate them overnight, see more details below.
To Refrigerate Overnight: Make the rolls and allow them to rise. After they have risen, keep them covered and refrigerate. When you're ready to bake, allow the rolls to come to room temperature for about 1 hour before baking for the best results.
You can also make the icing one day ahead and refrigerate. Pull it out of the refrigerator while the rolls bake to allow it to soften a bit before spreading onto the warm rolls.
To Freeze: Line your pan with parchment paper or use disposable foil pans. Allow the rolls to rise. After the rolls have risen, place them in the freezer. Once the rolls have frozen solid, wrap tightly with plastic wrap and foil. If you didn't use a disposable pan, you can remove the rolls from the pan before wrapping.
One day before baking, remove the rolls from the freezer. Place the rolls back into the pan if needed. Allow them to thaw completely overnight in the refrigerator. Bring to room temperature for at least 1 hr before baking.
Storage
The rolls are best enjoyed fresh and warm from the oven! If you have leftovers, store the rolls at room temperature. Eat within 2 days. Warm for 15 seconds in the microwave as needed to soften.
Important Tips to Remember
- Measure at least the flour by weight. This flour is very starchy so the most accurate measurement will be by weight instead of cups.
- Make sure the milk is warm to 120-130°F and the eggs and butter are at room temperature. Proper temperature of ingredients is necessary for proper activation of the yeast.
- Make sure you are using instant yeast and make sure it's fresh.
- The dough is should be somewhat soft. You'll notice this mostly when you go to slice the rolls. Use the dental floss hack or a serrated knife and a gentle sawing motion to slice them. If they do not have the perfect shape, it's ok, just keep them rolled and place them in the pan. Gently push the dough to reshape if needed.
- You must use parchment paper and extra flour when rolling out the cinnamon rolls. You do not want this dough stuck to your counter. Use any inexpensive gluten-free flour blend that you have on hand.
- If you make any substitutions to the dough recipe, I cannot guarantee the results! Follow the recipe as written. See trusted substitutions in the recipe card below.
Recipe FAQs
Gluten-free flour does not rise in the same way as regular wheat flour because it lacks gluten, a protein that provides structure and elasticity to traditional bread and pastry dough. Gluten is responsible for trapping carbon dioxide produced by yeast, which causes the dough to rise and create a light, airy texture in baked goods. Achieving a rise in gluten-free baking requires leavening agents, starches, binders, proper mixing, and specific flour blends. It's a bit of trial and error to get the best results in gluten-free baking.
To tell if your dough has proofed properly, check to see that the dough has visibly increased in volume. It should appear noticeably puffy and expanded. Take note that gluten-free dough may not rise as dramatically as wheat-based dough. You can also gently press your finger into the dough. If the indentation slowly fills in but leaves a slight impression, it's likely proofed correctly. If it springs back immediately, it may need more time. If the dough collapses and doesn't spring back, it may have over-proofed. If the top of your dough appears bubbly, this may also indicate the dough has over-proofed, as the bubbles are an indication of gasses escaping the dough.
The ideal temperature for a "warm spot" for dough rising is typically in the range of 80-85°F. This temperature range encourages yeast activity and helps the dough to rise effectively. You can create a warm spot by placing the dough in a turned-off oven with the oven light on, or near a heat source, but make sure it's not too hot to avoid over-rising. If your kitchen is particularly cold, you might need to use a slightly warmer spot or cover the dough with a damp cloth to maintain the desired temperature.
Some measurements are listed in teaspoons instead of grams for the sake of precision. While scales are precise, they may not accurately measure very small amounts, making measuring spoons a better choice for quantities under 10 grams.
More Gluten-Free Recipes with Fioreglut
Looking for more awesome ways to use Caputo Firoeglut? Try my gluten-free pan pizza recipe or the recipes below!

Recipe
Gluten-Free Cinnamon Rolls with Caputo Fioreglut
Ingredients
Cinnamon Roll Dough
- 280 g Caputo Fioreglut Gluten-free Flour Blend (*weight measurement preferred, click the metric button above.)
- 70 g brown sugar
- 2 ¼ teaspoon psyllium husk powder
- 2 ¼ teaspoons instant yeast (also known as rapid rise or bread machine yeast)
- ½ teaspoon table salt
- 185 g milk (warmed to 120-130°F)
- 2 large eggs (room temperature)
- 113 g butter (room temperature and soft)
Filling
- 113 g butter (very soft)
- 70 g brown sugar
- 8 g cinnamon
Frosting
- 57 g cream cheese (softened)
- 28 g butter (softened)
- 180 g powdered sugar
- ¼ teaspoon vanilla extract
Instructions
Make the Cinnamon Rolls
- Grease a 9-inch baking dish and set aside.
- In the stand mixer bowl, whisk the flour, brown sugar, psyllium husk powder, yeast, and salt together.
- Attach the bowl to the stand mixer and turn to level 2. Slowly pour in the warmed milk and blend until combined.
- Continue mixing and add in the eggs. Increase the speed to medium and blend until the mixture is well combined, about 1 minute.
- Add in the softened butter and blend on medium speed for 2 minutes. The mixture should be thick and smooth.
- Let the dough rest 10-15 minutes for the psyllium to hydrate and allow the dough to become more workable.
- Place a piece of parchment paper down and sprinkle with gluten-free flour. (Any blend is fine here, preferably an inexpensive one.) Place the dough on top and sprinkle a little more flour.
- With a floured rolling pin, roll out the dough into an 11x13-inch rectangle, about ¼-inch thick.
- Spread a thin, even layer of very soft butter over the dough, leaving one edge exposed.
- Mix together the brown sugar and cinnamon. Sprinkle the mixture evenly over the buttered dough.
- Roll the dough into a log, ending with the unbuttered edge. Pinch the end to seal the seam. Brush away any excess flour as you go. You can use the parchment paper to help you lift and roll if needed.
- Slice the log into 1 ½-inch slices using dental floss (preferred) or a serrated knife, wiping clean after each slice.
- Place nine slices cut side down in a greased 9-inch square pan. Any remaining slices can be placed in another small pan.
- Cover with plastic wrap or a kitchen towel and let them rise in a warm spot until doubled in size, about 1 to 1 ½ hours.
- Once risen, remove the covering and bake the rolls at 375°F for 20-25 minutes until golden brown.
Make the Frosting
- Cream together the softened cream cheese and butter.
- Blend in powdered sugar and vanilla until smooth.
- Spread the frosting on the rolls while they are still warm. Enjoy!
Notes
- It is best to measure especially the flour by weight. To convert the entire recipe to grams, click the "metric" button at the top of the ingredients list. Clicking the US/Cups button, will list ingredients in cups measurements.
- The dough may be soft, which is normal. If the slices aren't perfectly shaped, gently reshape them in the pan. A gentle hand is helpful here!
- These rolls are best when eaten freshly baked and can last up to 2 days at room temperature. Microwave for 15 seconds to soften.
- To Make Ahead: Prepare the rolls and allow them to rise. After they have risen, keep covered and refrigerate up to overnight. Allow the rolls to come to room temperature for at least 1 hour before baking.
- The frosting can also be made ahead and refrigerated, but let it soften a bit before spreading on warm rolls.
Save This Recipe!
Estimated Nutrition
* Nutritional information is provided as a courtesy and should be used as an estimate only. See the nutrition policy for more information.

Chelsea says
Very excited to make this! How exactly do you adapt the recipe and steps for using active dry yeast?
Katie Olesen says
Just dissolve the yeast in the warm liquid first, let it sit for 5 minutes and then proceed with the recipe. I highly recommend instant yeast for gluten-free baking though. You can read more about that here: https://wheatbythewayside.com/instant-yeast-gluten-free-bread/
Anne says
Is there a reason you adding Psylliam husk, as the Caputo Fioroglut flour already has this ingredience in it? I tried his recipe and they were really buttery, way to much butter, I think. They seemed good until they baked, and then they were a dud.
Katie Olesen says
Yes, the added psyllium husk helps with recipes that require extra shaping. This flour blend is designed especially for pizza, which isn't as hard to shape as cinnamon rolls. I tried versions with less hydration, but the result was much more dense and dry. The psyllium allows you to increase the amount of moisture, while keeping the dough workable. Hope that helps. Sorry you felt it was too much butter.
Susan says
Made them and totally loved them. Making my second batch right now.Thank you.
Carmelina says
Made these twice and absolutely LOVE the recipe! I was wondering for the fall if there's a way to turn the recipe into pumpkin cinnamon rolls?! Thanks!
Katie Olesen says
I'm so happy you enjoyed the recipe! I can definitely work on a pumpkin version!
CJ says
On the stand mixer should I be using the paddle attachment or whisk or bread dough hook? Thanks!
Katie Olesen says
The paddle attachment works best with this and most other gluten-free doughs.
Suzanne Charles says
Hi Katie, I made these rolls and it seemed like the dough was too wet and sticky. I added more flour, but I think I may have added a little too much. 280g Caputo flour, 185g milk and 113g butter and 2 eggs seemed like too much liquid for 280g of flour. I didn’t feel like there would be any way to roll them up. I added more flour, but I put in too much, and they are too dense. I used almond milk and Dairy free Country crock butter. They taste good, but too dense. Help!
Thanks!
Suzanne
Katie Olesen says
Yes, the dough is definitely softer than traditional dough made with gluten. If you add too much flour, the final result can turn out dense, just like you noticed. I’d recommend letting the dough rest for 10–15 minutes before rolling so the psyllium has time to hydrate—this usually makes it easier to work with. Be sure to use parchment paper and flour to help with rolling. I like using dental floss to cut the rolls—it’s the cleanest method I’ve found. A friend of mine actually rolls out the dough, sprinkles on the cinnamon sugar, and then uses a pizza wheel to cut it into strips before rolling each one individually. I think that’s such a genius idea too!
Suzanne Charles says
Hi Katie, I can try tour suggestions, however the consistency of my dough was like sticky taffy. I couldn’t imagine how I could roll it out between parchment paper and flour, or get it to roll up, to be able to be able to cut it into rolls.
Is this how the dough should look? Would it help to refrigerate the dough?
Thanks for your help!
Suzanne
Katie Olesen says
You’ll need to allow the psyllium to hydrate and use a gentle hand. That said, using some flour does help. I don’t roll between parchment paper, but rather on top of one piece that way you can use it to help you lift and roll up the rolls, if needed.
Are you using the proper type of psyllium? The powder, not whole husk? That will make a big difference in the result.
Kelsey says
Hard to get right but taste great! Can't wait to try the recipe again. Once I put in the warm milk (was at 128 degrees) the dry ingredients balls up in all little balls that I could not smooth out. I'm guessing it's the pysilum husk. Do you know how to make it so it doesn't form little balls?
Katie Olesen says
Hi Kelsey, I am curious if you whisked the dry ingredients together well before adding the wet ingredients. Also, are you using a stand mixer or mixing my hand? Using a stand mixer is extremely helpful for the yeast bread recipes, since the batter is so thick and sticky.
Sandy says
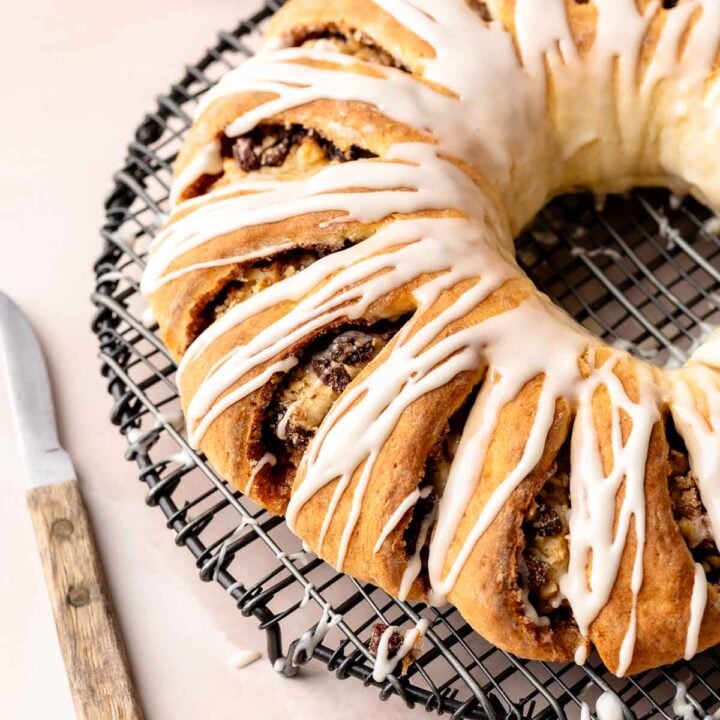
I have been trying unsuccessfully for a few years to come up with or adapt a recipe so I can make a gluten free Swedish tea ring, but I have been unable to find any with both a workable dough that doesn’t tear or collapse, will have the structure to hold the ring shape - and that doesn’t taste awful. Any suggestions?
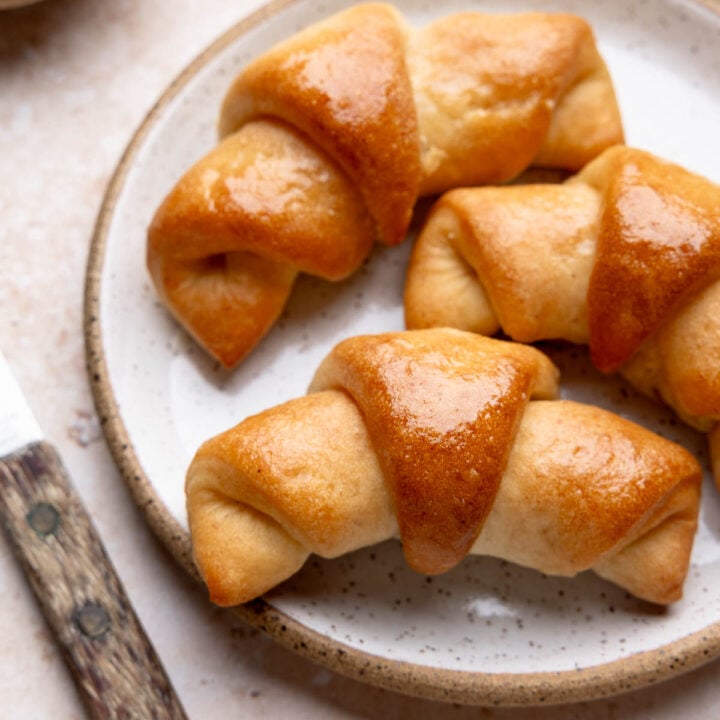
Katie Olesen says
I might suggest trying either this cinnamon roll dough or my gluten-free crescent roll dough. This is something I'd like to try working on if you want to share the recipe.