
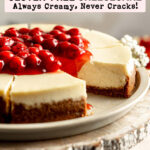

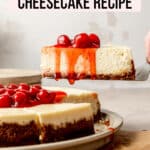
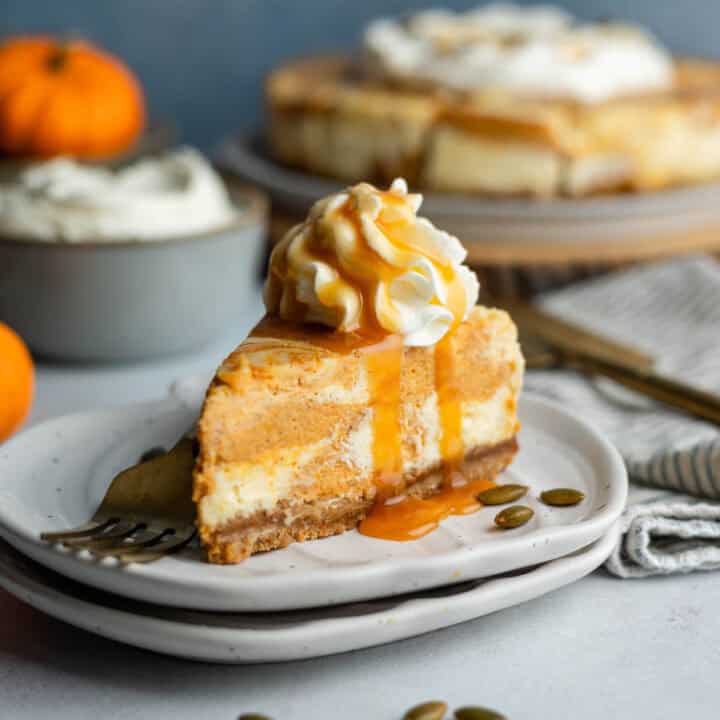
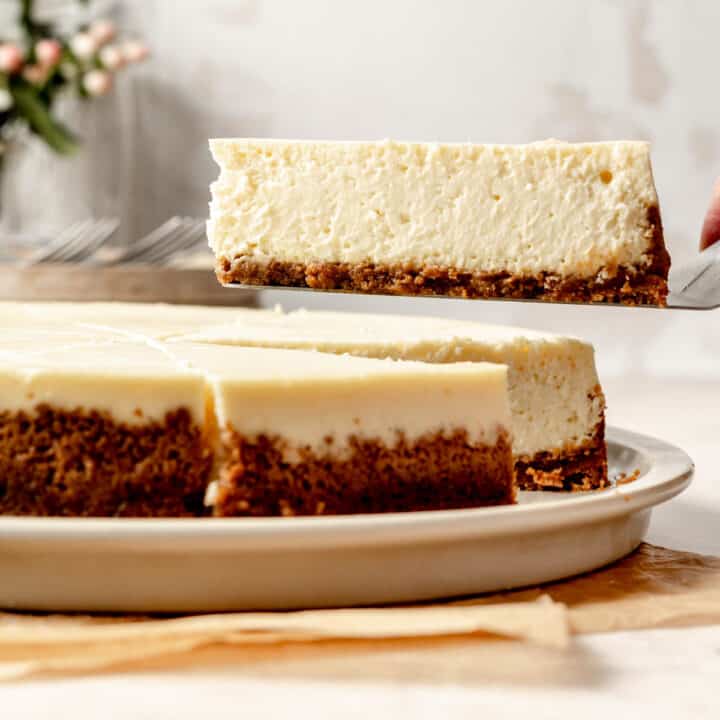
Your quest for the best gluten-free cheesecake recipe ends right here! Silky, ultra-smooth filling is paired with a rich and buttery gluten-free graham cracker crust, making this traditional cheesecake irresistibly decadent. Enjoy it as a plain vanilla cheesecake, or take it up a notch with homemade strawberry sauce!
Jump to:
- Why This Is The Best Gluten-Free Cheesecake
- Making Cheesecake Ahead
- Simple Ingredients
- Gluten-Free Cheesecake Toppings
- How to Make Gluten-Free Cheesecake
- Do You Actually Need A Water Bath?
- The Best Water Bath Tip
- Cooling and Chilling Cheesecake
- How to Remove the Bottom of the Springform Pan
- How to Store Cheesecake
- Top Recipe Tips
- Recipe FAQs
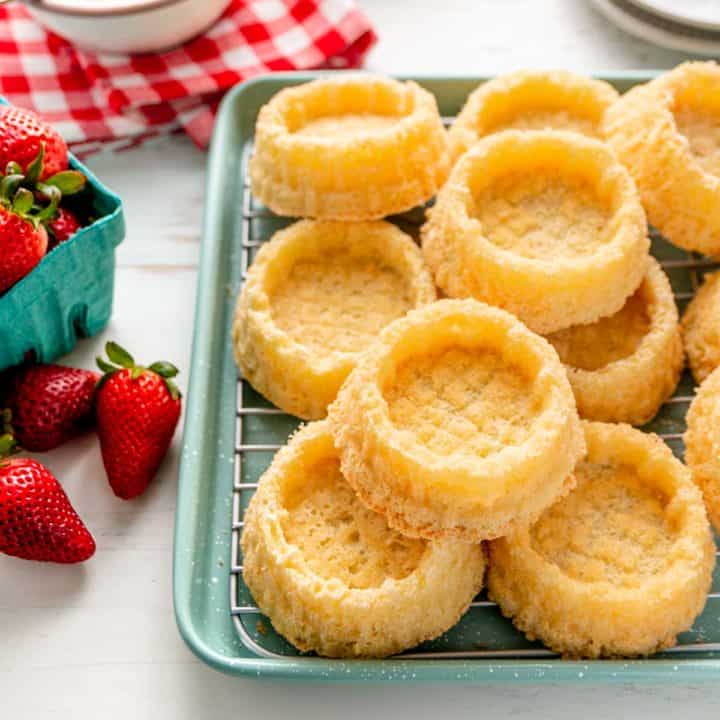
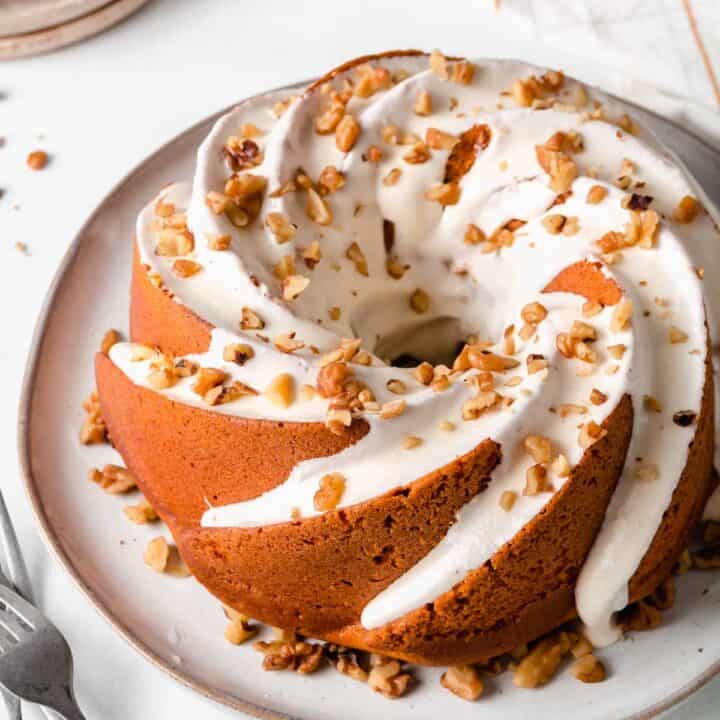
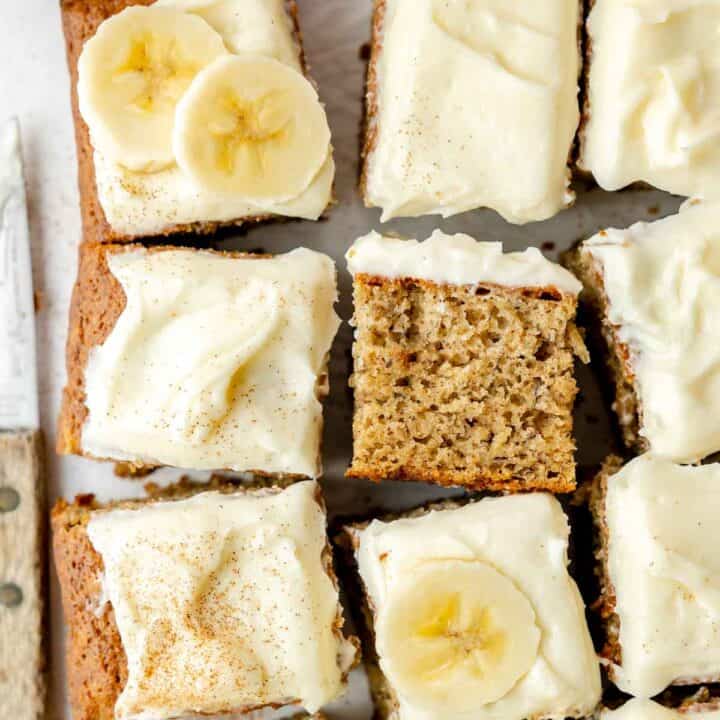
- More Gluten-Free Desserts
- Recipe
- Comments and Ratings
Why This Is The Best Gluten-Free Cheesecake
This recipe has become my go-to cheesecake recipe for many years now! Here's why:
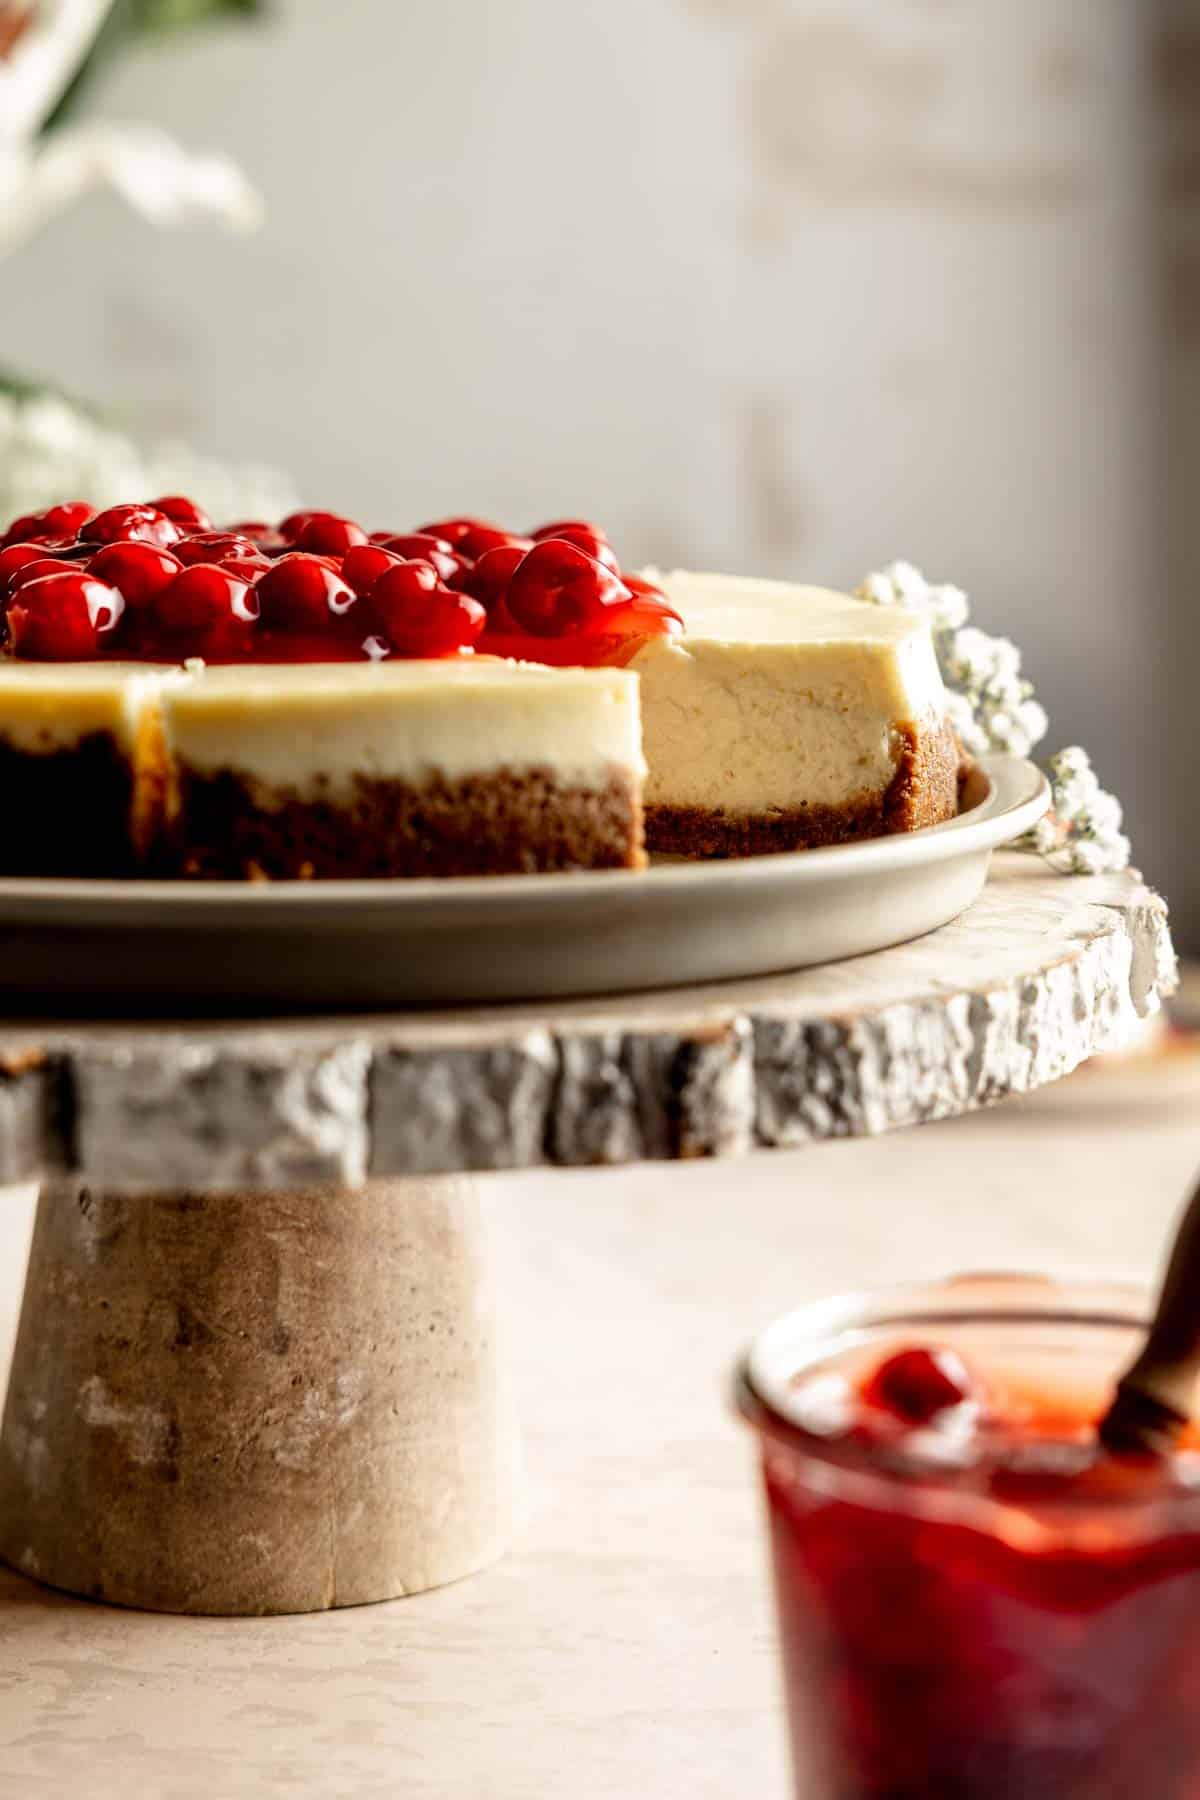
- Versatile! This plain cheesecake is delicious all on it's own but can easily be transformed into any cheesecake you like, by simply switching up the toppings or adding a few mix-ins to the filling.
- Never cracks! If you follow my methods for mixing and baking this cheesecake, you will never see a crack! The filling is always perfectly set, and never over-baked!
- Smooth and creamy! This is the smoothest, creamiest cheesecake ever!
- Perfectly tangy! The tangy filling compliments your sweet toppings!
Making Cheesecake Ahead
Fair warning: This recipe is not necessarily hard or overly complicated, but it does take time! Each step is important and you need to follow them for the best results!
That includes making a water bath and taking the time to properly cool and chill the cheesecake. Plan on making this cake 1-2 days before you would like to serve it.
Simple Ingredients
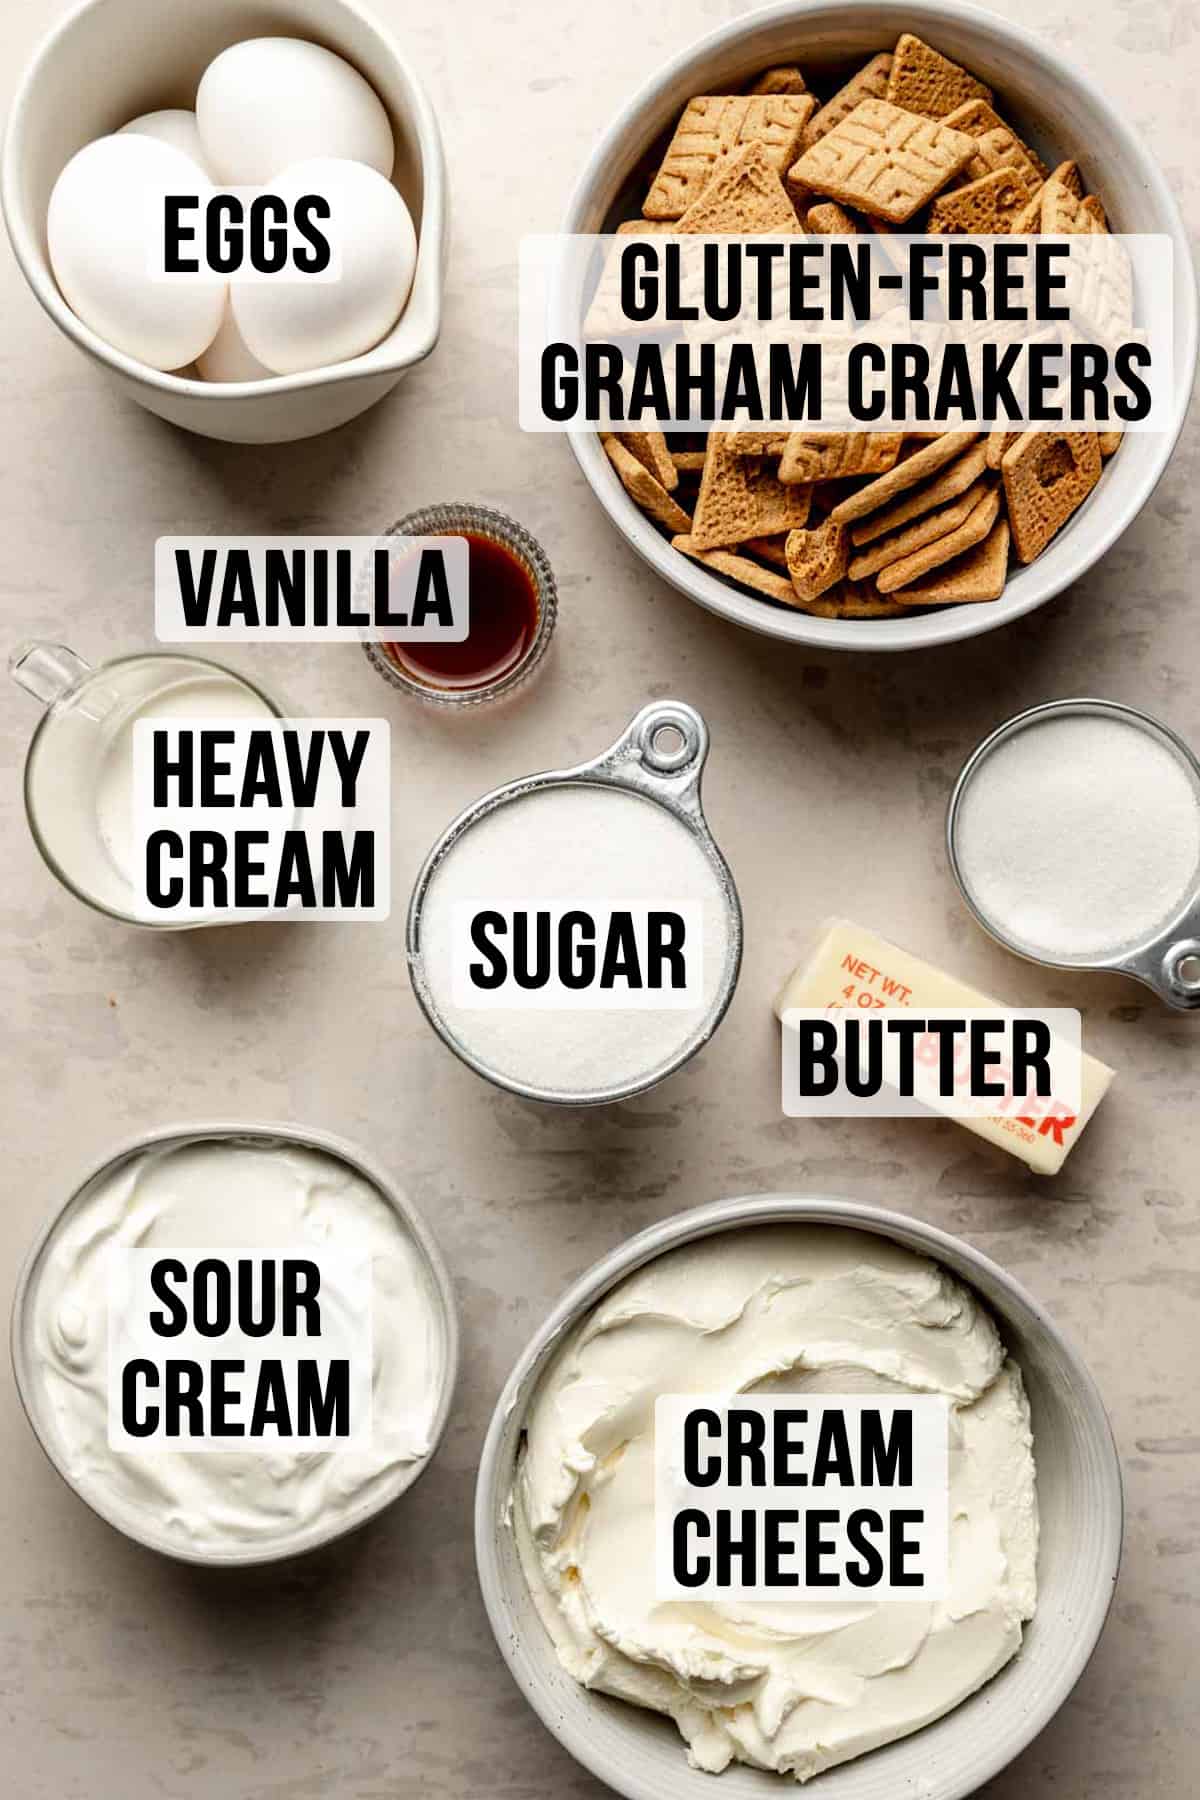
- Brick Cream Cheese: You will need 2 ½ (8-ounce) bricks of full-fat cream cheese for the base of this cheesecake. That is 20 ounces. Also, get the bricks of cream cheese and not cream cheese spread. I have only tested this recipe with full-fat cream cheese. Cream cheese is gluten-free.
- Love recipes that feature cream cheese? Try this Gluten-Free Blueberry Cheesecake No-Churn Ice Cream, or this Nothing Bundt Cakes Icing Recipe!
- Sour Cream: Aside from extra tangy flavor, sour cream adds stability and richness to the cake.
- Heavy Cream: Heavy cream adds creaminess, richness, moisture, and a luxurious texture to cheesecake filling, enhancing the overall flavor and consistency.
- Eggs: Eggs are necessary for structure, I have not yet tested an egg-free filling.
- Gluten-Free Graham Crackers: My favorite, aside from my homemade gluten-free graham crackers, are Simple Mills Sweet Thins.
- Sugar: There is only one cup of sugar in this filling, it's not much but the perfect amount to balance the tangy filling.
- Butter: Butter is used in the cheesecake crust.
- Vanilla Extract: Pure vanilla extract is gluten-free and my preferred choice for flavor. Vanilla bean paste would be a stunning substitute!
*Refer to the recipe card for full ingredient information.
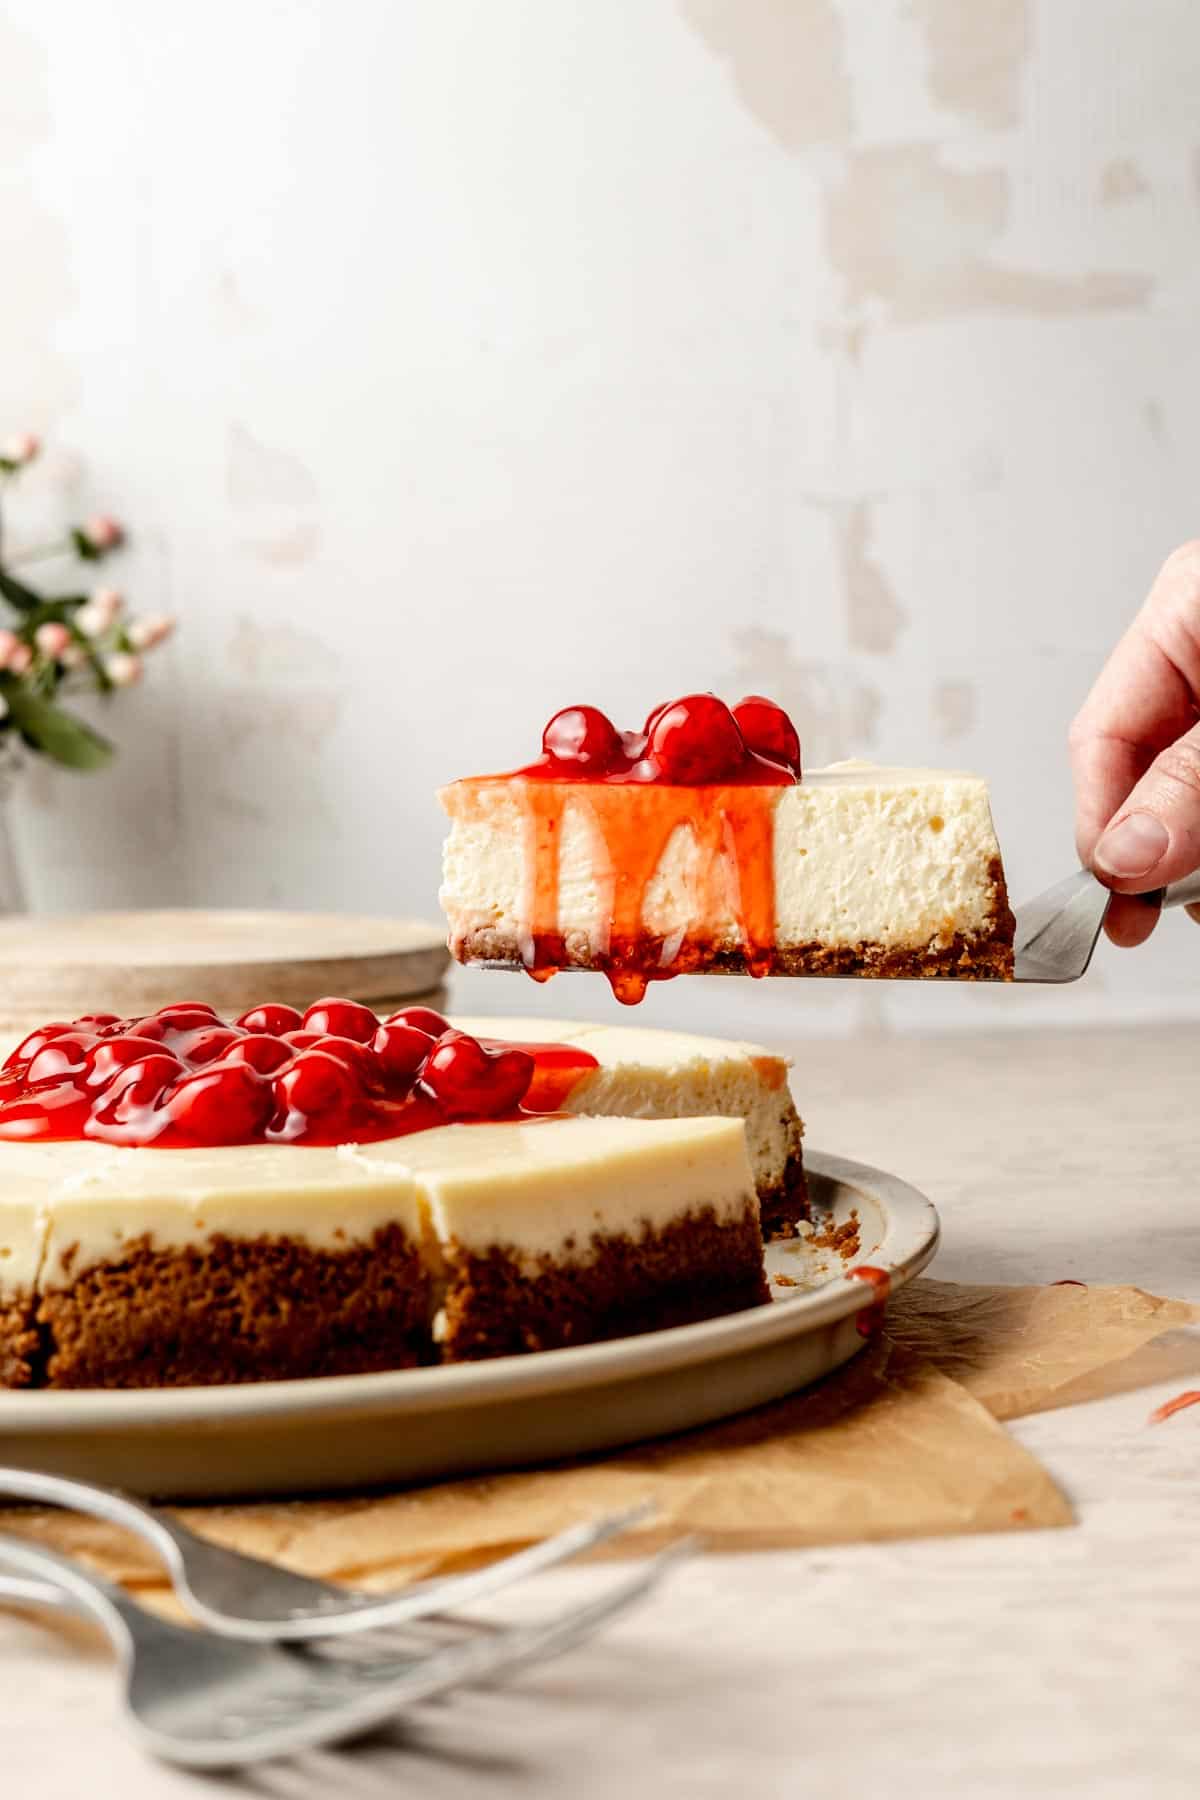
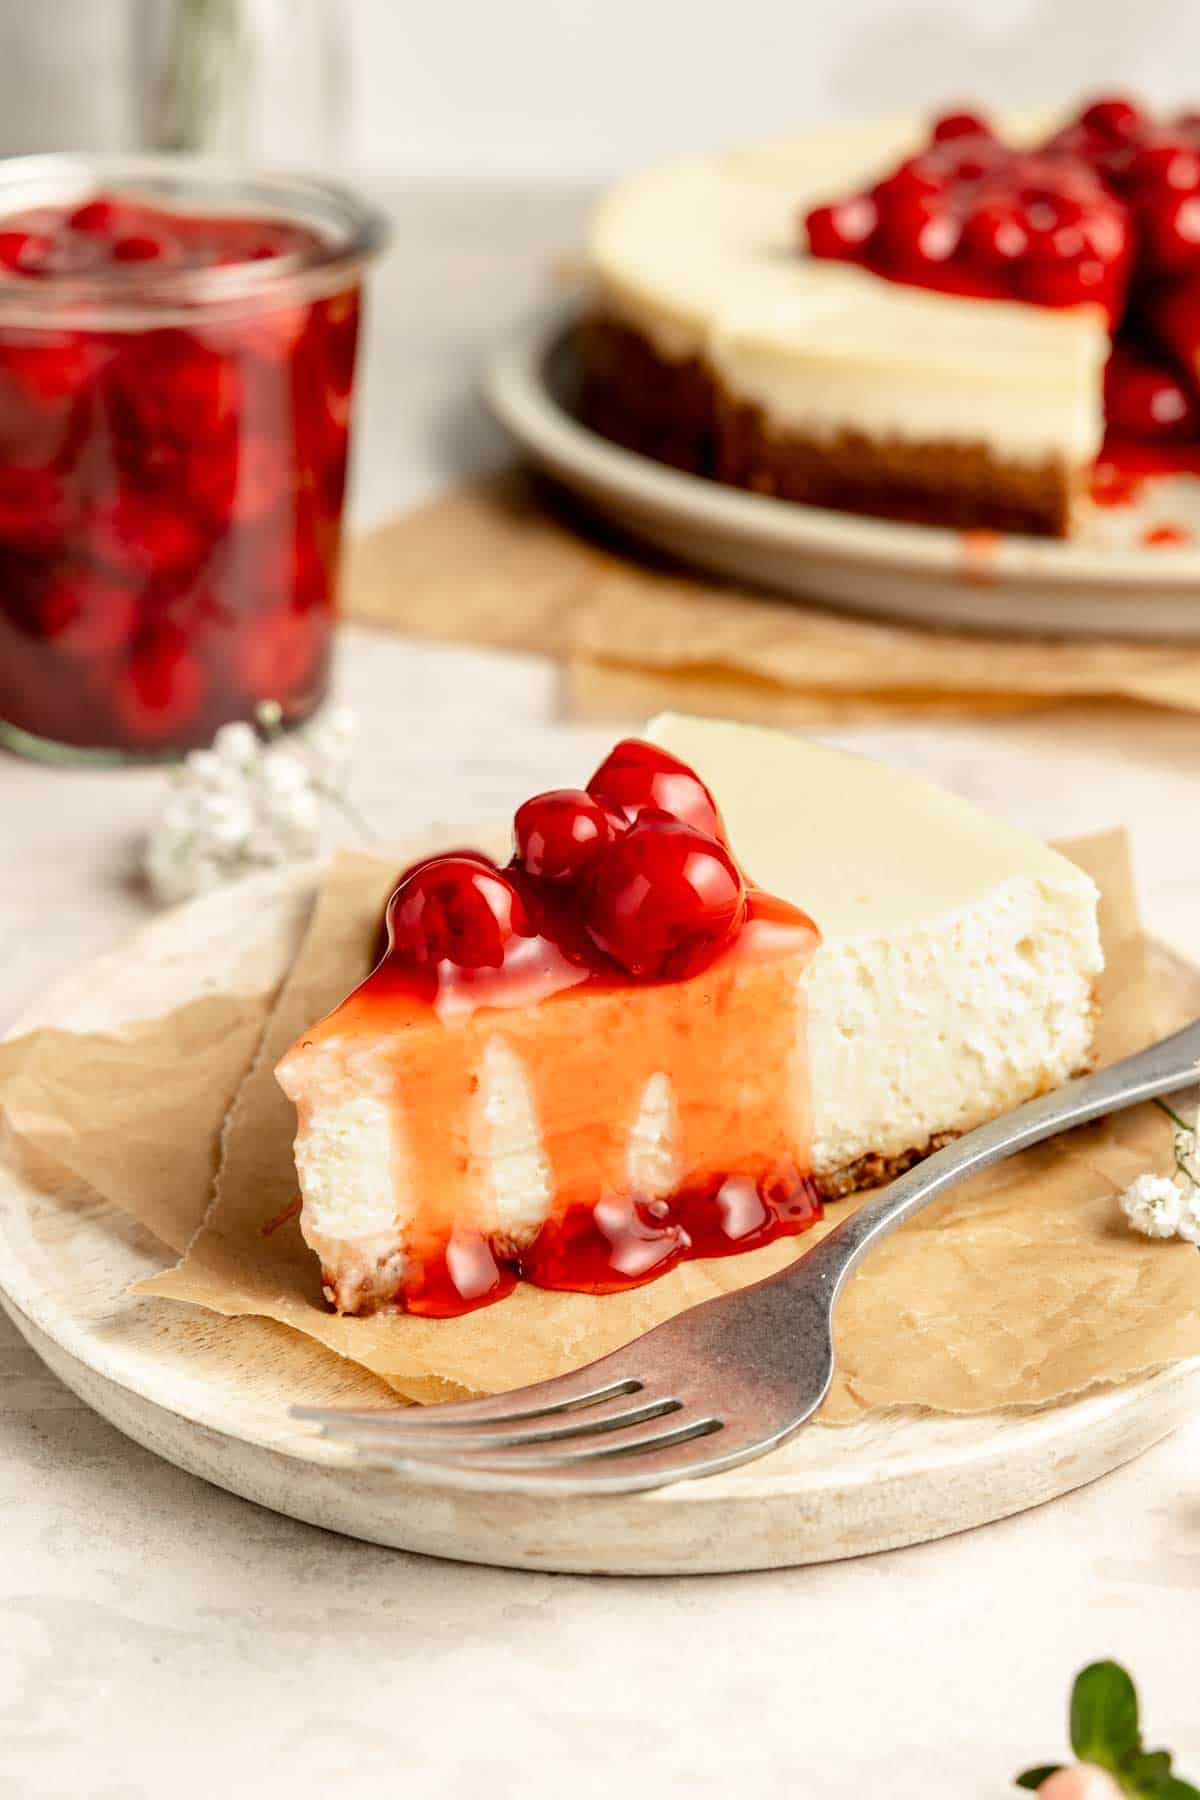
Gluten-Free Cheesecake Toppings
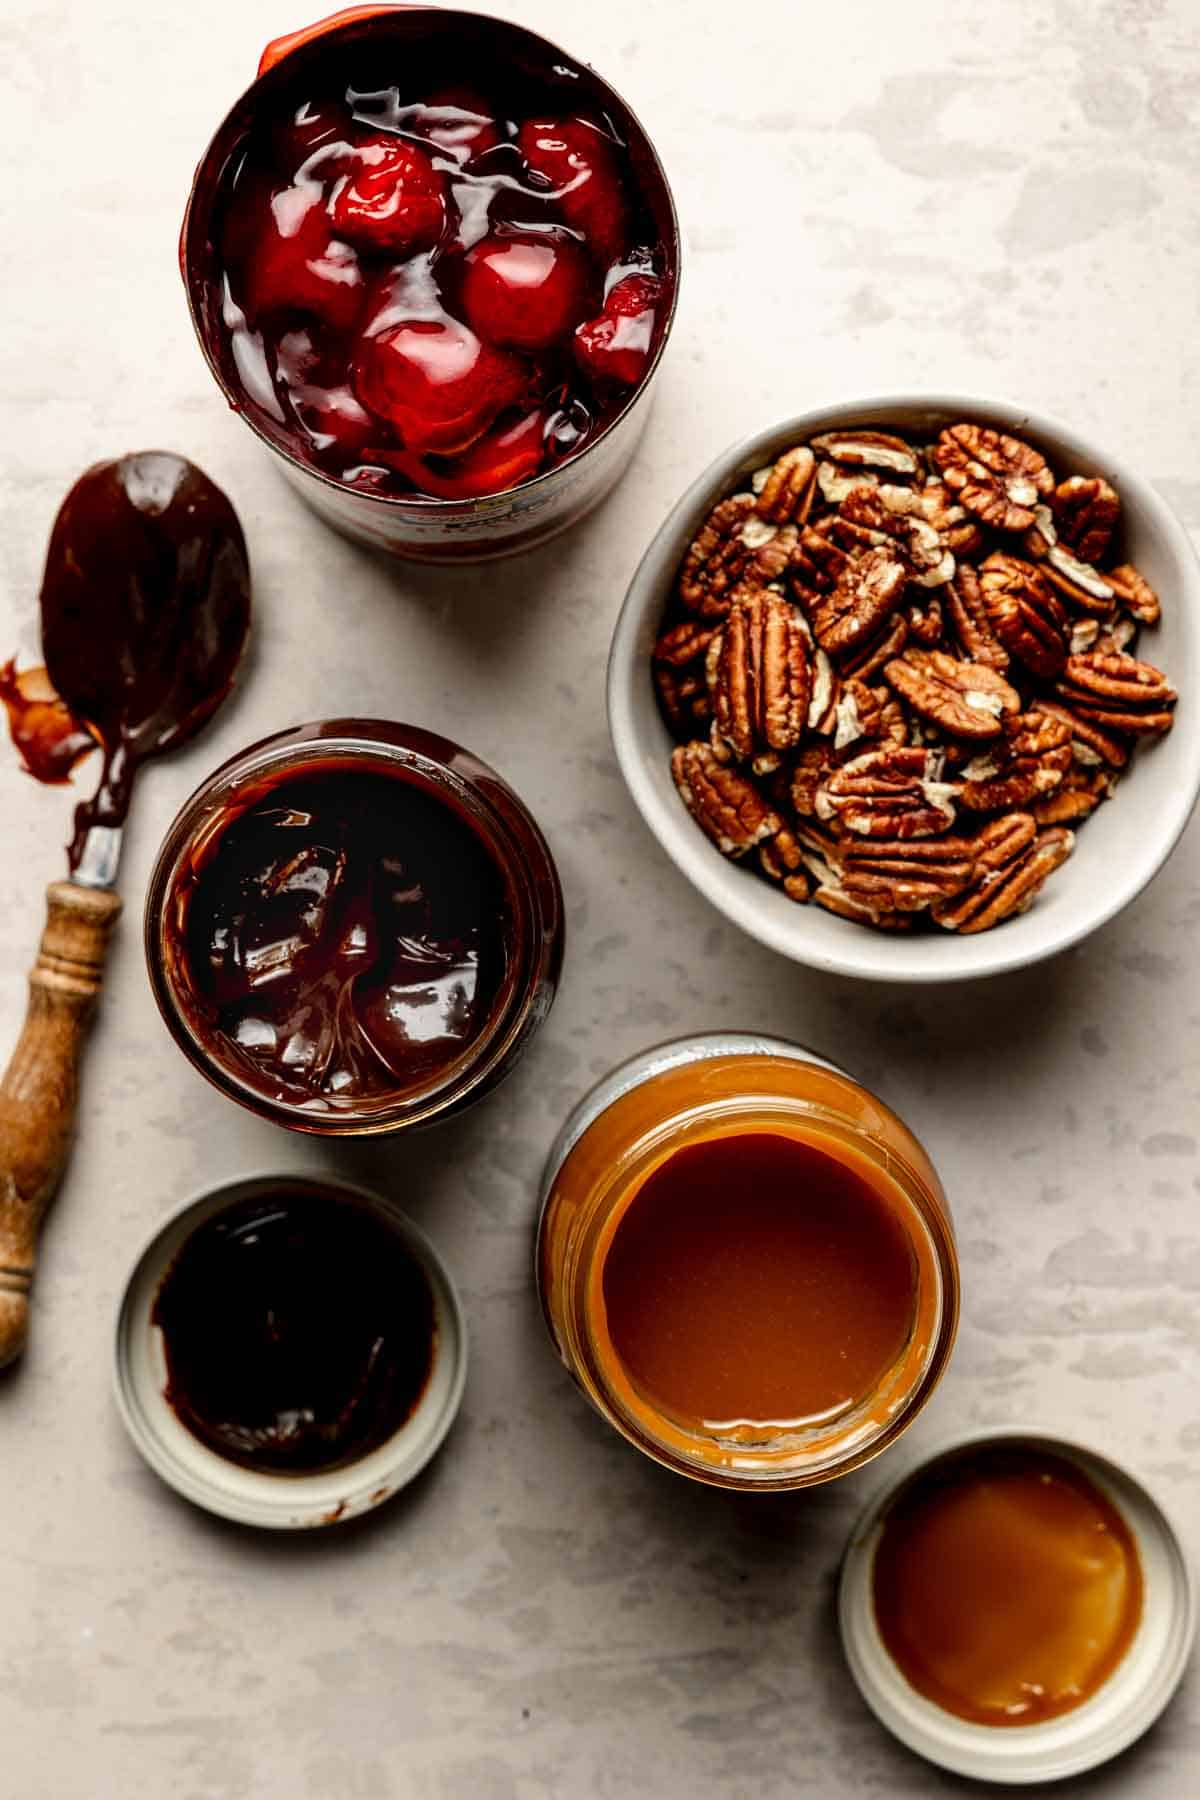
As far as toppings go, you can indulge in the velvety goodness of this cheesecake as is, or elevate it with an array of delightful toppings. Here are some suggestions:
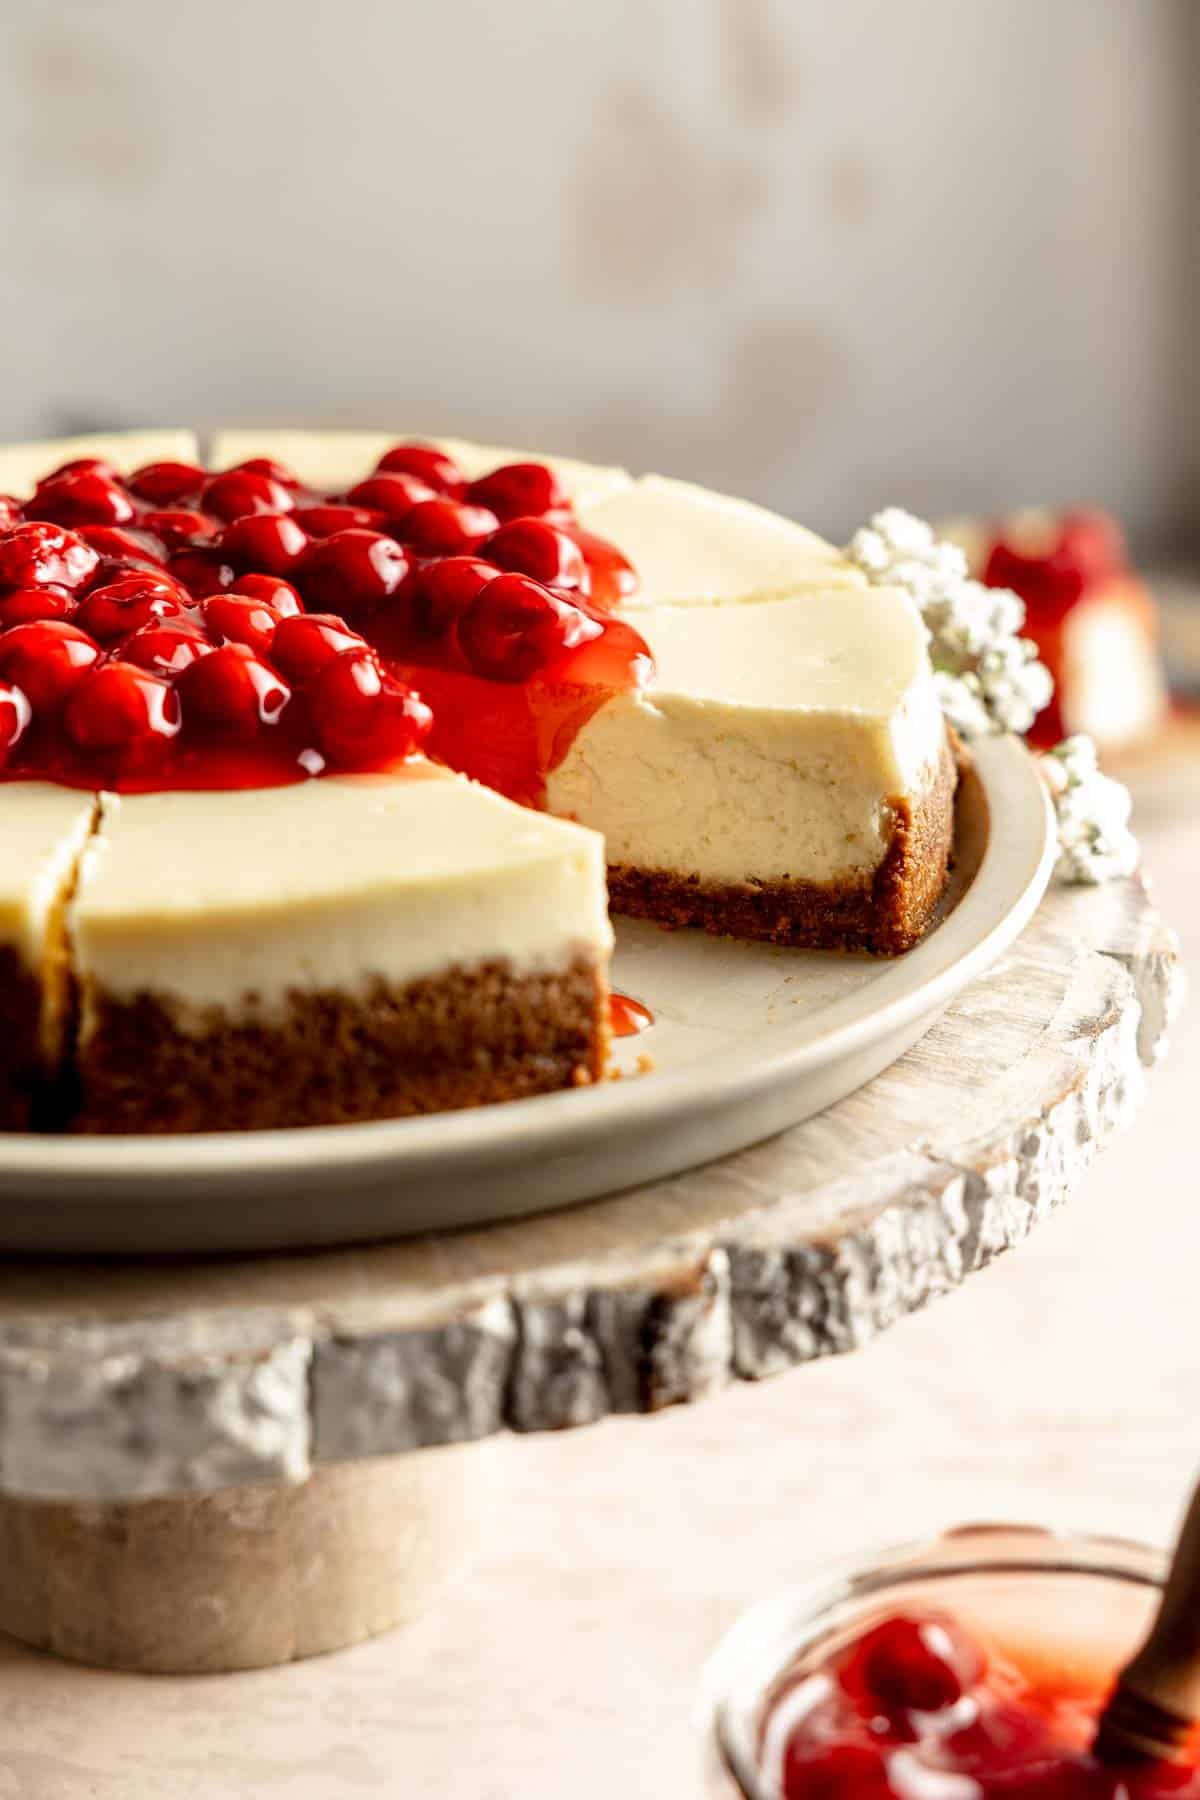
- Canned or Homemade Gluten-Free Pie Filling: Use your favorite pie filling. Raspberry, Strawberry, Blueberry, or Cherry pie filling would all pair well with this cheesecake. Even this homemade gluten-free apple pie filling would be a delicious choice!
- Check out my dedicated recipe posts for gluten-free turtle cheesecake, topped with fudge, caramel, and pecans, and gluten-free Oreo cheesecake, topped with chocolate ganache.
- Other favorite toppings: lemon curd, chocolate ganache, homemade whipped cream, or fresh strawberries, blueberries, and raspberries.
Need even more cheesecakes to love? Be sure to check out this San Sebastián cheesecake, from Amanda over at Gluten-Free Tranquility!
How to Make Gluten-Free Cheesecake
Make the Filling
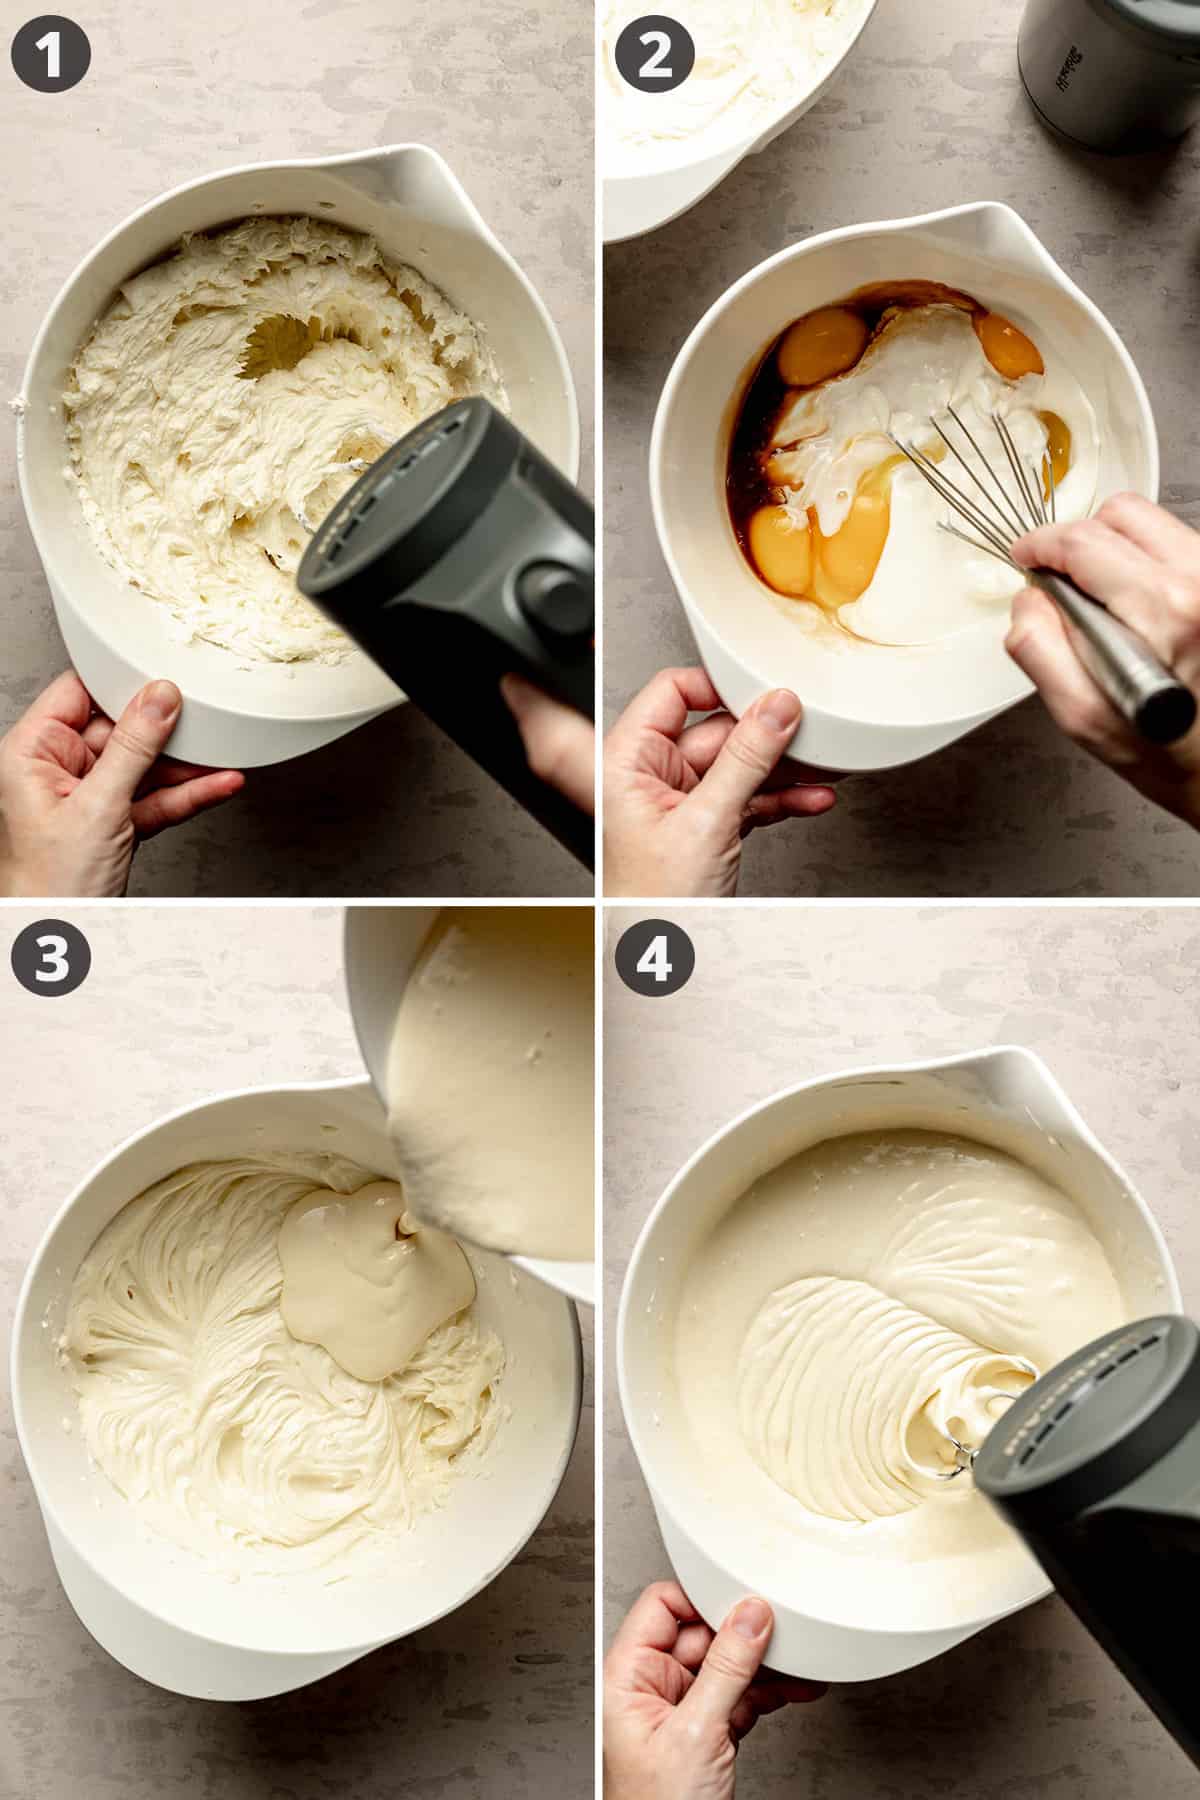
- In a large bowl, cream together the softened cream cheese and granulated sugar.
- In another bowl, combine the sour cream, heavy cream, eggs, and vanilla.
- Gradually combine the sour cream mixture into the cream cheese mixture.
- Scrape the bowl as needed. Do not over mix.
Prepare the Gluten-Free Cheesecake Crust
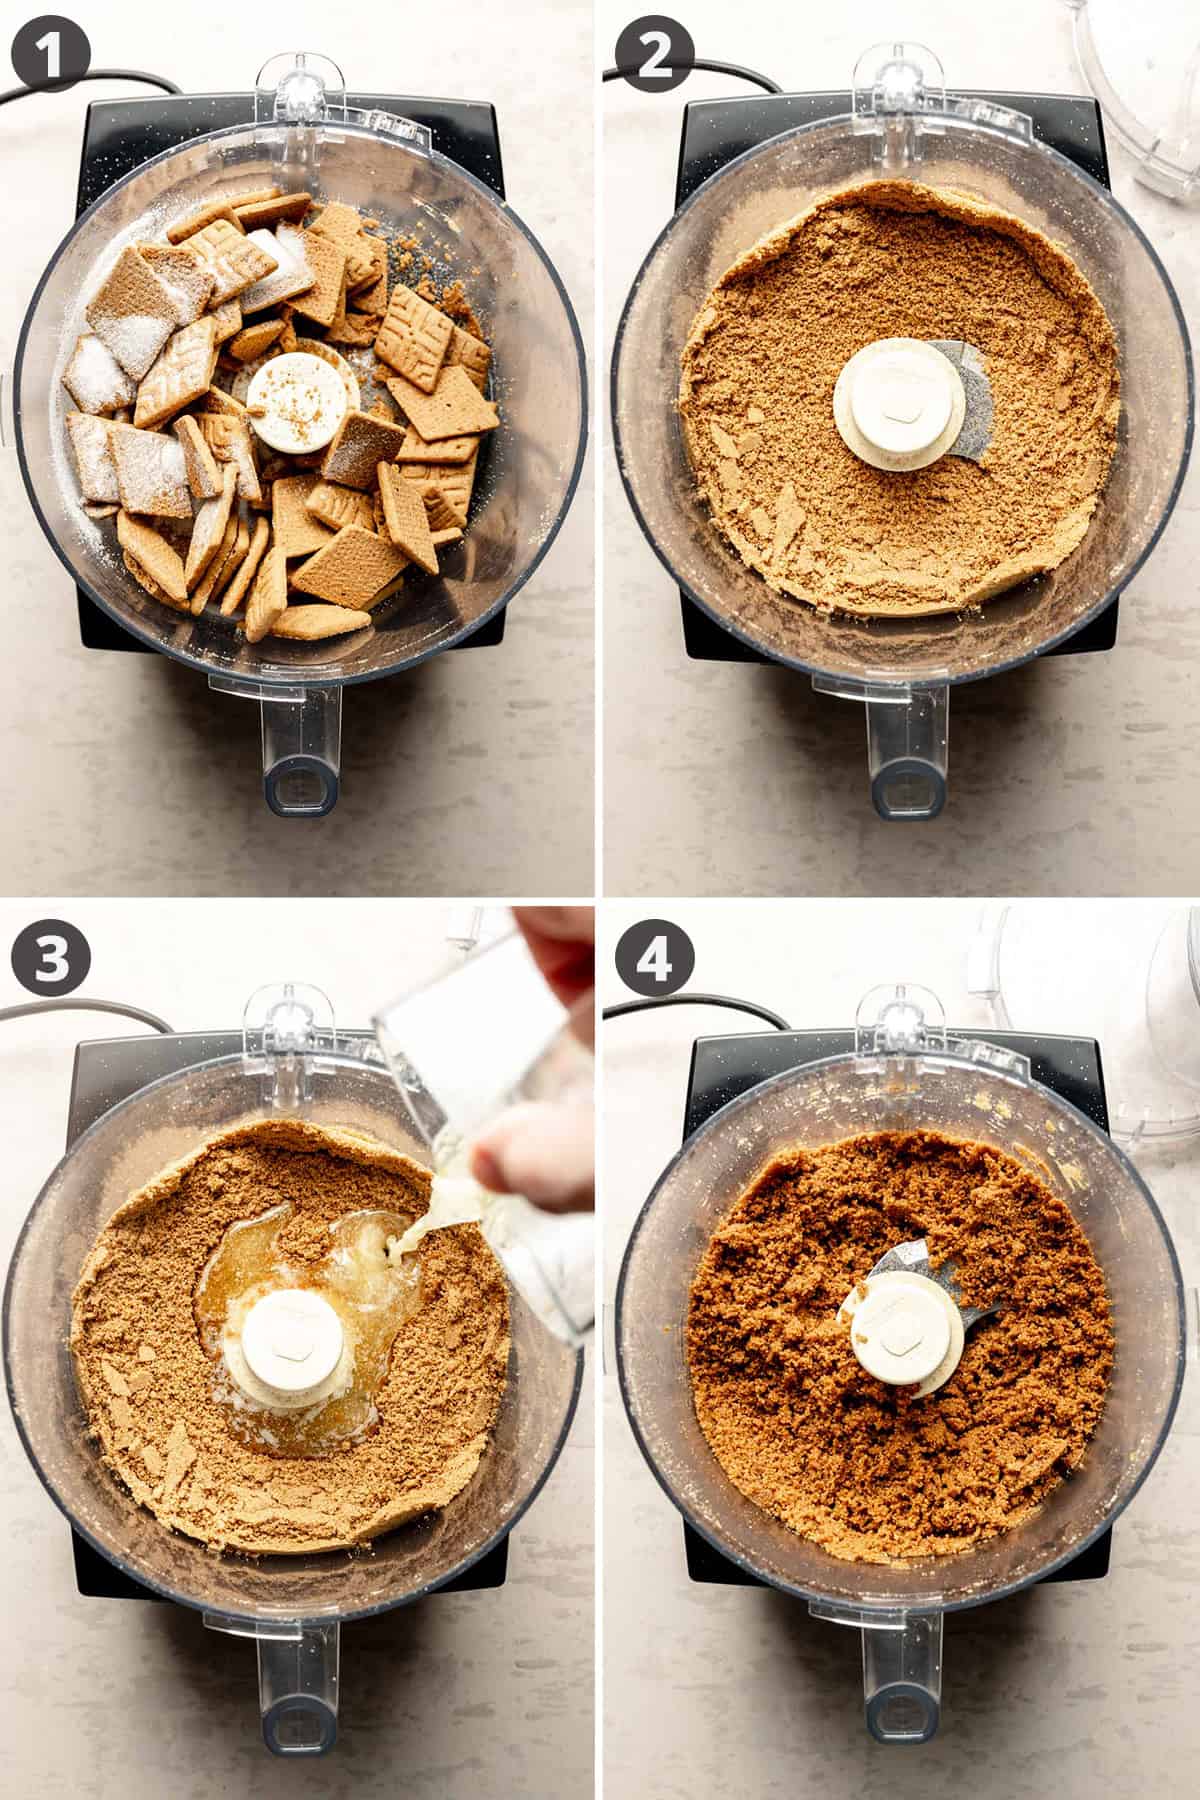
- Place gluten-free graham crackers and sugar into the bowl of a food processor.
- Pulse into a mixture of fine crumbs.
- Pour in melted butter.
- Pulse to combine.
Save This Recipe!
Assemble the Cheesecake
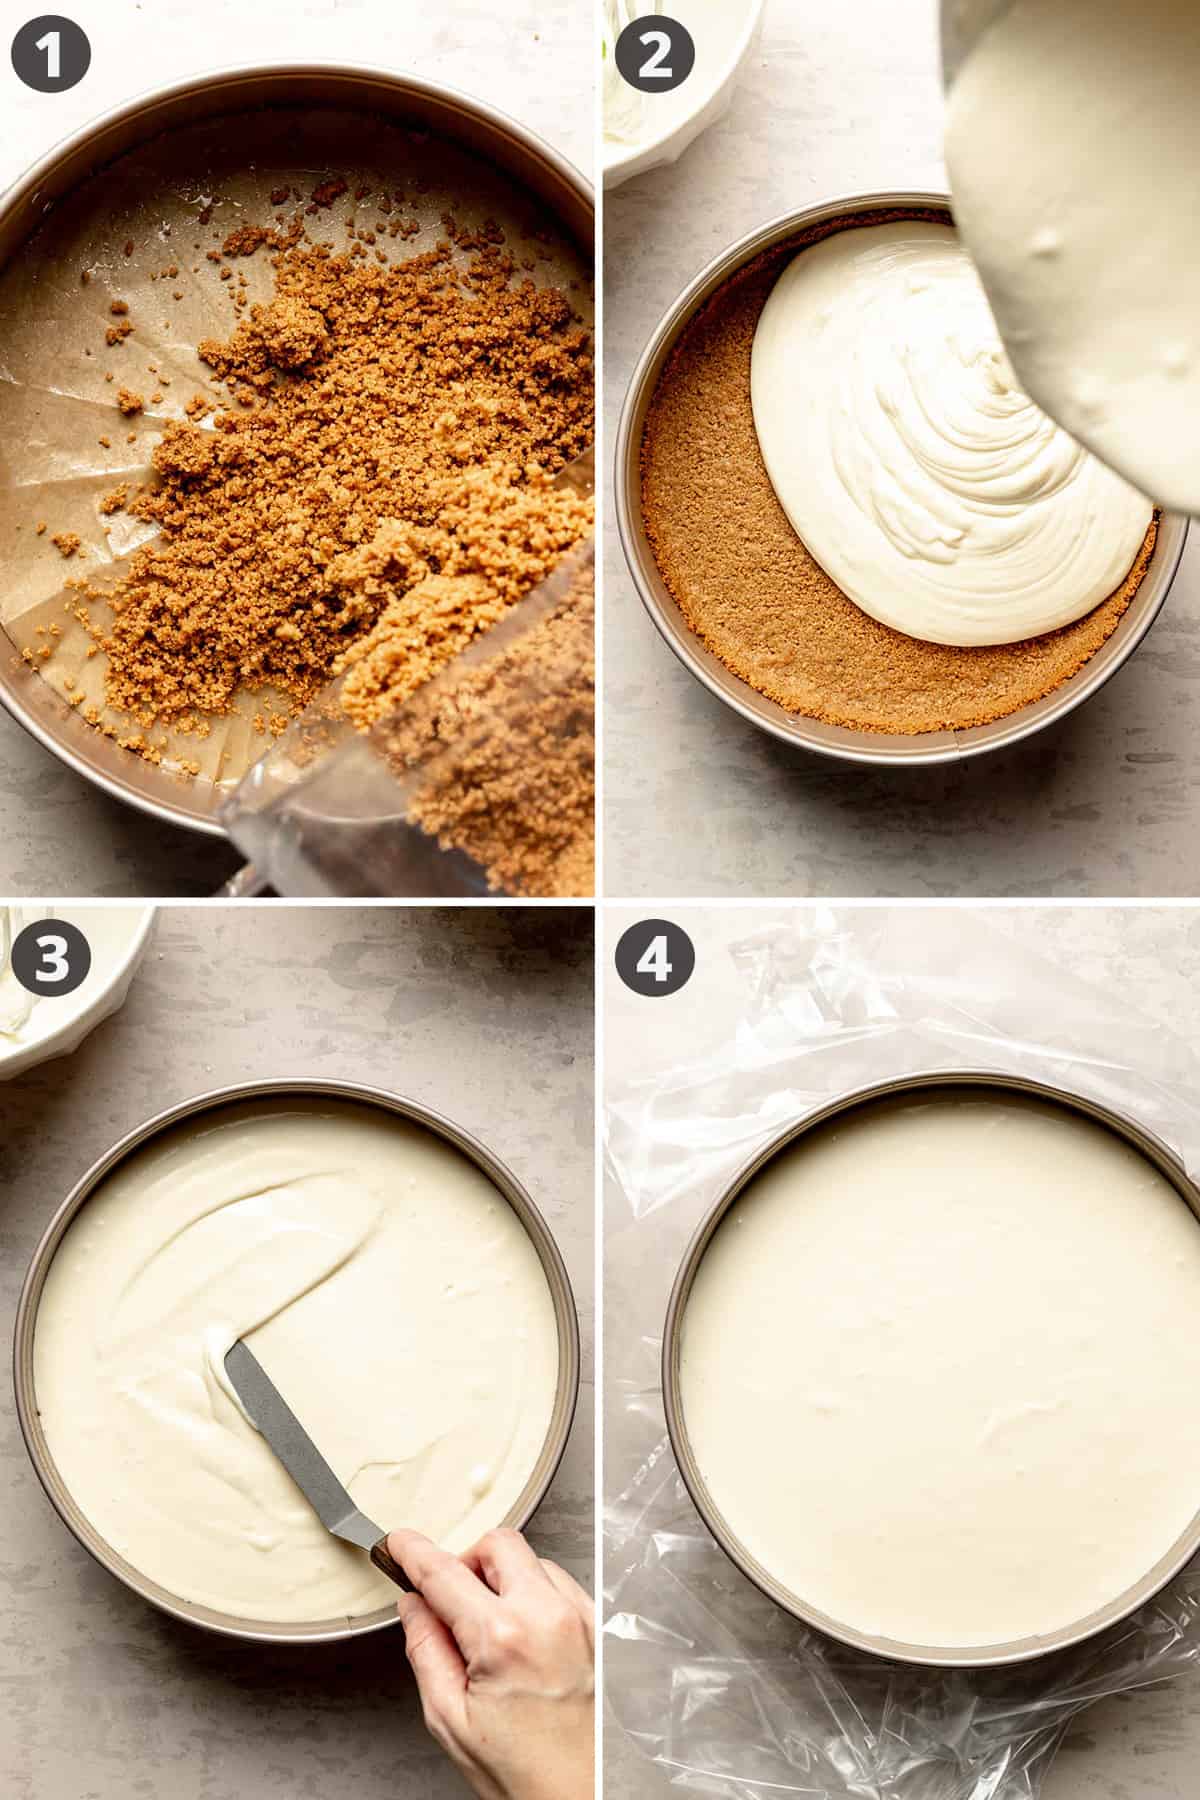
- Press the graham cracker crust into the bottom and slightly up the sides of the prepared springform pan. Pre-bake as directed in the recipe card below.
- Pour the cheesecake filling into the crust.
- Smooth as needed.
- Prepare a water bath and bake the cheesecake according to the directions below.
Do You Actually Need A Water Bath?
I understand the prospect of setting up a water bath might seem like a hassle. And let's be honest, if the springform pan leaks and results in a soggy crust, that is far from ideal!
However, I've tested this recipe, comparing cheesecakes made with and without a water bath and the results with the water bath are vastly superior. While it might feel like an additional, unnecessary step, I can confirm that it's absolutely worth it! Here's why:
- Even Baking: The water bath insulates the sides of the cheesecake, promoting slow and gentle baking. This ensures even cooking from the edges to the center.
- Prevents Sinking and Cracking: The slow, even baking in a water bath essentially prevents both cracking and overcooking. It also prevents the center from sinking or deflating as it cools.
- Moisture: A water bath introduces moisture to the oven environment, resulting in exceptionally creamy cheesecakes.
The Best Water Bath Tip
If you've ever had your springform pan leak in a water bath, you know how annoying that is. I have found the best solution to prevent water bath leaks: Oven Bags!
Oven bags are a better solution than wrapping the pan in foil because they do not leak!
Most stores carry oven bags near the household paper goods section. You can also purchase oven bags from amazon.
Here's how to use oven bags to prevent water from seeping into your cheesecake.
- Put your springform pan inside the oven bag.
- Place the oven bag-wrapped cheesecake into a larger pan, like a roasting pan. Ensure the oven bag extends high enough to prevent water from spilling into it as you fill the water bath.
- Carefully position the roasting pan with the cheesecake inside the oven.
- Gently pour boiling water into the larger pan taking care not to get water inside the oven bag. Fill it halfway up the sides of the springform pan. Bake as directed in the recipe.
If you want to use foil instead of the plastic bags, I have tips for that too!
- Use heavy duty foil, which is thicker and larger than standard foil which makes it better at protecting the cheesecake.
- Use a double layer of foil. Even when using the heavy duty foil, you can still get a small tear in the foil, which makes the wrap totally useless. A double layer of foil helps to ensure there are no tears that will allow water to sneak in.
- Make sure the foil covers the entire bottom and up the sides of the pan.
Cooling and Chilling Cheesecake
How you cool the cheesecake is arguably just as important as the water bath. Cooling in this manner also helps to prevent cracking.
- When your cheesecake is just slightly jiggly in the center, turn off the oven and leave the cheesecake inside for 1 hour.
- After the hour in the oven, remove the cheesecake and cool completely at room temperature.
- Once it's cool, refrigerate the cheesecake for at least 4 hours, or better yet, overnight.
- At this point, the cheesecake will be fully set.
How to Remove the Bottom of the Springform Pan
You may be surprised to learn that you can remove the bottom portion of the springform pan from your cheesecake. I've done it many times following this method:
- Ensure the cheesecake has chilled and set properly.
- Remove the sides of the springform pan from the cheesecake.
- Place a piece of parchment paper over the cheesecake.
- Place a plate or a flat surface (slightly larger than the cheesecake) on top of the parchment paper.
- Hold the plate and the pan together, then flip them both over. The cheesecake will now be upside down on the plate, and the bottom of the pan will be facing up.
- Gently remove the base of the springform pan. You can use a small icing spatula or butter knife to help you separate the pan from the cheesecake if needed.
- Place your desired serving plate on top of the inverted cheesecake.
- Hold both plates together and carefully flip them over again, so the cheesecake is right side up on the serving plate.
- Lift off the original plate and parchment paper to reveal your cheesecake!
How to Store Cheesecake
- You can bake this cheesecake about 1-2 days in advance of serving. Cool and refrigerate, then store it tightly wrapped in the refrigerator.
- Leftover cheesecake will keep up to one week in the refrigerator.
- You can freeze an entire cheesecake or individual slices to enjoy later. Wrap tightly in plastic wrap and then foil. The cheesecake can be frozen for several months. Thaw overnight in the refrigerator.
Top Recipe Tips
- Make sure the cream cheese is soft! If the cream cheese is not fully softened, it may cause lumps in the batter.
- Do not over-mix the cheesecake batter. Over-mixing can cause too much air to be incorporated and create bubbles or cracks on the surface of the cheesecake.
- Bake in a water bath. As discussed above, this step is so important for a truly creamy cheesecake!
- There will be a slight wobble. The center of a cheesecake should be slightly jiggly when you turn off the oven. It will continue to set as it cools. Aim for the center to have a gentle wobble while the edges are set. This ensures a creamy and smooth texture once the cheesecake has fully cooled and set.
- Cool in the oven for 1 hour. Then, cool completely at room temperature.
- Refrigerate at least 4 hours before removing from the pan and adding toppings.
- The entire process takes time, so plan on preparing this cake 1-2 days before you want to serve it.
Recipe FAQs
Not all cheesecakes are gluten-free. Most traditional cheesecakes use wheat-based crusts and may include flour in the filling, meaning they are not gluten-free unless intentionally prepared as such.
A gluten-free cheesecake is typically made using gluten-free crust ingredients like gluten-free graham crackers or almond flour. The cheesecake filling itself remains similar to a traditional recipe, comprising cream cheese, sugar, eggs, and flavorings. The key is to replace any gluten-containing components in the recipe with gluten-free alternatives, ensuring that all ingredients are free from wheat, barley, rye, oats, or any other sources of gluten.
Cheesecake filling, on its own, is typically gluten-free as it primarily consists of cream cheese, sugar, eggs, and flavorings. However, it's essential to verify that all ingredients used in the filling are indeed gluten-free. It should also be noted that someone with celiac disease should not just eat the filling out of a cheesecake if it has been prepared with a wheat-based crust due to a high risk of cross-contamination with gluten.

Recipe

Gluten-Free Cheesecake
Equipment
- 9-inch springform pan
- Large oven bag or heavy duty foil
- Large roasting pan or pan large enough to hold the springform pan
Ingredients
Crust Ingredients:
- 2 cups gluten-free graham cracker crumbs (8 ounces)
- ¼ cup sugar
- 6 tablespoons butter (melted)
Cheesecake Filling:
- 20 oz cream cheese (2 ½ - 8 oz packages, softened)
- 1 cup sugar
- 1 ¼ cups sour cream
- 1 tablespoon vanilla extract
- 2 large eggs
- 3 large egg yolks
- ⅓ cup heavy cream
Instructions
Make the Crust:
- Preheat the oven to 350°F.
- Cut a circle of parchment paper to fit the bottom of a 9-inch springform pan.
- Spray the pan with non-stick spray. Place the parchment paper in the bottom and spray the pan again.
- Combine the gluten-free graham cracker crumbs with ¼ cup sugar.
- Add the melted butter and stir well to combine.
- Press the crust mixture into the prepared pan. Bake for 10 minutes, then set aside to cool. Reduce oven temperature to 250°F.
Make the Cheesecake Filling:
- Blend together softened cream cheese and sugar using an electric mixer until smooth and well combined.
- In a separate bowl, whisk together the sour cream, whipping cream, eggs, egg yolks, and vanilla.
- Gradually blend the sour cream mixture into the cream cheese mixture.
- Set aside.
Prep the Water Bath:
- Place the pre-baked crust inside a large oven bag and place that into your large roasting pan.
- Pour the cheesecake mixture over the crust. Pull the sides of the oven bag up just past the rim of the pan.
- Boil enough water to fill the roasting pan halfway up the sides of the springform pan when it is placed inside.
Bake the Cake:
- Carefully place the roasting pan with the cheesecake into the oven. Pour boiling water into the roasting pan until it's halfway up the sides of the springform pan, taking care not to get water into the oven bag.
- Close the oven and bake at 250°F for 1 ½ hours. Avoid opening the oven door.
- Once the timer goes off, check the cake. You want the sides to be firm, and the center to have a slight jiggle. If it's still very wobbly, keep baking for 10-minute intervals until it's just slightly jiggly in the center. Once it's done, turn off the oven. Leave the cake inside the oven with the door closed for 1 hour to finish cooking.
- After the hour is up, remove the cake from the oven and cool completely at room temperature. Then refrigerate for at least 4-6 hours or overnight before removing the cake from the pan and adding your desired toppings.
Remove the Cake from the Pan:
- Run a knife or spatula around the sides of the cake.
- Release the sides of the springform pan.
- Place parchment paper on top of the cheesecake.
- Put a flat plate on top and invert the cheesecake.
- Remove the bottom of the pan and parchment paper.
- Place a serving plate on the crust and flip the cake back over. Remove the parchment from the top of the cake. Add your desired toppings. Refrigerate until serving.
Notes
- Do not over-mix the cheesecake batter.
- Do not skip the water bath.
- There will be a slight wobble. The center of a cheesecake should be slightly jiggly when you turn off the oven. It will continue to set as it cools. Aim for the center to have a gentle wobble while the edges are set. This ensures a creamy and smooth texture once the cheesecake has fully cooled and set.
- The entire process takes time, so plan on preparing this cake 1-2 days before you want to serve it.
Save This Recipe!
Estimated Nutrition
* Nutritional information is provided as a courtesy and should be used as an estimate only. See the nutrition policy for more information.
Kathy says
I’ve made this several times and am making it again this week. Everyone loves it. Thanks for the recipe!