

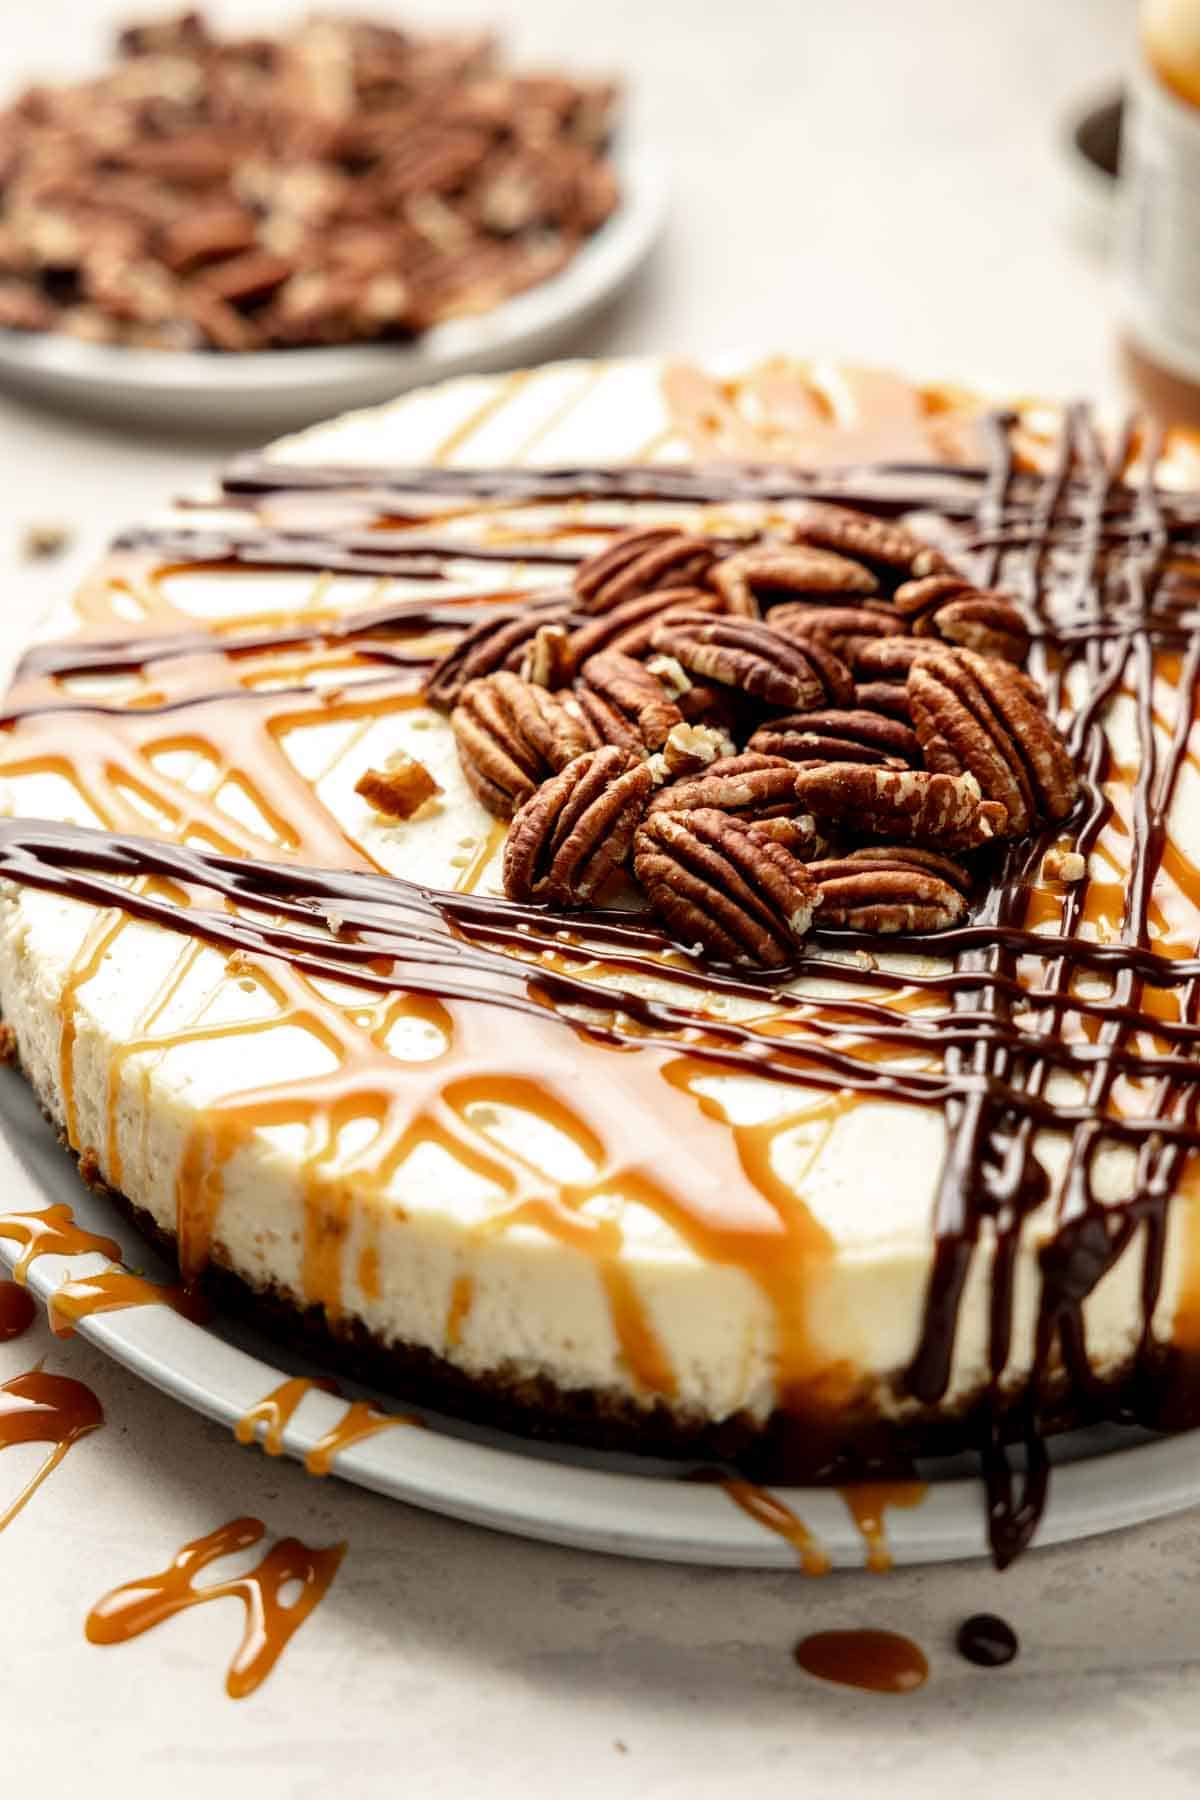
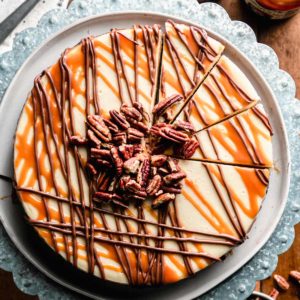
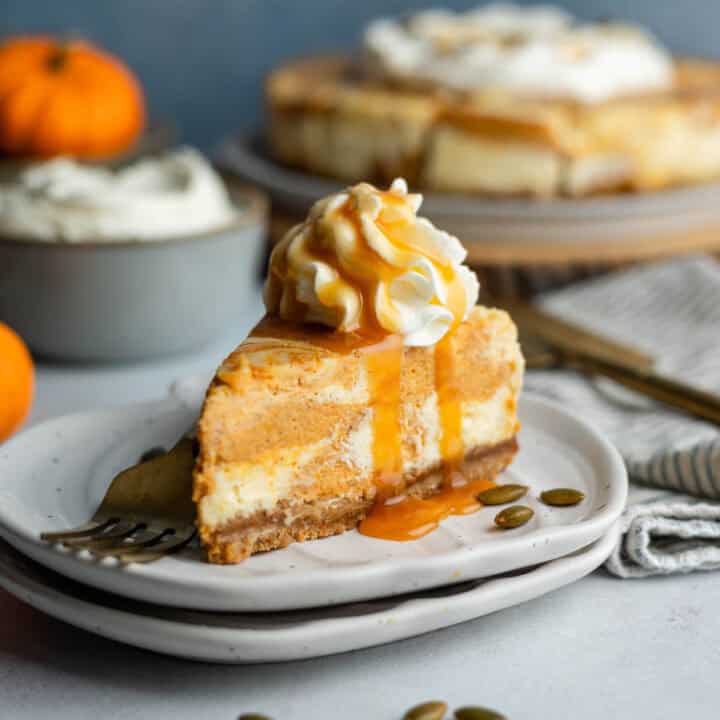
This amazing Gluten-free Turtle Cheesecake features a gluten-free graham cracker crust, the creamiest cheesecake filling, and is topped with caramel, fudge, and toasted pecans. This decadent dessert has been a family favorite for years!
Katie's Recipe Notes
Making a gluten-free cheesecake from scratch is a little bit of a process, but when broken down into steps, it's a dessert any home baker can master. I first made this turtle cheesecake, by request, for my son's 18th birthday! It is the best cheesecake I've ever made! So good, he has been asking for it every year since!
- The filling is taken from my original gluten-free cheesecake recipe. It's a sour cream based filling, which is similar to a New York style cheesecake and is naturally gluten-free.
- The gluten-free cheesecake crust, calls for any variety of gluten-free graham crackers or chocolate cookies you like.
- The toppings are caramel sauce, fudge sauce, and toasted pecans. Just be sure to check all your labels to ensure these are gluten-free.
Ingredients
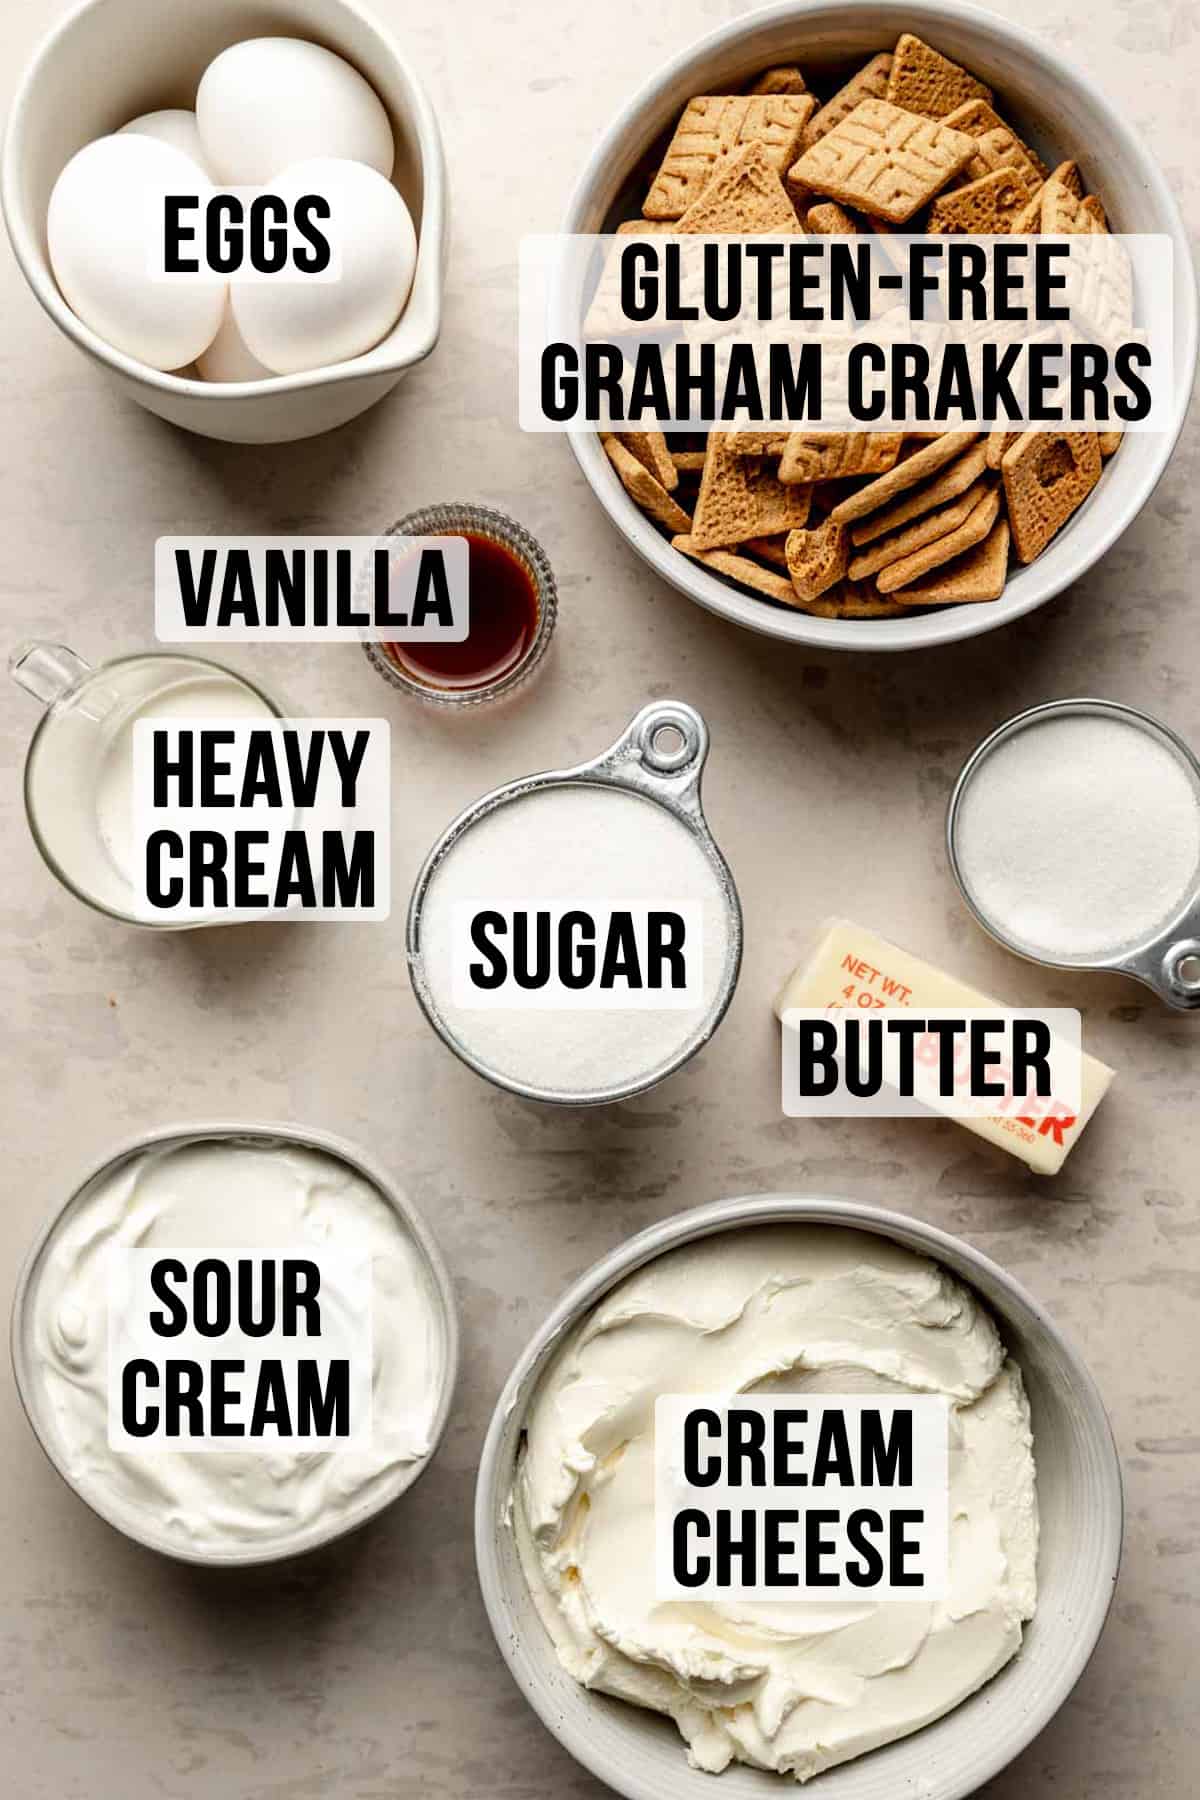
- Filling: For the filling you'll need cream cheese, sour cream, heavy cream, eggs, sugar, and vanilla.
- Crust: For the crust you need gluten-free graham crackers or crunchy cookies, butter, and sugar. I like to use the Simple Mills Honey Cinnamon Sweet Thins or Pamela's Gluten-Free Honeygrahams. In the past, I've used Annie's Vanilla and Chocolate Bunny Grahams. Gluten-free Oreo cookies would work as well.
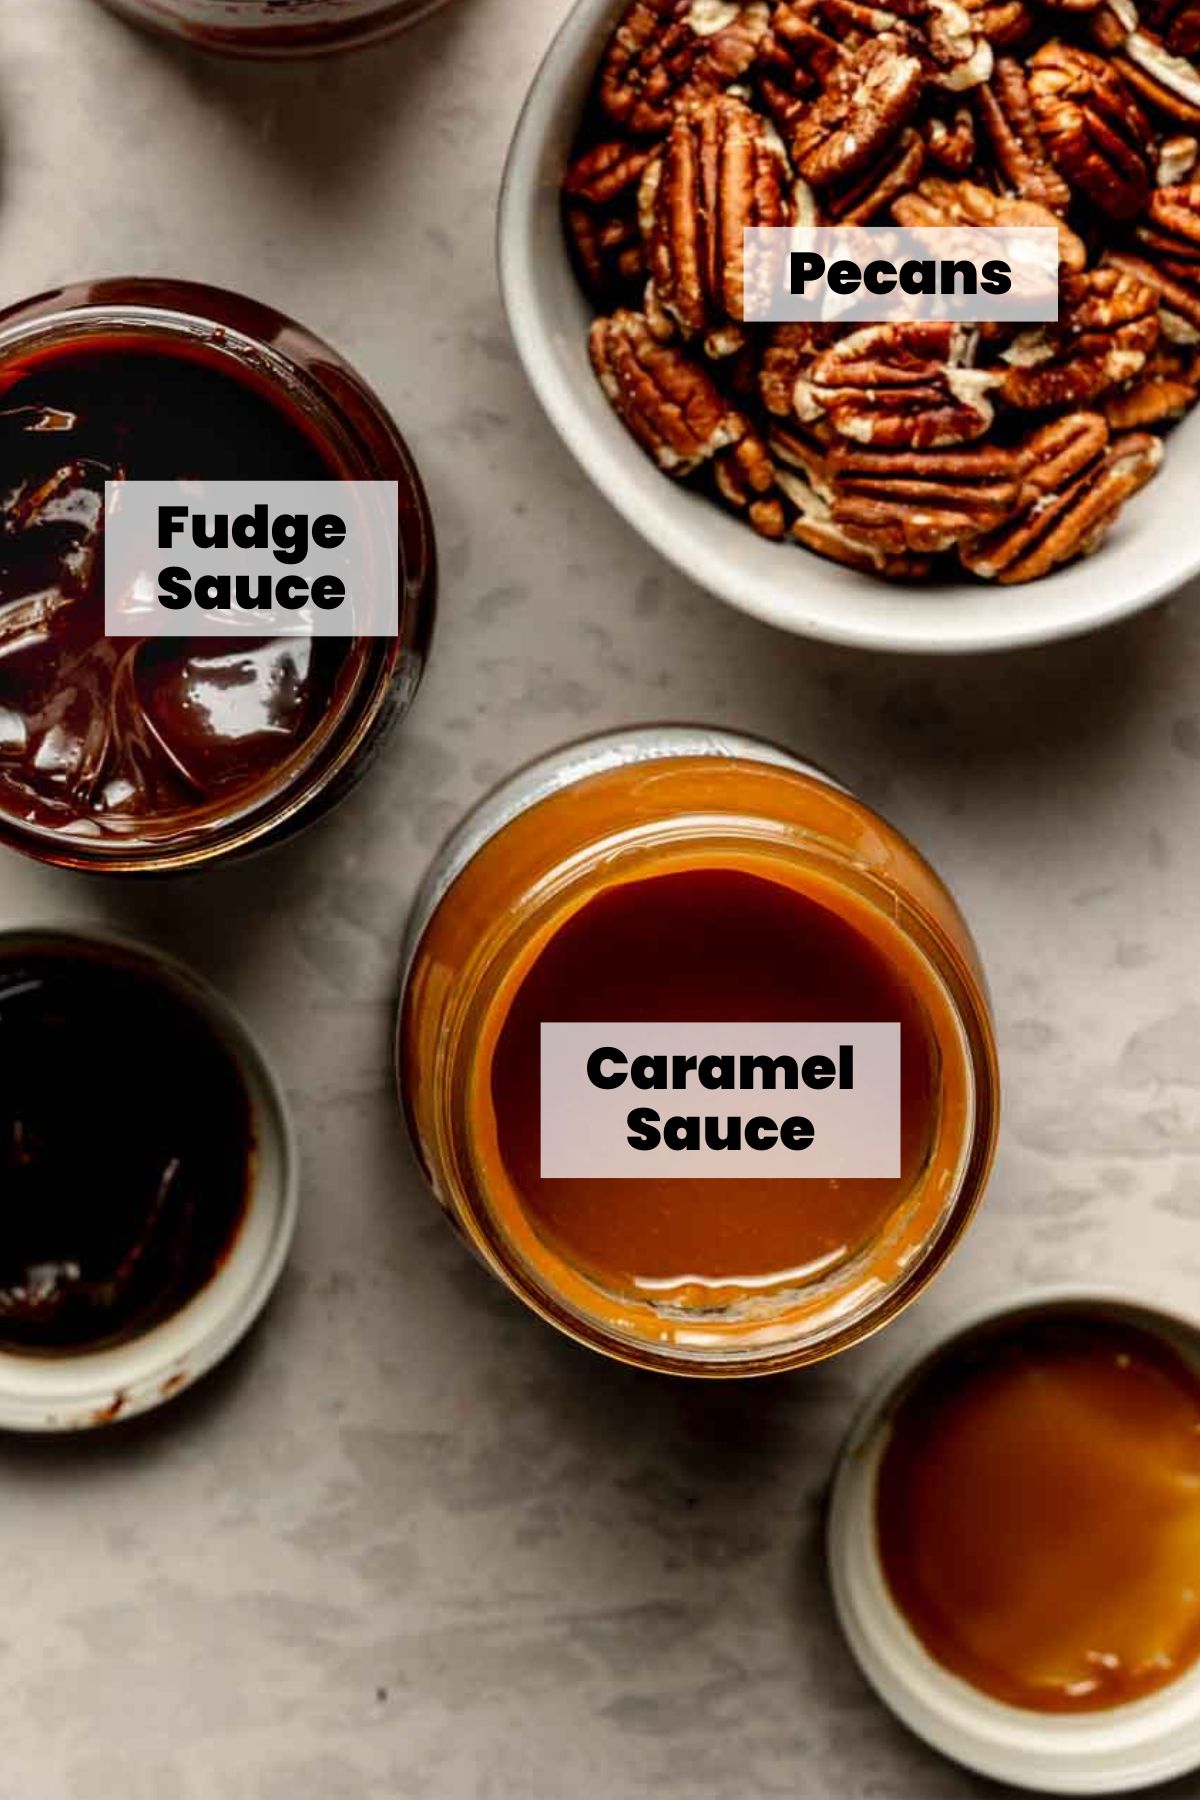
- Topping: Caramel sundae sauce, hot fudge sauce, and pecans. The caramel sauce can be especially tricky, since I have seen some with barley. Just check your labels and make sure there are no gluten ingredients.
Make the Cheesecake Crust

- First things first, prep the pan. Use a 9-inch springform pan-the size of the pan is important for baking times! Line the pan with parchment paper and spray with non-stick spray, getting the sides of the pan greased as well so the filling doesn't stick.
- Use a food processor or rolling pin to crush up one 8 ounce box of your favorite gf graham crackers or crunchy cookies. You'll need about 1-¾ cup of crumbs. Mix the crumbs with melted butter and sugar.
- Press the mixture evenly into the bottom of the pan.
- Bake until golden brown and then set aside to chill while you make the filling.
Making the Cheesecake Filling
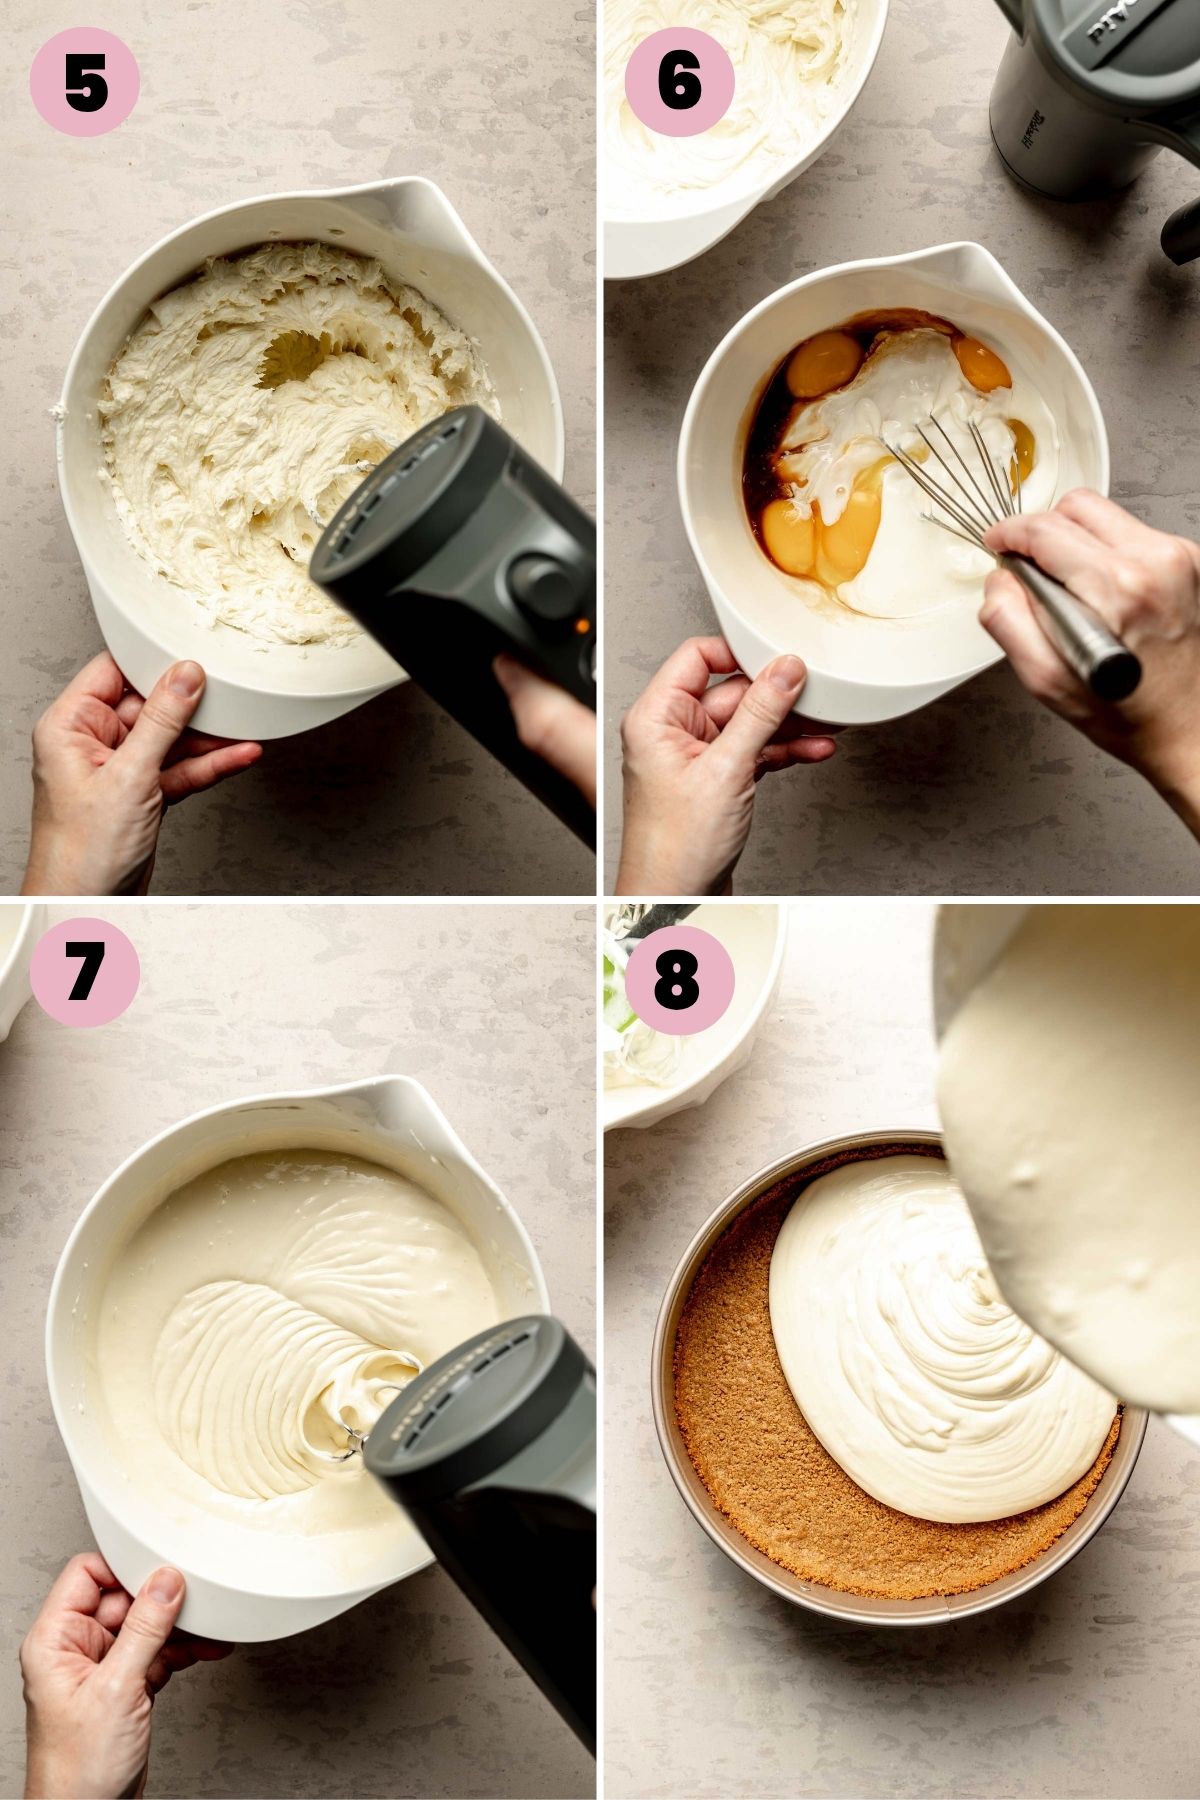
- In a mixing bowl, beat together the cream cheese and sugar. The key is making sure the cream cheese is completely softened to room temperature. The other ingredients should also be at, or near, room temperature as well. This helps everything mix together smoothly without lumps.
- Then in a separate bowl, combine the eggs, sour cream, whipping cream and vanilla.
- Blend the egg mixture into the cream cheese mixture. Don't overmix, and scrape the bowl to make sure the everything is evenly combined.
- Pour the mixture in to the pre-baked crust. Prepare a water bath, then bake and cool according to the recipe card below. This is very important to the final outcome.
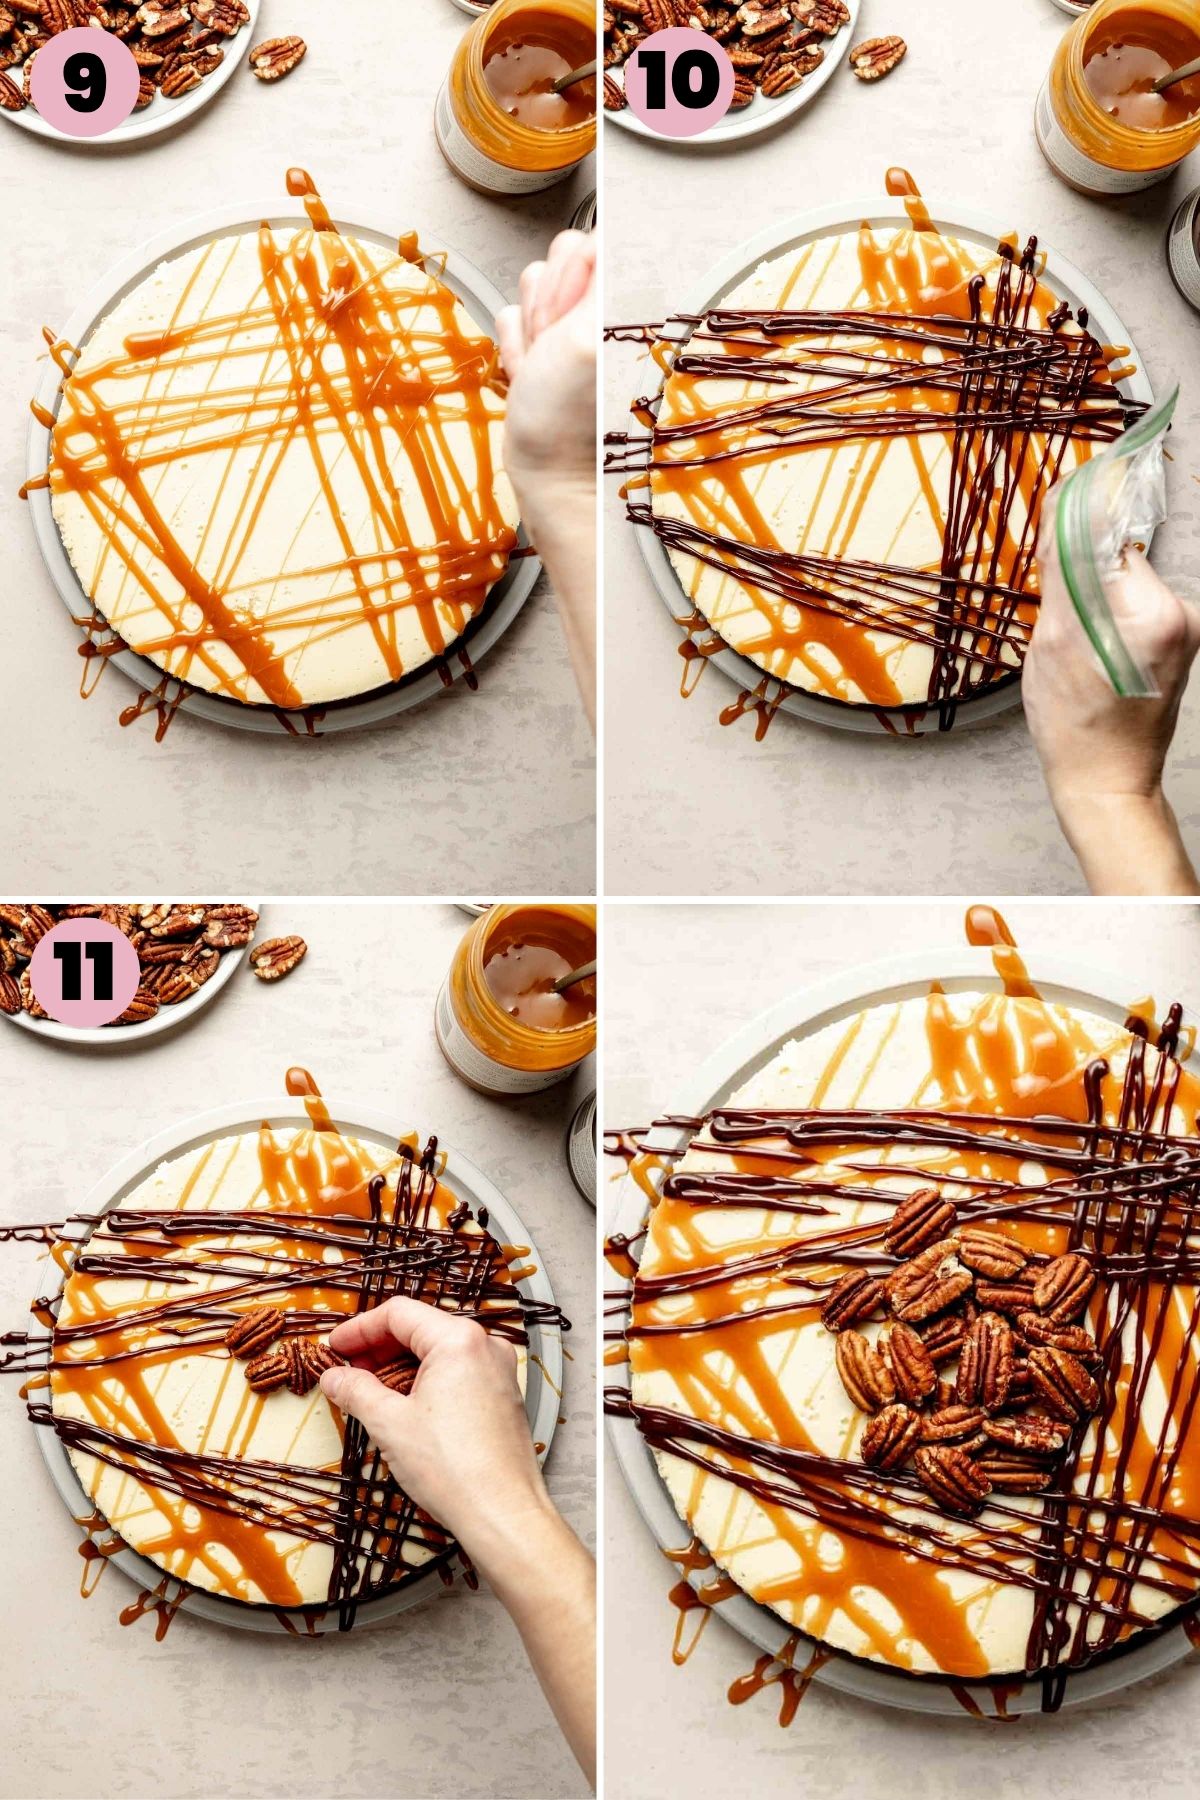
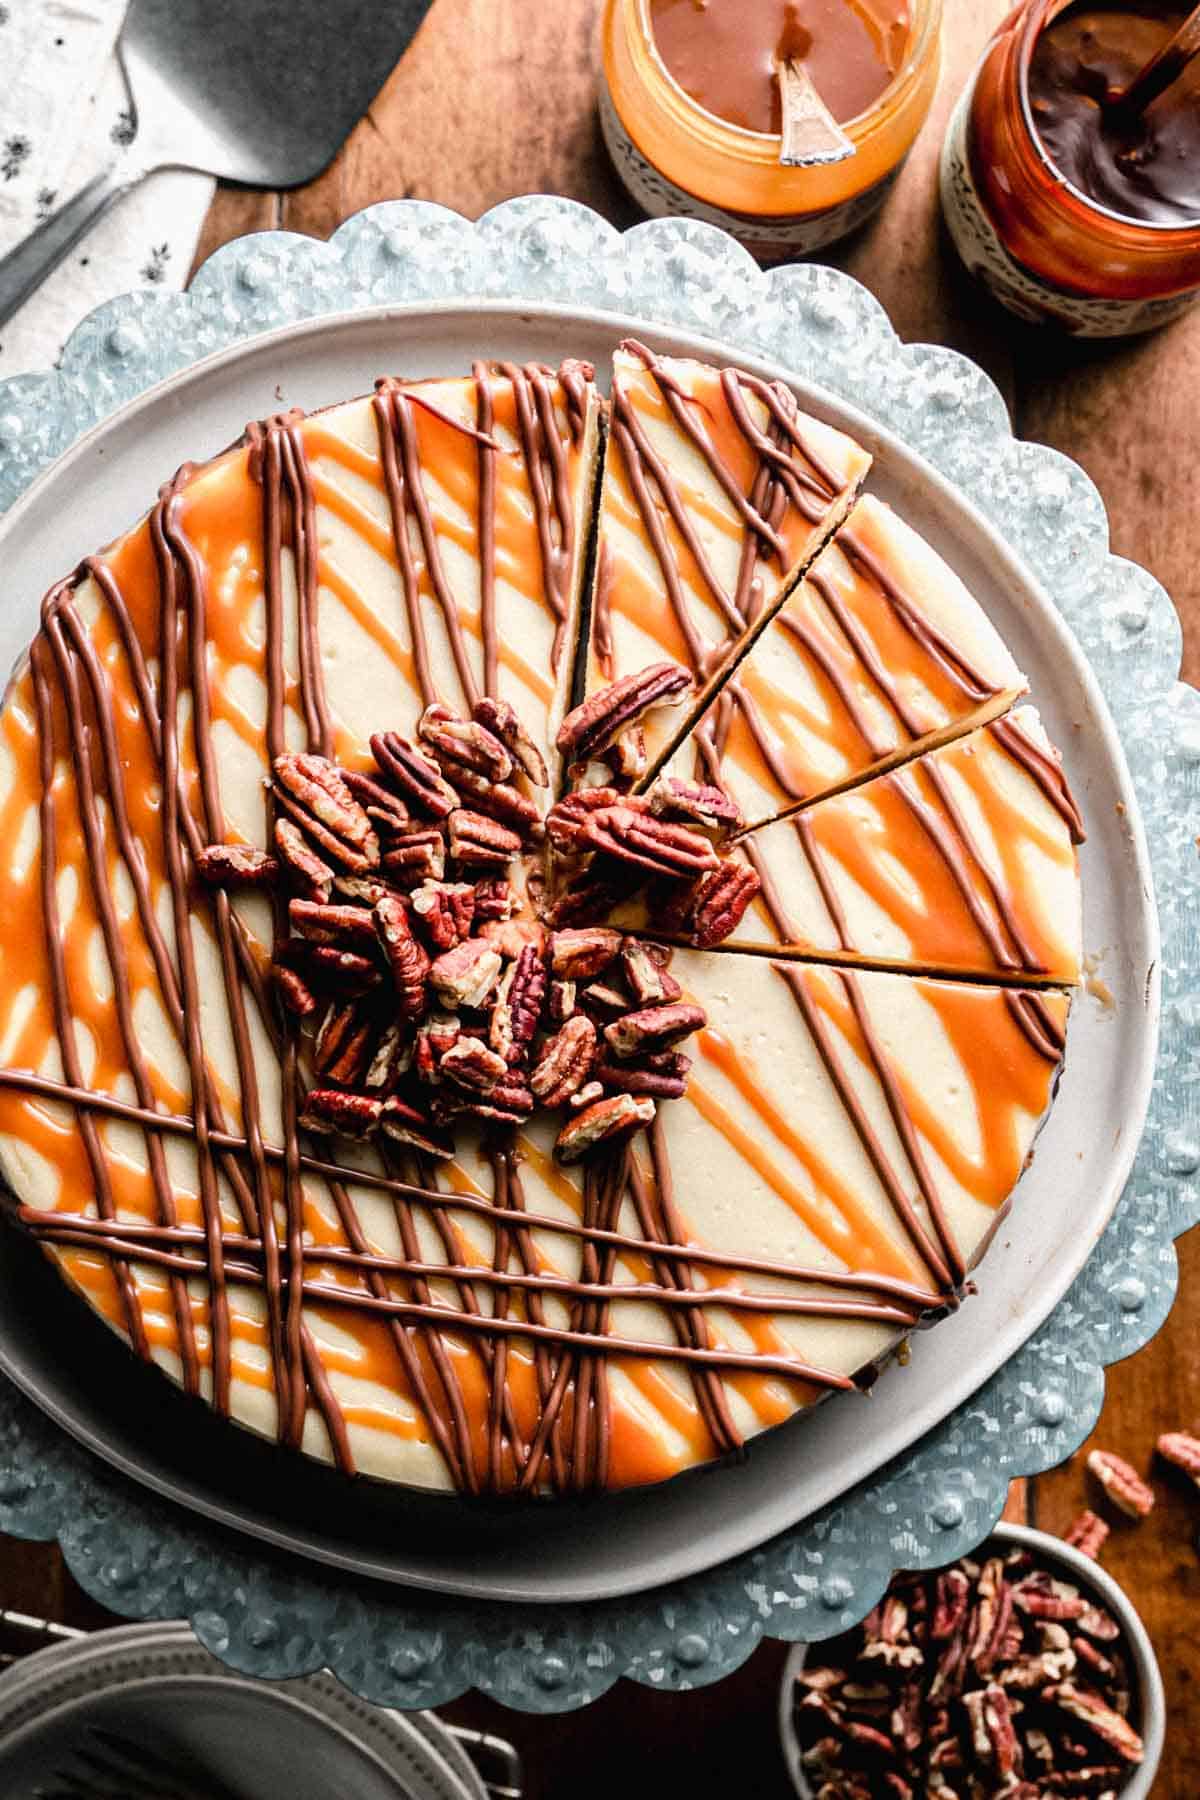
- Once your cheesecake is properly cooled, you can remove the chilled cheesecake from the pan and add the turtle toppings. Start with a drizzle with caramel sauce.
- Then, add a drizzle of chocolate sauce. Microwave the sauce for a few seconds if it's too thick to drizzle.
- Finish with a sprinkle of toasted pecans.
- Keep chilled until ready to serve.
Why You Need a Water Bath
If you want a smooth and creamy cheesecake, you need to bake your cake in a water bath. The water gently insulates the cake so the edges don't overbake before the center sets, while adding moisture that helps prevent cracks. The result is a flat, evenly baked cheesecake every time.
How to Make a Water Bath That Doesn't Leak
The only issue I've had with water baths is that they can leak into your springform pan and make your crust soggy. This is obviously not ideal.
Many people will say to cover the pan with foil. For me, this was not working because one sheet was not wide enough to cover the entire pan and the water would get in between the layers.
For a while I was placing my pan inside an oven bag and letting that act as a barrier between the water and the cake. That seemed to work well, but lately, I'm finding even those bags tend to leak.
The solution I've finally found that works is extra wide heavy duty foil. The foil is 18-inches wide, which is large enough to cover the bottom and sides of the pan with one piece. It's also thicker, and less prone to tearing.
Save This Recipe!
How to Prepare a Water Bath
- Before adding your cheesecake filling, place the pan on a double layer of extra wide heavy duty foil. Wrap the foil up around the sides of the pan, ensuring that the entire bottom and sides of the pan are covered and there are no tears.
- Add your filling on top of the crust.
- Carefully place the pan inside a large roasting pan or any pan a few inches larger than your springform pan.
- Pour boiling water into the roasting pan so that it fills about halfway up the sides of the springform pan, taking care not to get water in the cheesecake.
- Carefully slide the pans into the oven to bake.
Removing the Cheesecake from the Pan
Before removing the cake from the pan, you must allow the cheesecake to cool completely to allow it to set up. Refrigerate the cheesecake for at least 6 hours or overnight before removing it from the pan.
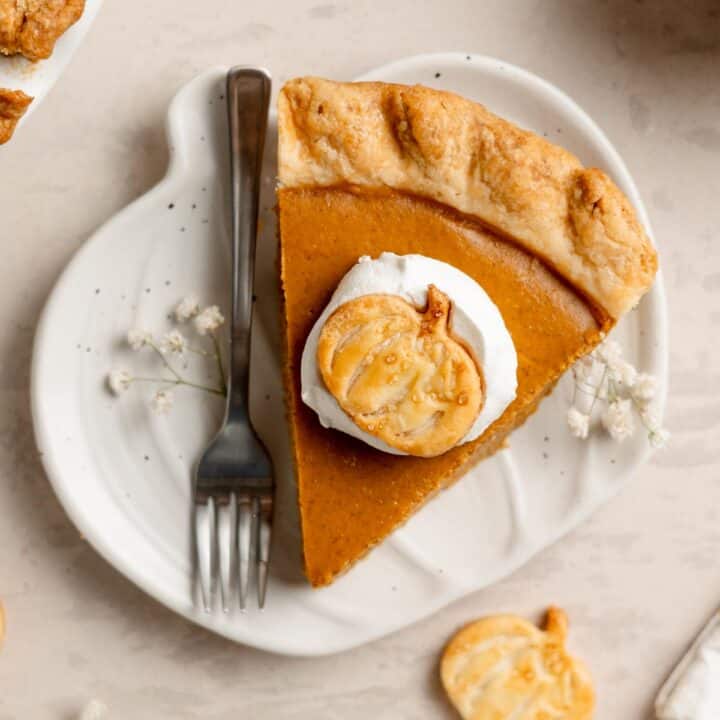
The picture below is from my gluten-free pumpkin cheesecake and shows you how to remove a cheesecake from the pan, including from the base of the springform pan.

- Remove the sides from the springform pan. Cover the top of the cake with a piece of parchment paper.
- Place a flat plate on top of the parchment covered cake.
- Invert the cake and remove the bottom of the springform pan.
- Then remove the parchment paper from the crust.
- Place a serving plate on top of the inverted cake and then flip it all back over.
- The cake should now be resting right side up on your serving plate. Remove the parchment paper from the top of the cake... and voila! You are now the proud owner of a beautiful cheesecake on a serving plate!
Storage
Store the cheesecake in the fridge until serving. It will keep for 3-4 days, but I usually plan to serve it within a day or two.
To make it more than a few days ahead, prepare the cheesecake but wait to add the toppings. Freeze the entire cheesecake, tightly wrapped. Thaw overnight in the refrigerator and then top before serving.
Individual slices can be frozen and enjoyed later as well.
More Gluten-Free Recipes You'll Love
For more pecan inspiration, try my gluten-free pecan pie or gluten-free pecan tassies. For all of my cheesecake variations, check out my gluten-free cakes page!

Recipe
Gluten-Free Turtle Cheesecake
Equipment
- 9-inch springform pan
- extra wide heavy duty foil
Ingredients
Crust Ingredients
- 8 ounces gluten-free graham crackers ( 1 ¾ cup gluten-free graham cracker or cookie crumbs)
- ¼ cup sugar
- 4 tablespoons melted butter (melted)
Cheesecake Filling
- 20 ounces cream cheese ((2½ - 8 oz packages), softened)
- 1 cup sugar
- 1 ¼ cups sour cream
- ⅓ cup heavy cream
- 2 large eggs
- 3 large egg yolks
- 1 tablespoon vanilla extract
Turtle Topping
- ¼ cup caramel sundae sauce (always check labels, some brands are not gluten-free)
- ¼ cup hot fudge sauce
- ¾ cup toasted pecan pieces
Instructions
Make the Graham Cracker Crust
- Preheat the oven to 350°F. Grease a 9-inch springform pan and line with parchment paper.
- Crush 8 ounces gluten-free graham crackers into crumbs. Put the crumbs in a small bowl with the ¼ cup sugar and 4 tablespoons melted butter. Stir to combine.
- Pour the crust mixture into the prepared pan and press them down firmly, into an even layer.
- Bake for 8-10 minutes, or until golden brown, and then set it aside to cool.
Make the Cheesecake Filling
- With an electric mixer, cream the softened 20 ounces cream cheese and 1 cup sugar together in a large bowl until well combined. Scrape the sides and bottom of the bowl with a rubber spatula.
- In a separate small bowl, whisk together 1 ¼ cups sour cream, ⅓ cup heavy cream, 2 large eggs, 3 large egg yolks, and 1 tablespoon vanilla extract.
- Pour half of the sour cream mixture into the cream cheese mixture and mix until well combined. Scrape the sides and bottom of the bowl. Then mix in the remaining sour cream mixture, scraping the bowl again. Set this mixture aside while you prepare the water bath.
Bake the Cheesecake
- Wrap the springform pan with a double layer of extra-wide heavy duty foil, ensuring the bottom and sides are covered and there are no holes. Place the foil wrapped pan inside a large roasting pan.
- Pour the cheesecake mixture over the crust.
- Boil water and fill the roasting pan about halfway up the sides of the cheesecake pan.
- Carefully transfer the roasting pan with the cheesecake into the oven. Reduce the temperature of the oven to 250°F.
- Bake at 250°F for 1-½ hrs. Don't open the oven door while it is baking.
- When the time is up, the cake will still look jiggly in the center and will look underdone. Turn the oven off and let the cake cool in the oven for 1 hour to finish cooking. It still may seem a slightly jiggly in the center after this, but the edges should look set.
- Remove the cake from the oven. Refrigerate the cake for at least 6 hours or overnight. The cake should be firm at this point.
Remove the Cake from the Pan
- Gather two plates: any flat plate and a serving plate large enough to hold the cheesecake.
- Release the sides of the springform pan. If it looks like it might stick, run a thin knife along the edge.
- Place a piece of parchment paper on top of the cheesecake to cover it. Then, take the flat plate and lay it on top of the cheesecake. Invert the cheesecake and set it down.
- Remove the bottom of the springform pan and then parchment paper from the crust. Place your serving plate on top of the crust and flip the cake back over. Remove the parchment from the top of the cake.
Top the cheesecake
- Drizzle the top of the cheesecake with caramel sauce and fudge sauce. Then, sprinkle the top of the cake with toasted pecan pieces.
- Keep refrigerated until serving.
Notes
- To toast pecans, bake at 350°F for about 10 minutes.
- If you only have an 8-inch springform pan, extend the baking time by 10-15 minutes.
- Follow the instructions closely, the cooling is part of the baking process.
- Skipping the water bath could result in uneven baking and cracks.
- For pretty drizzles, put the caramel and fudge sauce in zip top bags and snip the corner, then drizzle lines across the cake. Drizzling with a spoon works too, but this is usually more controlled.
Save This Recipe!
Estimated Nutrition
* Nutritional information is provided as a courtesy and should be used as an estimate only. See the nutrition policy for more information.
SaveSave
SaveSave
Maheen Ansari says
it’s the most delicious cheesecake I have ever had in my life. It turned out amazing and people who came to my house as guests, they went crazy over it and couldn’t stop complimenting it. Thank you so much for the recipe.
Katie Olesen says
I am happy to hear you enjoyed the cheesecake! It really is one of our favorite recipes!
Shanna says
My very first from scratch cheesecake for my son’s birthday. So pretty that everyone took pictures. A couple comments on the recipe, I used a small oval enamel roaster and needed about twice as much water for the bath. I also put the spring form pan with the bag into the roaster before adding the cheesecake filling to reduce the chances of potential disaster with all of the moving around.
Jen says
Why is your baking time 90 minutes and Alton’s is 60 when the filling ingredients and baking method/temps are the same?
Katie Olesen says
This recipe has worked well for me and many others. Baking for 1 hour was not long enough and the filling was too soft.
Debbie says
Had this tonight. Best cheesecake I’ve ever had. 😊
Kristin says
Made this for my friend’s birthday and everyone loved it!
Chrissy says
Can I use dairy free cream cheese, and sub heavy cream for full fat coconut milk?
Katie | Wheat by the Wayside says
I haven’t tried this dairy free so I’m not 100% sure. If you try it, I’d love to know how it works out!
Riri says
The recipe is amazing! I added mashed pecans to the batter and extra cream, used GF oreos as the crust, and used torani dark chocolate and caramel sauce. It's GF and teast really good, although the caramel does not stick too well on the cheesecake if it is even a little warm when you drizzle it.
Sadie says
Do you roll the sides of the oven bag down, or do you close it? I’m sorry but wouldn’t it fall into the cheesecake? I love this idea but I’m just not able to visualize what you do.
Katie Olesen says
Roll it down. The top should be open. It’s just there to cover the sides of the pan and prevent water from getting in.
Fanceeist says
Thank you, Katie. I made this, using a little less sugar and subbing some stevia and replacing sour cream with plain Greek yogurt because I already had an open tub in the fridge- it is AMAZING! Thank you again, I will be using this recipe again in the future.
Kathy says
This is probably the best cheesecake I’ve eaten!!