


Making a homemade gluten-free pie crust can be tricky, but with this flaky, no-fail recipe and some helpful tips and tricks, you will be well on your way to a delicious pie crust! Use it in all of your favorite pie recipes!
Jump to:
Why this Recipe Works
I've been trying to master a gluten-free pie crust for years now. Suffice it to say, I've gone through an embarrassing amount of gluten-free flour and butter in the process! And as you know, those ingredients are not cheap!
In the quest for a gluten-free pie dough that worked, I tried everything from converting old recipes to trying just about every recipe on the internet, but for some reason, I was still struggling! I was about to give up, forget pie forever, and sulk in gluten-free self-pity. Then I thought to myself, not today, pie. Not today. And I kept on trying!
What I've learned through all of my trials over the past couple of years is that making a successful gluten-free pie lies more in the technique than the recipe itself. Using good quality flour and keeping everything nice and cold, goes a long way to achieving success. In this article, I'll walk you through making the dough step-by-step plus I will give you many helpful tips that I've learned along the way!
Uses
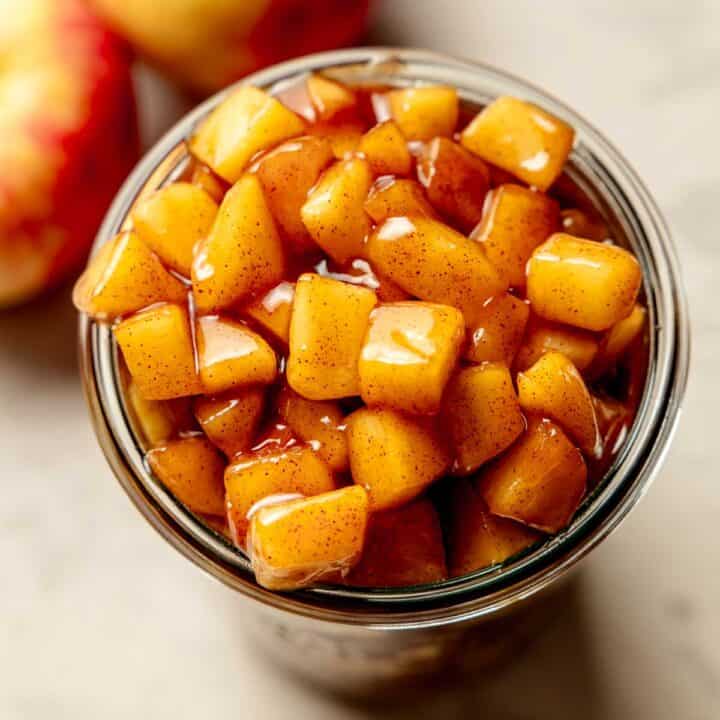
You can use this gluten-free pie crust for any of your favorite pie recipes, like gluten-free apple pie with a pre-cooked apple pie filling, gluten-free pumpkin pie, gluten-free pecan pie, or even custard pies!
If you're converting an old recipe to gluten-free, make sure to substitute any flour in the filling for an appropriate gluten-free substitute, such as cornstarch.
This recipe will also work for savory pies, like a quiche or chicken pot pie, in which case you can omit the sugar, if desired.
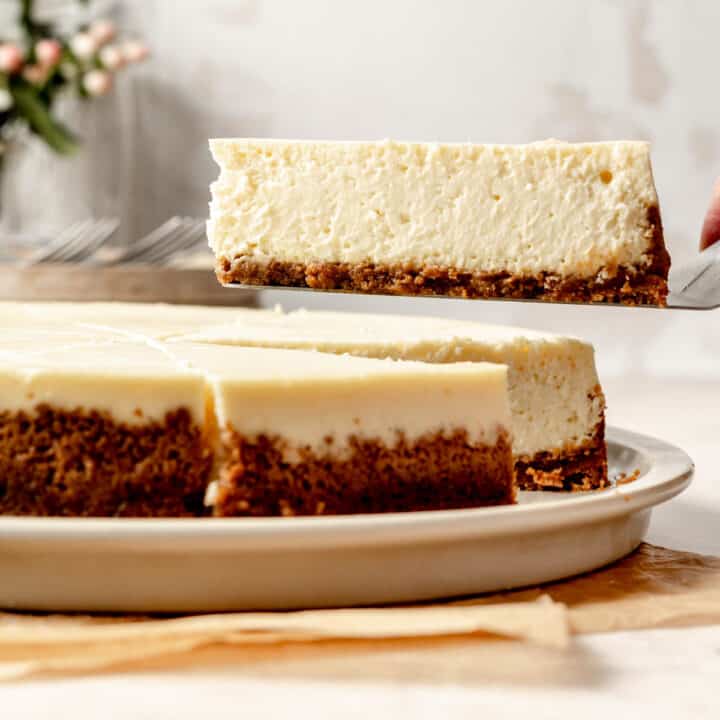
Need a graham cracker crust? Check out this gluten-free graham cracker crust recipe!
Ingredients
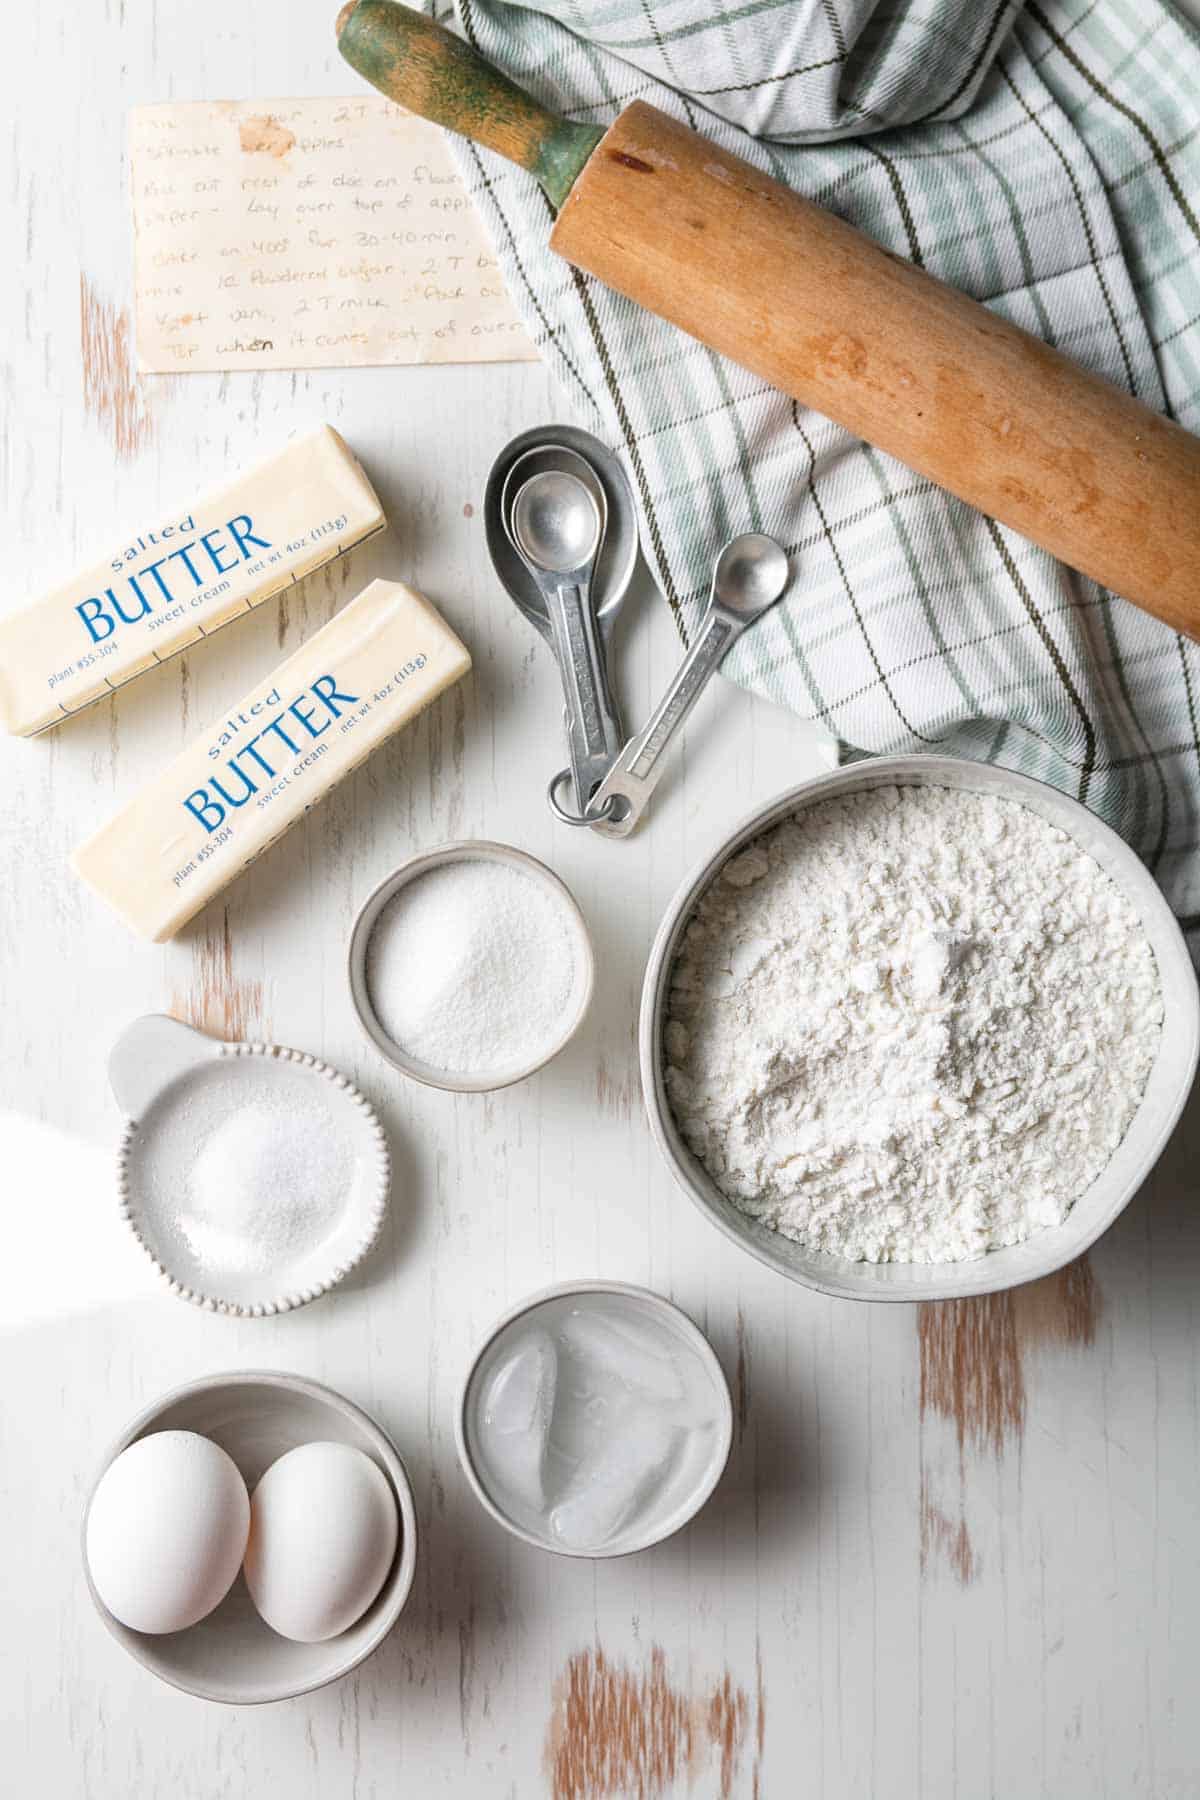
- Cup4Cup Gluten-free Flour: Cup4Cup is my ultimate recommendation for this recipe. It is truly amazing the difference in result and ease of handling the dough with that flour blend. If for whatever reason you don't want to use it, I have successfully used Pamela's All-purpose Gluten-Free Flour and Namaste Perfect Blend. Others also recommend King Arthur Flour Gluten-free Blend. You can also use my DIY Cup4Cup gluten-free flour blend.
- Butter: Make sure it is very cold! I cube the butter and then pop it in the freezer for about 15 minutes before I get started.
- Dairy-free: Substitute Earth Balance Vegan Buttery Sticks (or your preferred butter substitute for baking) Use a fat that is solid at room temperature. (I would not recommend coconut oil.) Treat the sticks just like butter, cube it and get it very cold before you begin. Also note, Cup4Cup is not dairy-free, so you will need to use an alternate flour as well.
- Egg Yolks: These help with structure but can be omitted if you are egg-free. You will need additional water if you omit the egg yolks.
- Sugar & Salt: Both add flavor. The sugar aids in browning although, you can omit the sugar if you're making a savory pie.
- Ice Cold Water: the colder the better!
Making Gluten-free Pie Dough
Now, I will walk you through the steps to achieve a perfect pie crust! It's really not hard but there are techniques that will help you be successful!
You can use a stand mixer to make this dough or you can do this by hand. Either works great, so don't worry if you don't have a stand mixer. I wouldn't recommend a food processor because it tends to overmix the dough.
- First, gather your ingredients and get them icy cold.
- Whisk the egg yolks with half of the water and pop it back in the fridge.
- Cube the butter and put it in the freezer for at least 15 minutes but not long enough to freeze solid. You just want it to be very cold.
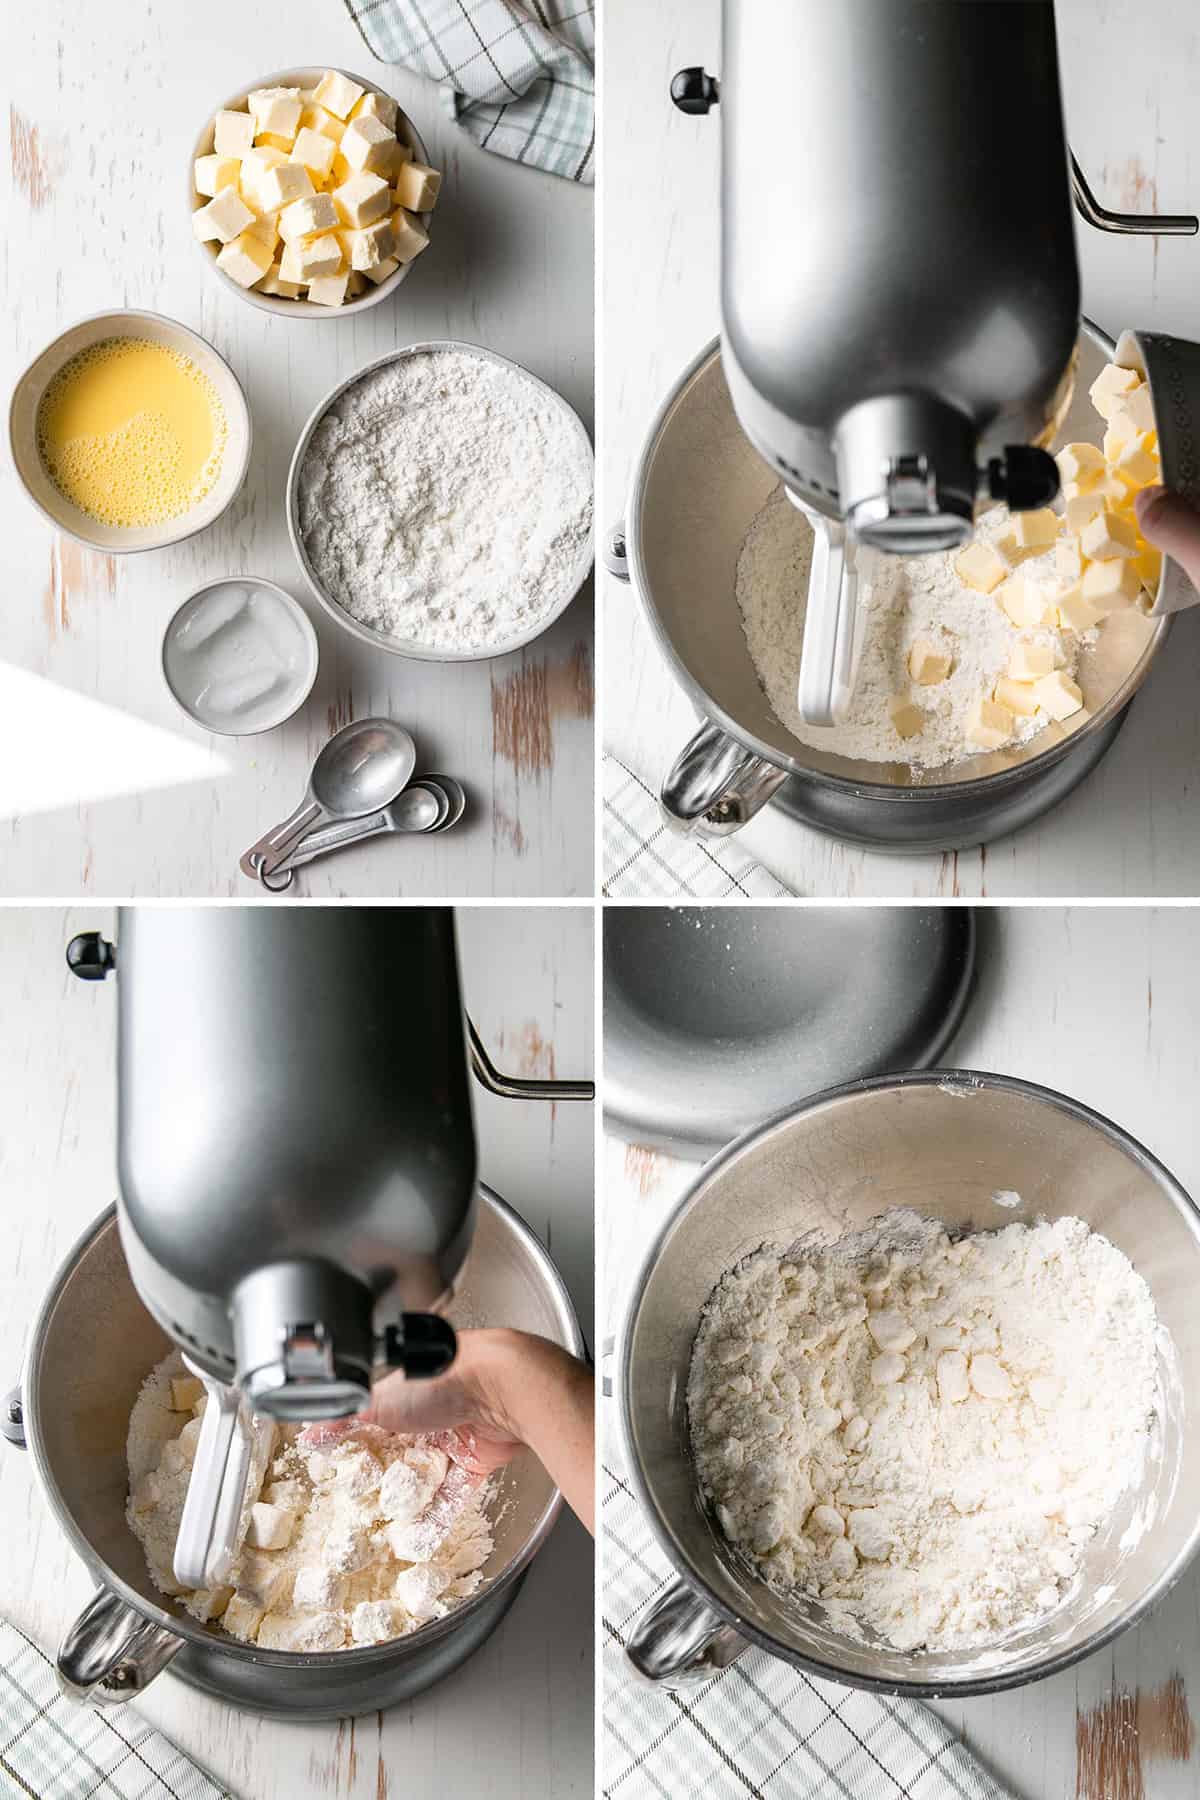
- Whisk the flour, sugar, and salt together. Pop it in the freezer for a few minutes, along with the bowl and paddle attachment.
- Place the flour mixture in your bowl, then toss the butter cubes with the flour.
If using a stand mixer, turn the mixer to low and mix until the butter is flattened leaving some larger chunks about the size of walnut halves.
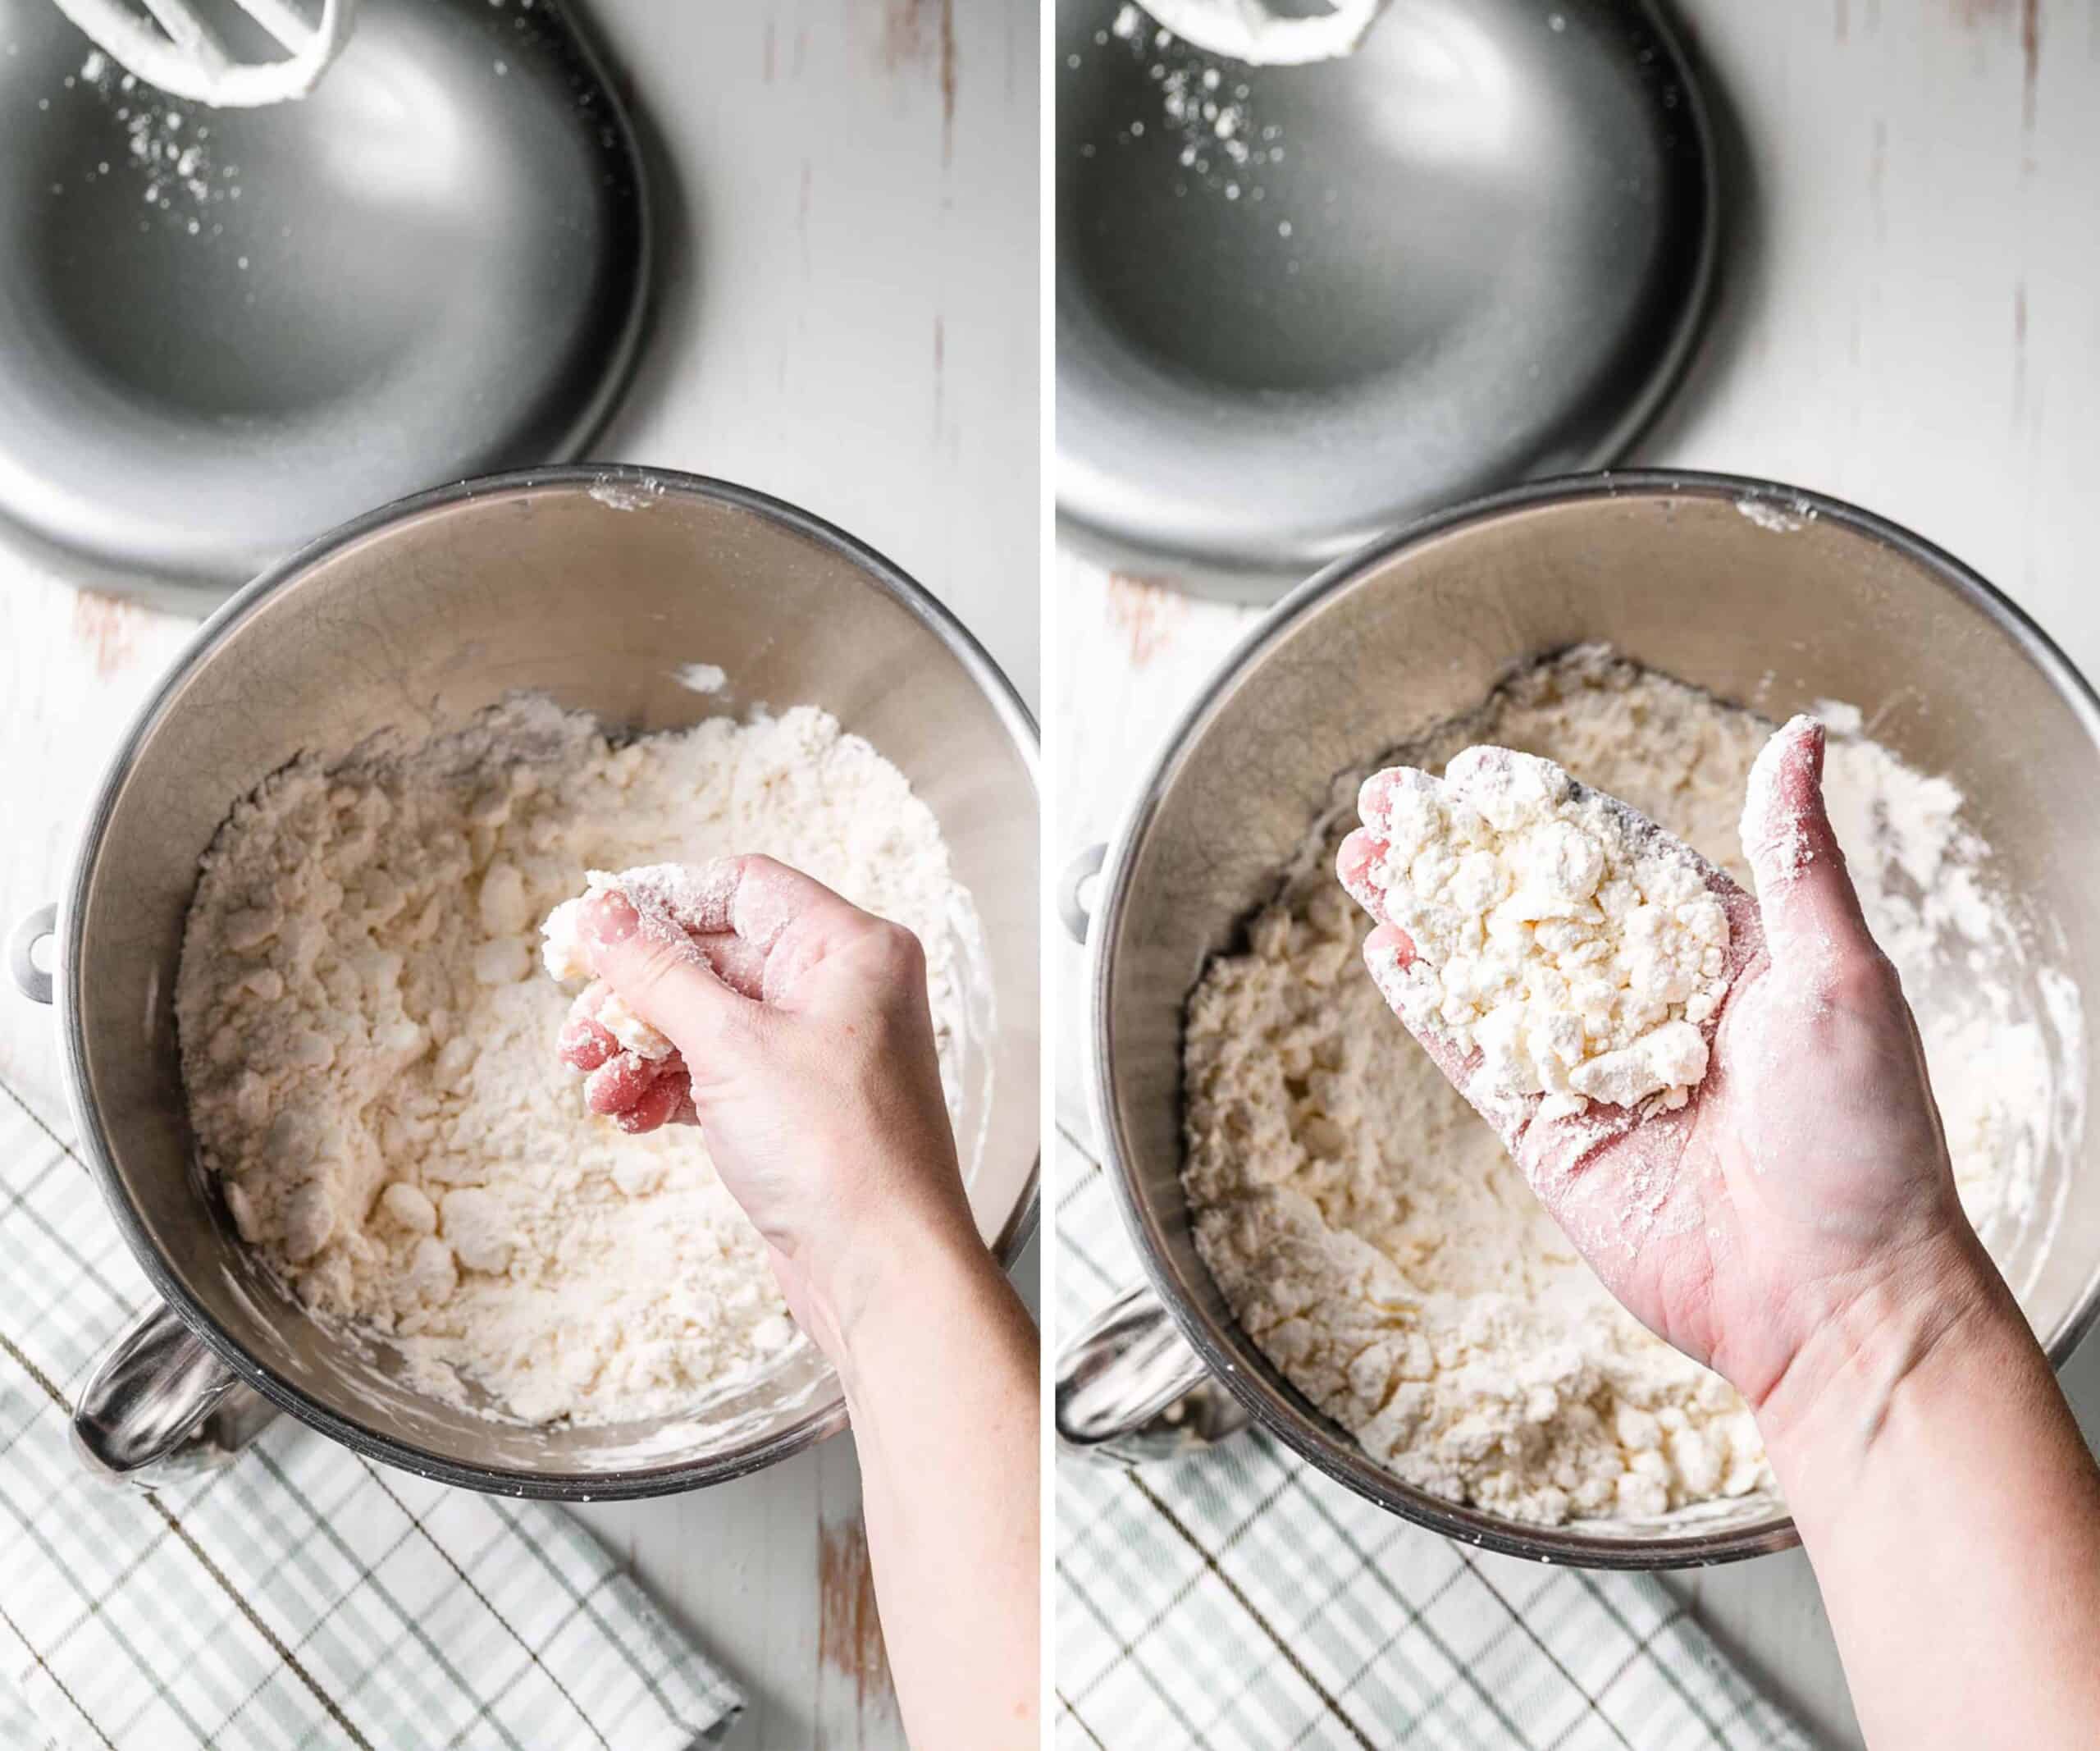
If you're doing this by hand, grab each cube of flour-coated butter and squish/rub it between your fingers and thumb to flatten it. Then, drop it back in the flour. Keep doing this until the flour mixture has some larger walnut-halve sized chunks and some smaller pieces. (See picture below.)
Pro-tip! Those chunks of butter are important! The larger chunks of butter are what create a flaky pie crust! The smaller your pieces of butter, the less flaky the crust will be.
- Once your mixture looks like the picture above, it's time to blend in the wet ingredients. Pour in your egg/ice water mixture and toss to combine with the flour.
- Add more ice water, 1 tablespoon at a time, until the flour looks to be just moistened enough to hold together. You can do this by hand or with the help of the stand mixer.
- As soon as the mixture comes together, or looks just moistened enough to hold together, stop mixing and press the dough into a ball. Don't over-mix the dough here!

Pro-tip! The dough should not be overly wet or sticky. There also should not be any visibly dry patches of flour. Add the water slowly, 1 tablespoon at a time, and stop when the mixture is just right! It should look moistened yet crumbly until you press it together into a ball.
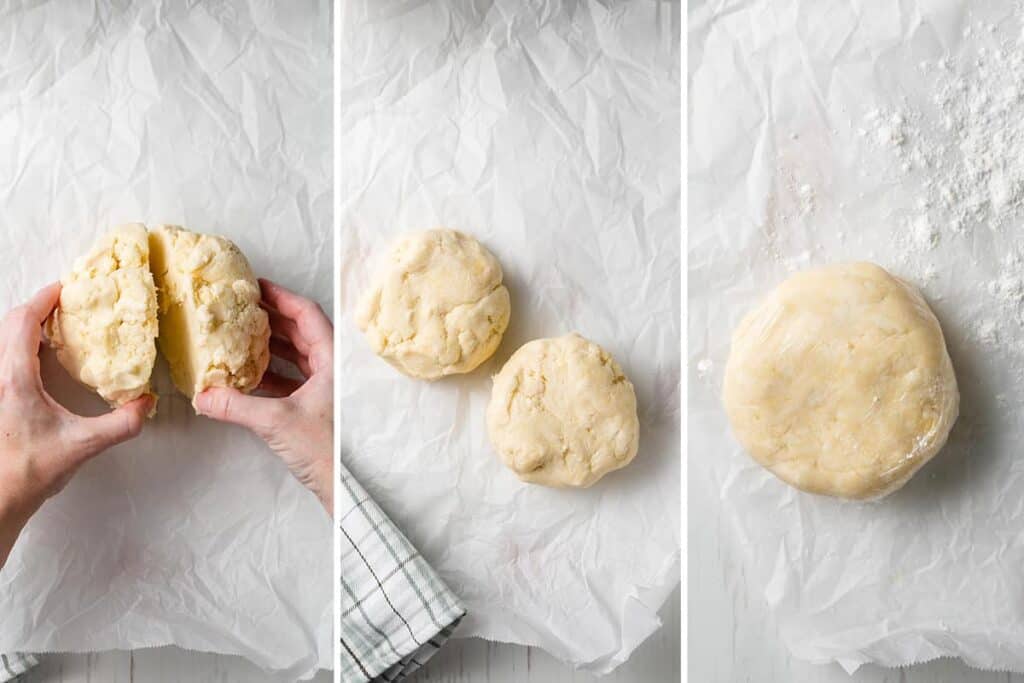
- Divide the dough into two balls.
- Wrap the dough tightly with plastic wrap and refrigerate for at least 30 minutes before you continue.
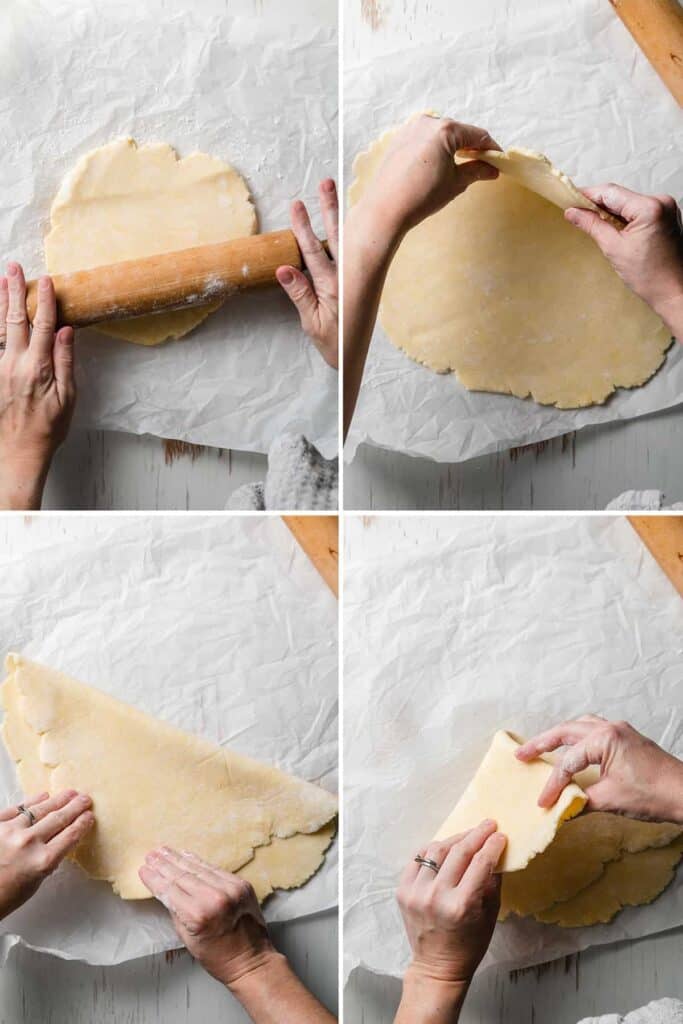
- After the dough has chilled, roll it out on a lightly floured piece of parchment paper.
- As you roll it out, be sure to move the dough around to ensure it isn't sticking to the parchment.
- Add a little more flour as needed if it starts to stick.
Pro-tip! Working on parchment is like an insurance plan! (If you have a silicone mat, that would work as well.) If the dough starts to stick, you will be able to lift the parchment, peel it back, and sprinkle more flour underneath. You can also pop the whole thing back in the fridge right on the parchment paper if things start to get too warm. Otherwise, you may end up with a doughy mess stuck right to your counter.
Save This Recipe!
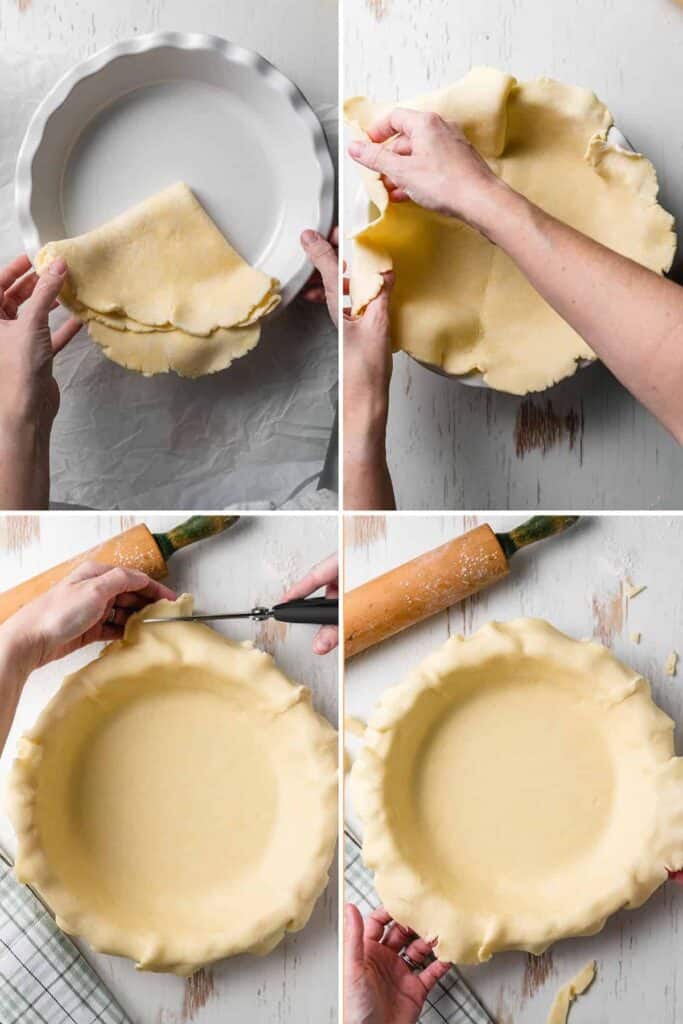
- When the dough is large enough to fit in your pan, fold it into quarters and place it in your pie dish.
- Gently unfold the dough and press into the bottom ensuring there are no air pockets in the corners.
- Trim the edges of the crust to about 1-inch of overhang around the edge of the pie plate.
If you're making a double-crust pie:
- Fill the pie.
- Roll out the top half and place it on top.
- Then continue with the next steps.
For a single-crust pie, continue to the next steps.
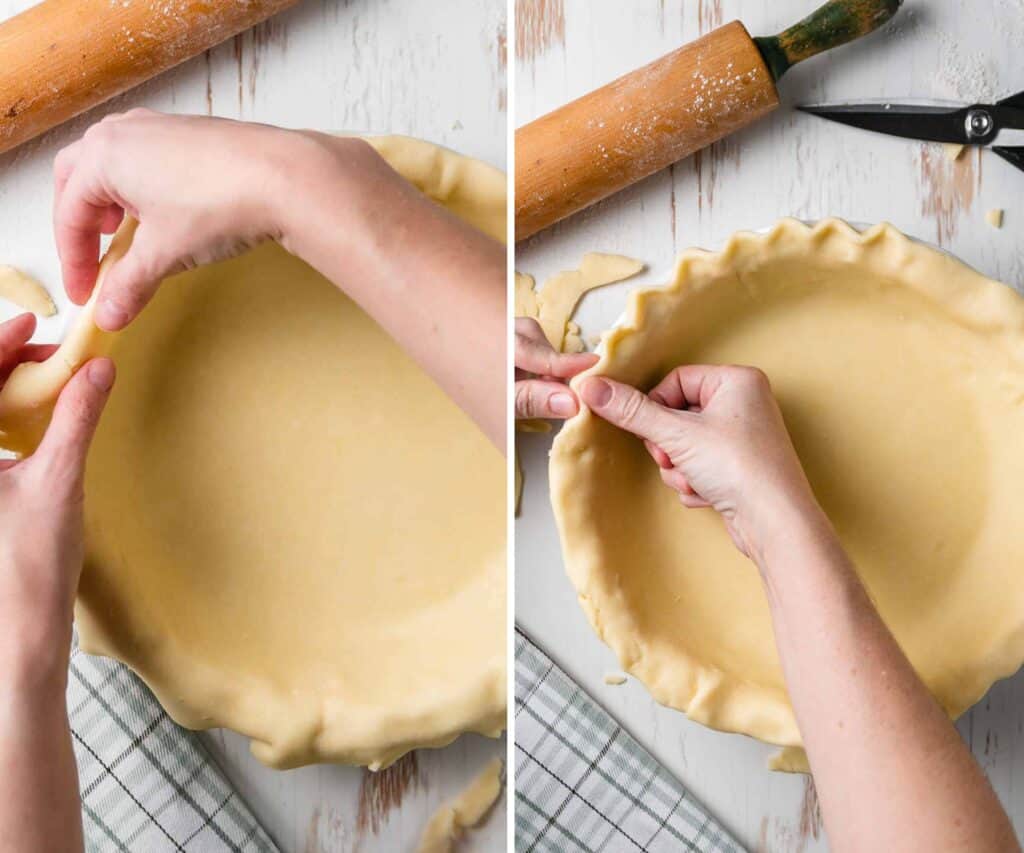
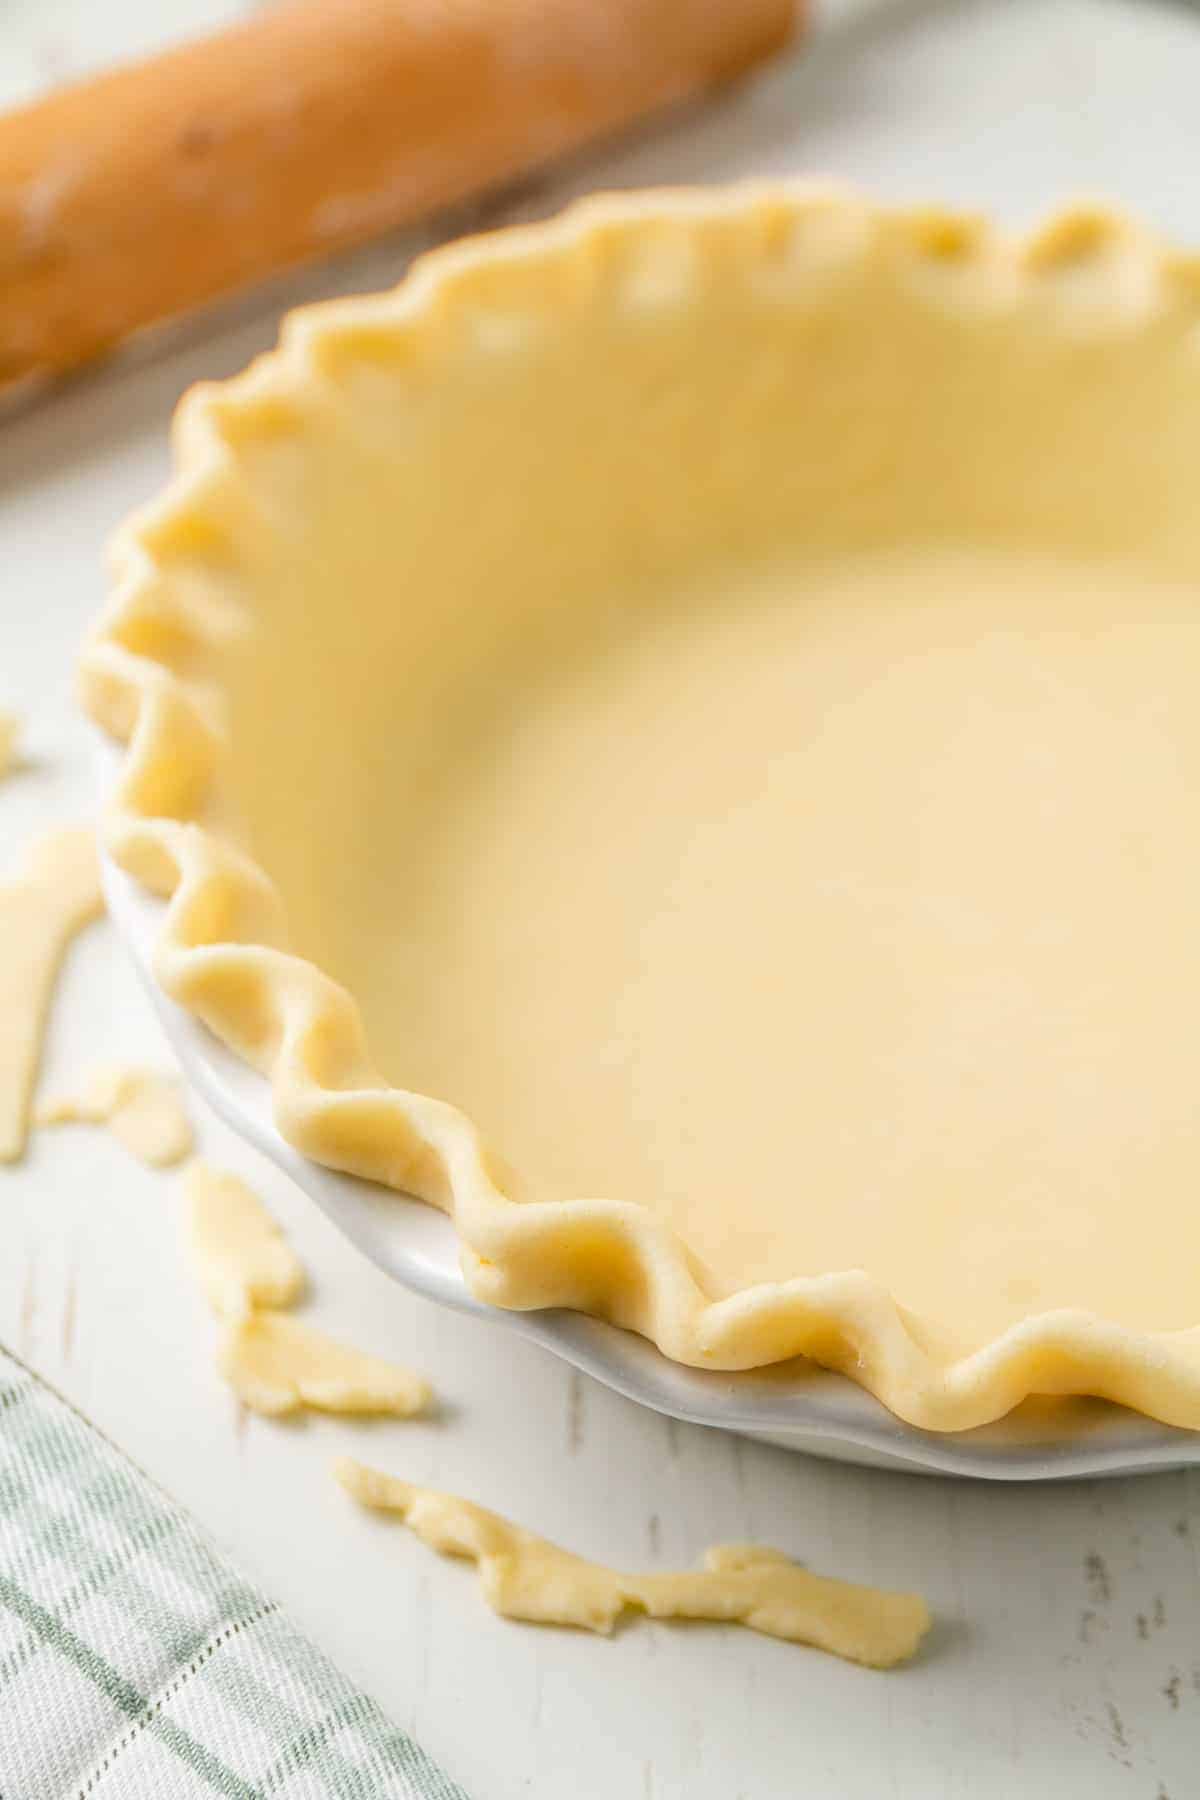
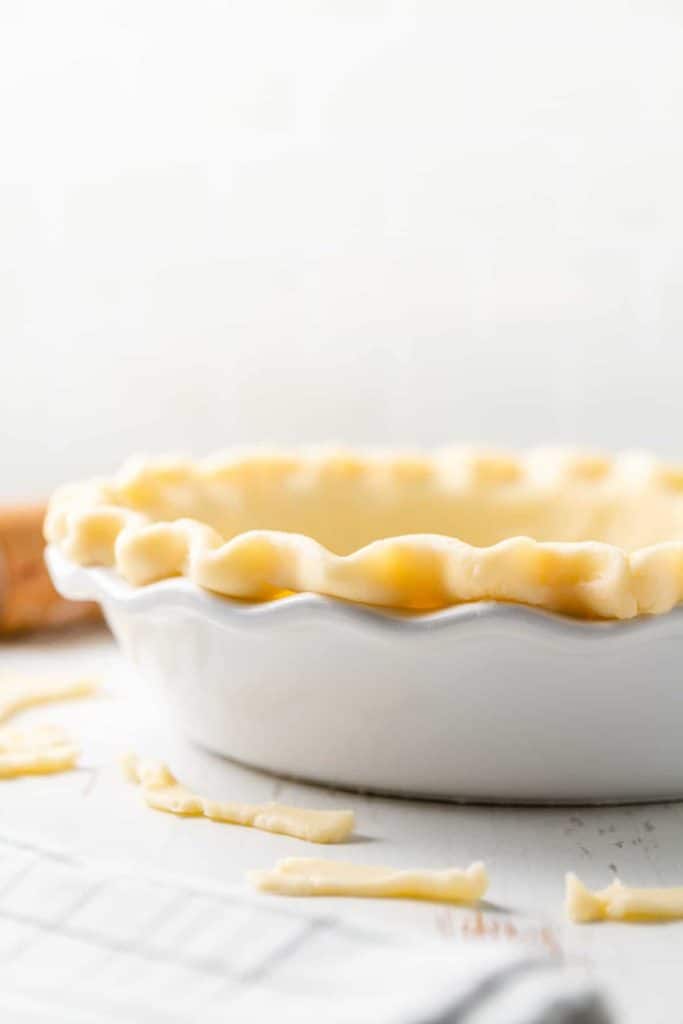
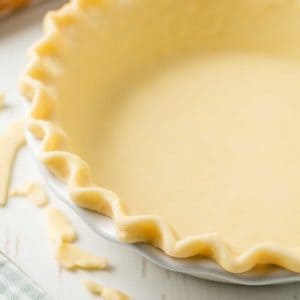
- To finish the pie, fold the edges under to be even with the edge of the pie plate.
- Then, crimp the edges however you would like! See the picture above for a standard crimping method.
Pro-tip! Tightly-wrapped dough can be refrigerated overnight or frozen for later use.
Options for Baking
You can follow the baking instructions in your specific pie recipe, but here are some general guidelines for baking pie crust.
Par-bake (partially bake) the crust:
You par-bake a crust when you will be further baking the pie after you've filled it. It's good to par-bake a pie crust when the filling may cook faster than the pie crust.
- Poke holes in the bottom and sides of the crust with a fork.
- Place parchment paper on top of the crust and fill with pie weights or dried beans. Fill all the way up the sides of the crust.
- Bake at 425, on the lowest rack of the oven, for 10-15 minutes, or until very light golden brown.
- Remove the pie weights and parchment paper.
- Return to the oven for a few more minutes and bake until the bottom, where the pie weights were, appears dry.
- Fill with filling and bake according to your recipe.
Blind bake (fully bake) the crust:
You blind bake a pie crust when you want to fully bake the crust for a pie in which the filling does not need to be baked, a good example is a custard or cream pie.
- Follow the steps above to bake with pie weights.
- After removing the pie weights and parchment paper, bake the crust an additional 10 minutes or until the crust is golden brown and cooked through.
Filled Pie
For a filled pie, such as a fruit pie, you do not bake the crust before-hand.
- Fill and crimp the pie.
- Bake the filled pie at 425°F for 15 minutes.
- Reduce the oven temperature to 375°F and bake for an additional 45-60 minutes, or until the filling is bubbling, the fruit is tender, and the crust is a deep golden brown.
Pro-tip! Cover the pie with foil as soon as the crust has set and appears light golden brown. It will continue to brown the longer it cooks and the foil will help prevent over-browning.
Trousbleshooting
Problem: Dough is hard to work with.
- Make sure the dough isn't too wet or too dry.
- If the dough is too dry, it will crack when you try to roll it out. Add a few sprinkles of water to the dough and roll it in.
- If it's too wet, it will be very sticky. Work with extra flour on your surface.
- Keep everything COLD! If you ever find yourself struggling, STOP. Put everything in the fridge until it's cold again, about 15-30 min. This is the number one reason the dough becomes hard to roll out or work with.
- Try a different flour. If your dough keeps falling apart, try a different flour the next time. I have found that Cup4Cup is the most reliable and easiest to work with for this recipe.
- Avoid sticking. If the dough sticks to your surface or your rolling pin, that's when problems start! Make sure to keep the surface and pin lightly floured while you're rolling out the dough. Check frequently that your dough isn't sticking, add another sprinkle of flour if it is. Working on a piece of parchment paper also helps.
Problem: Dough crumbles and falls apart when transferring to the pie dish.
- Be quick, nimble, and gentle to get the dough in the pan. If it cracks, don't be afraid to patch those areas.
- Start over. If your dough completely falls apart when trying to put it into the pan, it was probably too warm.
- Gather everything up back into a ball, wrap it up, and pop it back in the fridge. Try again when it is cold.
- Embrace the more rustic look. If it doesn't turn out as perfectly as you imagined... it's ok! It will still taste great! Gluten-free pie dough is still a tad trickier to work with than regular dough, so embrace the fact that it may not always be perfect.
- Try a different flour: Again, some gluten-free flours work better than others.
Problem: Crust isn't flaky.
- It's all in the butter! If your crust isn't flaky, the butter was either too warm or it was worked into the four too much.
- Start with icy cold butter. Cube the butter and pop it in the freezer for 15 minutes before you make the dough.
- If you're going for the traditional pea-sized chunks of butter or coarse crumbs appearance, you've gone too far. There should be some walnut-halve sized pieces of butter left in the flour before you add the wet ingredients.
- Again, keep everything very cold throughout the process, from mixing the dough, rolling it out, and even chill the pie before you bake it. All of this helps achieve a flaky crust because those chunks of butter release steam in the oven, which is what creates the flaky texture.
More Troubleshooting Advice
- Practice. If you're making pie for a special event, make a practice pie ahead of time. This will ensure your gluten-free flour works well and you'll be able to work out any kinks!
- Try different types of crusts using either nuts or cookie crumbs. Instead of a double-crust, try a crumb topping.
- There is no shame in buying a pre-made crust if you're just not into it! Listen, I love to bake but sometimes I get frustrated, too. In those times, I buy premade! Check the freezer section at your local grocery store or Trader Joe's. I've used the Wholly Made brand found at my local Kroger and it was just fine!
- Cover with foil. Cover the edges with foil as soon as the crust is set and light golden brown to prevent the crust from becoming too brown. If you wait until the pie is "browned to your liking" to cover it, it may still end up getting too brown in the end.
Now for the recipe! I hope you found this post helpful and informative! See below the recipe card for more references and links to helpful pie content. If you have any questions or comments, drop them in the comments section below and I'll do my best to help you out. Happy Baking! ♡
References
I have found many helpful pie references that all culminated in this perfect gluten-free pie dough recipe. Here they are in case you'd like to dive even deeper into pie crust making!
- This episode of Bake It Up a Notch! was so helpful in learning about making pie crusts. Erin doesn't reference gluten-free flour, but the techniques still apply to this post.
- I found these pie troubleshooting tips and these gluten-free pie troubleshooting tips helpful!
- Erin McDowell's All-buttah pie dough plus an old recipe from my mother were the references used in developing this recipe.
- King Arthur's Gluten-free Pie Crust was my original reference for pie dough before updating this recipe. Instead of Instant ClearJell, you can use cornstarch.
Recipe
Gluten-free Pie Crust
Video
Ingredients
- 2 cups Cup4Cup Gluten-free Multipurpose Flour Blend (other flour blends will work but Cup4Cup is best, use a blend with xanthan gum included. (Note: Cup4Cup is not dairy-free))
- 1 Tablespoon sugar
- ½ teaspoon table salt
- 1 cup cold butter ( cold shortening for dairy-free)
- 2 egg yolks (omit for egg-free, will need extra water.)
- ⅓ cup ice water (divided)
Instructions
- Cube the butter and place it in the freezer for 15 minutes before starting. (The butter should be very cold but not frozen.)
- Whisk the egg yolks with 3 tablespoonsof the ice-cold water. Place in the fridge until ready.
- Whisk the flour, sugar, and salt together.
- Add the cubed butter into the flour and toss to coat.
- Blend on low speed with a stand mixer or use your hands to squish the butter cubes into the flour, making sure to keep the butter coated in flour while you work it in.
- Keep working until butter resembles large chunks mixed with smaller pieces. The large chunks should be about the size of walnut halves.
- Take the egg yolk/water mixture out of the fridge. Pour into the flour mixture.
- Stir together on low speed or with a spatula until just combined.
- Add 1 Tablespoon more of ice water at a time and mix just until the mixture holds together or looks like it could. The dough should be just moistened, without visibly dry parts of flour. It should also not be overly wet or sticky.
- Cut the mixture in half and form into two balls. Wrap tightly with plastic wrap. Refrigerate for at least 30 minutes.
Rolling out the Dough
- Place a piece of parchment paper on your work surface and sprinkle with flour. Also flour the rolling pin.
- Take one ball of dough out of the fridge and roll it out. Move the dough around to ensure it isn't sticking to the parchment while you're rolling. If it starts to stick, sprinkle a little more flour underneath.
- Continue to roll the dough until it is large enough to fit your pie plate with at least 1-inch of overhang.
- Fold the dough in half and then in half again. Gently place the dough with the corner in the center of your pie plate.
- Carefully unfold the dough and gently press it into the corners of the pan ensuring there are no air pockets.
- Patch any areas that may need to be patched. Trim the excess off the edges so there is about 1-inch overhang.
Single Crust Pie
- Fold the edges of the crust under to be even with the edge of the pie plate.
- Crimp the edges as desired.
Double-crust Pie
- Fill the pie. Roll out the other half of the dough and place on top.
- Fold the edges of the crust under to be even with the edge of the pie plate. Crimp the edges as desired.
To Par-bake the Crust
- Poke holes in the bottom and sides of the crust with a fork.
- Place parchment paper on top of the crust and fill with pie weights or dried beans. Fill all the way up the sides of the crust.
- Bake at 425, on the lowest rack of the oven, for 10-15 minutes, or until very light golden brown.
- Remove the pie weights and parchment paper.
- Return to the oven for a few more minutes and bake until the bottom, where the pie weights were, appears dry.
- Fill with filling and bake according to your recipe.
To Blind (Fully) Bake the Crust
- Follow the steps above to bake with pie weights.
- After removing the pie weights and parchment paper, bake the crust an additional 5-10 minutes or until the crust is golden brown and cooked through.
Baking a Filled Pie
- Bake the filled pie at 425°F for 15 minutes.
- Reduce the oven temperature to 375°F and bake for an additional 45-60 minutes, or until the filling is bubbling, the fruit is tender, and the crust is a deep golden brown.
Notes
- The recipe can be halved for a single-crust pie.
- Tightly wrapped dough can be refrigerated 1-3 days or frozen for later use.
- Keep everything extra COLD at all times from blending ingredients all the way through the rolling process. Chill the pie before baking if the dough gets warm.
- If you ever find yourself struggling, STOP. Put everything in the fridge until it's cold again, about 15-30 min. This is the number one reason the dough becomes hard to roll out or work with.
- Avoid sticking. Make sure to keep the surface floured while you're rolling out the dough. Check frequently that your dough isn't sticking, add another sprinkle of flour if it is.
- If your dough completely falls apart when trying to put it into the pan, it was probably too warm. Gather everything up back into a ball. Wrap it up and pop it back in the fridge for 30 minutes. Try again when it is cold.
- Cover with foil. Cover the edges with foil as soon as the crust is set and light golden brown to prevent the crust from becoming too brown.
Save This Recipe!
Estimated Nutrition
* Nutritional information is provided as a courtesy and should be used as an estimate only. See the nutrition policy for more information.

Vanessa says
Can you make this dough a day ahead and refrigerate?
Katie | Wheat by the Wayside says
Of course!
Cliff says
Seriously, I've gone without pie for years due to a slight gluten intolerance. Unbelievably good crust! Wish I would have found this site and recipe sooner. No more pumpkin filling baked in a glass cup.....
Cliff
Holly T says
I’m newly diagnosed celiac and I love to bake. I made your pie crust with apprehension because lately everything gluten free that I have tried was horrible however not the case with your recipe! It was so delicious! I made a meat pie with onions, mushrooms potatoes and brown gravy it was gone by the next day! I just made another batch of crust ans currently have a custard pie in the oven. Thank you for sharing your delicious recipe! Thank you
Holly
Katie | Wheat by the Wayside says
This is so wonderful to hear! I am so happy you enjoyed the recipe!
Shantel says
Hi! Do I need to grease my pie pan before putting the crust in? Thanks!
Katie | Wheat by the Wayside says
Nope! There's so much butter in the crust already you shouldn't have a problem with it sticking.
Sara says
The recipe card on the Pinterest thumbnail says “ 1 2 cups Cup” verbatim for the Cup4Cup flour. Can you please correct the typo? Thank you.
Katie | Wheat by the Wayside says
Sara, I see the problem. Unfortunately, Pinterest pulls that information itself. I have no control over it nor does Pinterest provide a way to edit that part of the pins. Hopefully you will just click through to the actual recipe so that you have the correct information. Thanks for letting me know.
Alayna Jennings says
THE BEST gluten free pie crust. Simple, and easy to follow. Thank you so much for this recipe.
Katie | Wheat by the Wayside says
So happy you enjoyed the recipe, Alayna!!
Shelby says
I used this recipe to make an apple pie this weekend. I used bob red mills 1:1 gluten free flour. I’m no baker and this turned out amazing! Can’t wait to use this for other recipes!
Jane Bourne says
awesome pastry just like my homemade loved it flakey yummy Thank you store bought frozen one once like eating paper.
Katie | Wheat by the Wayside says
So glad you enjoyed the recipe!
Jane Bourne says
awesome just like my favorite pastry flakey yummy, no taste dif at all to regular pastry thanks
Bethany says
This was amazing! The flakiest, easiest to roll out gf pie crust I’ve made. I’m so excited to have found this recipe; it will now be my go-to for pies. I used Bob’s Red Mill 1 to 1 gf flour and your directions and tips were perfect. Thanks!!!
Katie | Wheat by the Wayside says
So happy to hear that! Glad you had success with Bob's. Thanks for sharing!
Cindy says
Can I use Blanched Almond Flour for my crust?
Katie | Wheat by the Wayside says
I haven't tried that with this specific recipe. Personally, I would look for a recipe written with almond flour if I were wanting to make an almond flour pie crust.
Vicki Bonin says
Hello!
I made this crust for a rustic bacon/onion tart for happy hour. This crust was fabulous! I can’t thank you enough. I made a double crust and only used half. I refrigerated the other half. Now I am not sure how long to leave out before rolling it for a coconut cream pie. I’m going with 30 mins and crossing my fingers. Can you give me a timeframe for future?
Katie | Wheat by the Wayside says
15-30 minutes should be good Vicki! You just don't want it getting too warm or it will be hard to handle.
Amy says
I used shortening at room temperature and it did not work. The dough was very soft and if I would have added all the water it would have been mushy. Should the shortening be cold and should I have used more flour?
Katie Olesen says
The shortening should be ice cold, just like the butter. I noted that in the post but I will make that more clear in the recipe card. The key with working with gluten-free pie crust is keeping everything very cold throughout the process. Hope that helps.
Katie Olesen says
And I just noticed a typo in the recipe card. Oof. It should be 2 cups. I'm so sorry! But it has been fixed. Please let me know if you try again. It truly is a great pie crust! ♡
Amy says
Success! Best pie crust ever! I made the crust again with Cup4Cup and ice cold butter and it worked perfectly. Thanks so much for your help and feedback Katie!
Katie Olesen says
That is so great!! I’m so happy to hear you had success! Have a happy Thanksgiving!
Kathy says
Awesome post!! Hard to believe that crust is gluten-free. Looks better than most that have gluten.
Alayna Edwards says
This is hands down the best gluten free pie crust recipe. It never fails me! Thank you so much for sharing
Meri Schroeder says
I seriously can't thank you enough for this recipe! I just made an apple pie and it tastes great and held together beautifully when I rolled it out. This is a game changer recipe, as I've been buying very expensive GF pie crust mixes. I have been trying for years to make a good tasting, easy to use GF pie crust, and now I can!!! I also used King Arthur's measure for measure GF flour and it worked great. Thanks again!!!
Katie Olesen says
So happy to hear you had such great success! ♡
Meri Schroeder says
Hi Katie - it looks like maybe this recipe changed since I made it a few weeks ago. I believe I used xantham gum the last time I made it. Did you delete that from the recipe? Or am I just dreaming I used it? Thanks!
Katie Olesen says
I did update the post because I feel this version is much better but here's the old one if you need it:
1 1/4 cup Gluten-free Flour Blend Pamela's All-purpose Artisan Blend
1 Tablespoon Sugar
2 teaspoons Cornstarch
1/2 teaspoon Xanthan Gum
1/2 teaspoon Table Salt
6 Tablespoons Butter cubed
1 Egg
2 teaspoons Lemon Juice or vinegar
1-4 Tablespoons Ice Water
INSTRUCTIONS
Whisk the flour, sugar, cornstarch, xanthan gum, and salt together until well combined.
Add the cubed butter into the flour. Use a pastry knife to cut the butter into the flour until mixture resembles coarse crumbs.
Whisk the egg and lemon juice together. Pour into the flour mixture. Stir together with a fork or spatula until well combined.
Add 1 Tablespoon of ice water and mix well. Keep adding ice water, 1 Tablespoon at a time and mixing well after each addition, until the mixture holds together.
Form the mixture into a ball and wrap tightly with plastic wrap. Chill for 1 hr or overnight. Let the dough come to room temperature for 10-15 minutes before rolling. (Can use immediately if necessary.)
Rolling out the Dough
Flour the surface and rolling pin. When rolling out the dough, keep moving the pastry around to make sure it isn't sticking. Add more flour as needed, on top and under the dough, so it doesn't stick to your counter or rolling pin.
To transfer the dough to the pie pan, place your rolling pin in the center of the dough. Gently drape the dough over the pin.
Place your pie plate right next to the rolling pin. Gently pick up the rolling pin and drape the pie dough over the pie pan, making sure the crust will be centered over the pie pan. Slowly unroll the dough into the pan. Then gently press the dough down into all corners of the pan.
Patch any areas that need patched. Trim the excess off the edges so there is about 1-inch overhang. Fold the excess under and crimp the edges.
Fill and bake according to your recipe.
NOTES
To blind baking the crust:
Poke holes in the bottom of the crust with a fork. Place parchment paper on top of the crust and fill with pie weights.
Bake at 425 for 10-13 minutes, or until light golden brown.
Remove the pie weights and parchment paper.
Fill with filling and bake according to your recipe.
For a filling that will not be further baked:
Remove the pie weights and parchment paper.
Reduce the oven to 375°. Bake the crust an additional 8-10 minutes or until the crust is light golden brown.
To make a filled, double crust pie: Bake according to your recipe. King Arthur recommends baking on the bottom rack starting at 425° for 25 minutes, reducing the heat to 350°, and then moving the pie to the center of the oven to finish baking until golden and bubbly.
Meri Schroeder says
Awesome - this turned out so beautifully before!! Thank you so much for posting the old recipe.
Katie Olesen says
No problem! Have a Happy Thanksgiving!
Kathy says
I use a water filled spray bottle for adding as little as water as needed. It works great.
I can't wait to try this crust.
The last gf crust I made was rock hard qnd I had to use a steak knife to cut it.
Lauren Hyden says
This looks wonderful! Do you know what type of wheat-based pastry this resembles? I'm looking to make a filled pastry that traditionally uses short-crust pastry.
Katie Olesen says
This is similar to a traditional pie crust.
Talitha says
Could you tell me what I did wrong? I got it all put together, but when I put it in the oven butter started dripping everywhere.
I think maybe I left too large pieces of butter in the dough, but they were about the size that the recipe said if not smaller. Should I be seeing chunks of butter in the dough when I roll it out?
Katie | Wheat by the Wayside says
I've not had that happen before! I wonder if maybe your crust was too warm before putting it into the oven. As you saw in the pictures, I do leave some pretty large chunks of butter as well when mixing the dough.
Talitha says
I noticed in your pictures that I can't see any chunks of butter in the rolled out dough. In mine they were everywhere. I think maybe my butter was too cold because it was frozen and didn't get mixed in well enough when I added the eggs and water.
I will definitely be trying it again though, because it was so tasty! Practice makes perfect.
Also I ended up grilling my pie because the butter that dripped caused a lot of smoke in my oven😬 I learned a lot, including that you can grill pie 😂