


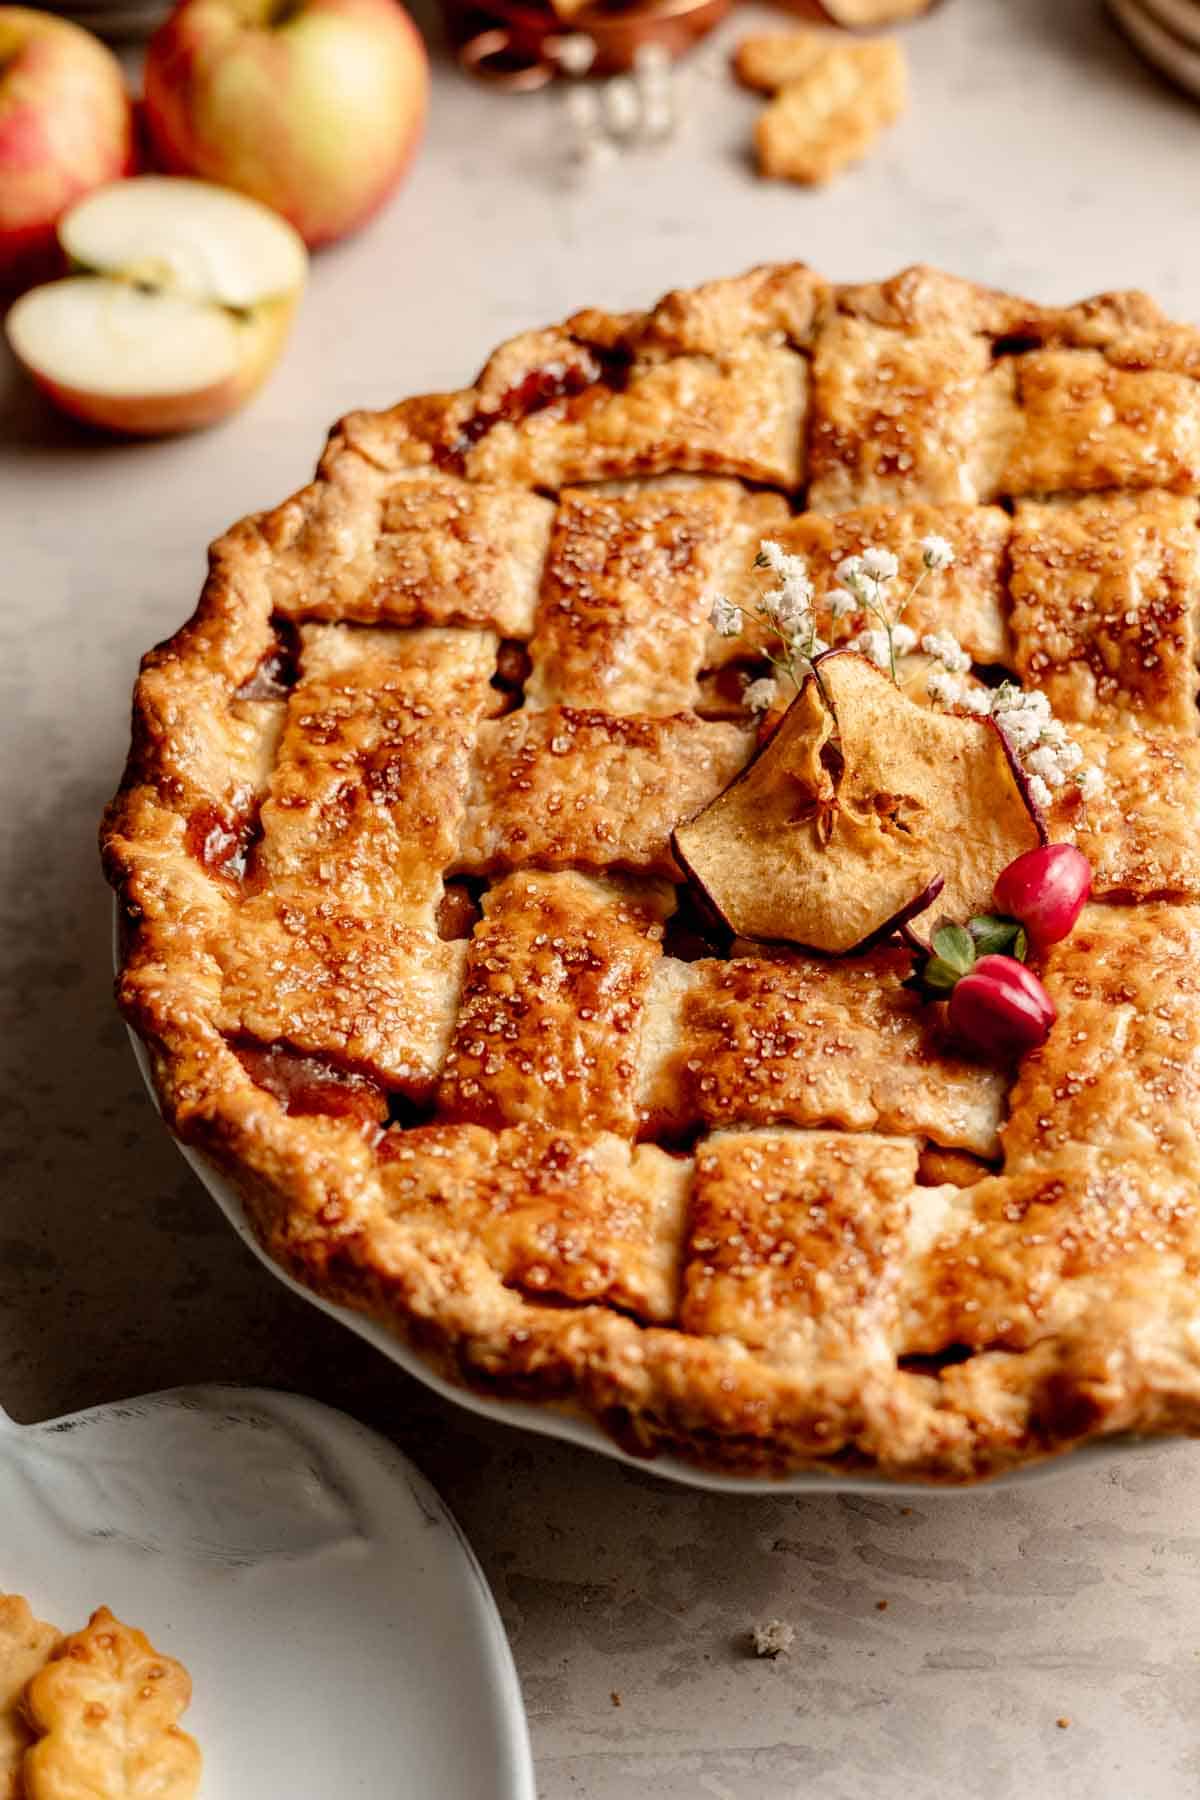
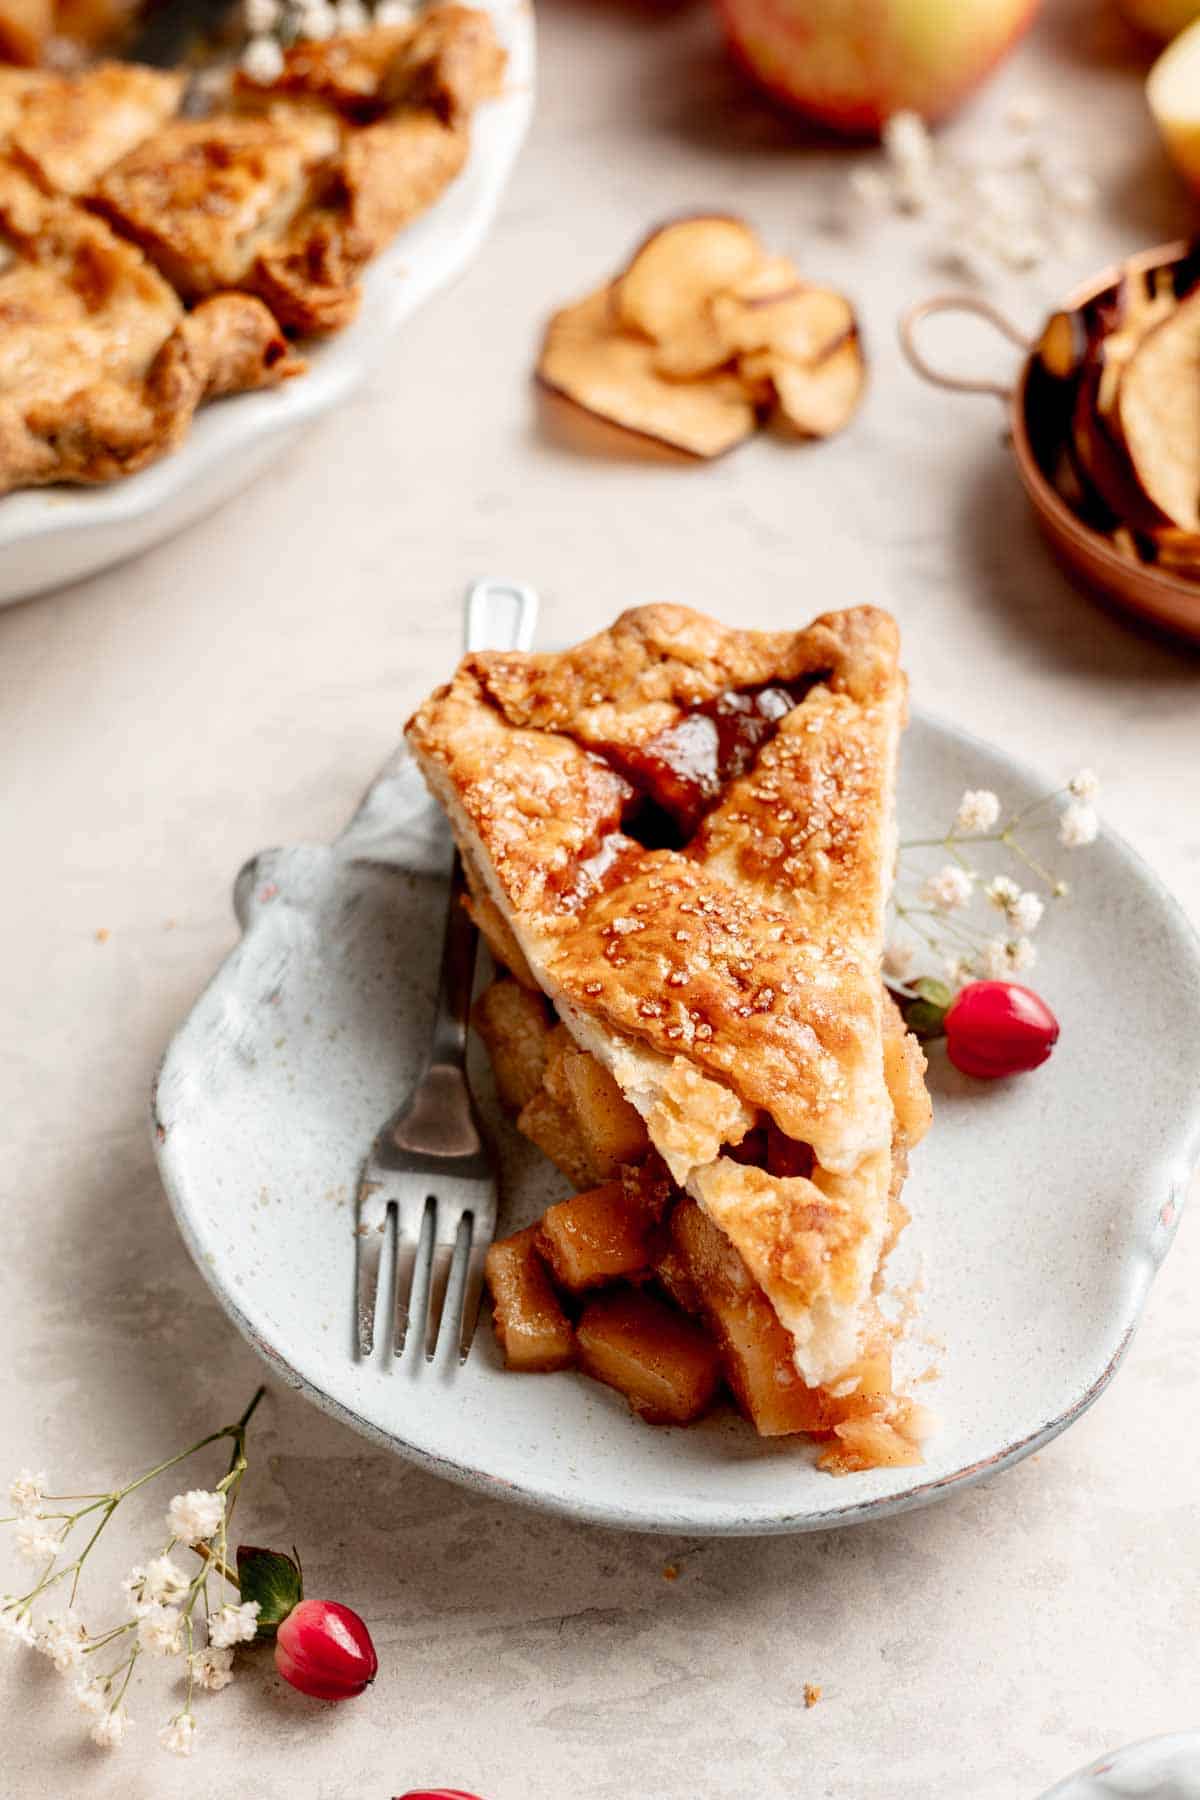
This gluten-free apple pie recipe is a true perfection! A flaky gluten-free pie crust is brimming with tender cinnamon-spice apple pie filling. This apple pie is a comfort food classic, perfect for crisp autumn days and cozy gatherings!
Jump to:
Why You'll Love This Recipe
When it comes to homemade apple pie, nothing quite hits the spot like this gluten-free gem with its classic flavors and a perfectly flaky lattice crust. The secret is my favorite gluten-free pie crust recipe and the pre-cooked apple pie filling, both of which deliver on taste and texture!
While pre-cooking a pie filling might seem like an extra step, it actually makes the whole process easier and more reliable. It's the secret to an apple pie that is packed with flavor, has perfectly thick consistency, without excess moisture that threatens to make your crust soggy.
As an added bonus, both the filling and pie dough can be made several days ahead and refrigerated, so that all you need to do is assemble and bake the pie on the day you plan to serve it!
Picture a warm slice of this pie topped with a generous scoop of vanilla ice cream and you'll see why this is the best recipe to satisfy your apple pie cravings!
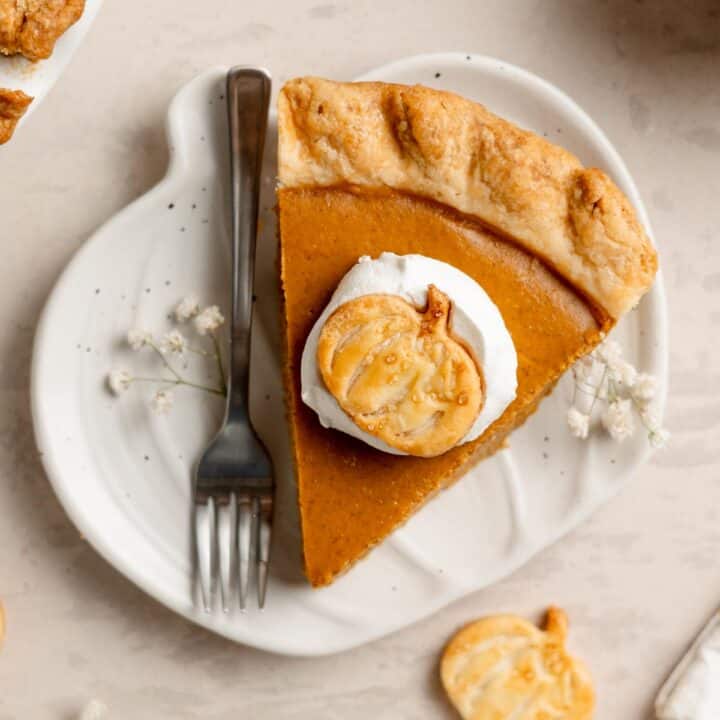
While you're here, check out these irresistible classics, this traditional gluten-free pecan pie recipe or this creamy gluten-free pumpkin pie recipe! You'll also love this gluten-free apple crumble pie!
For even more great fall baking, try these gluten-free pecan tassies, gluten-free pumpkin bars, or gluten-free pumpkin oatmeal cookies!
Ingredients
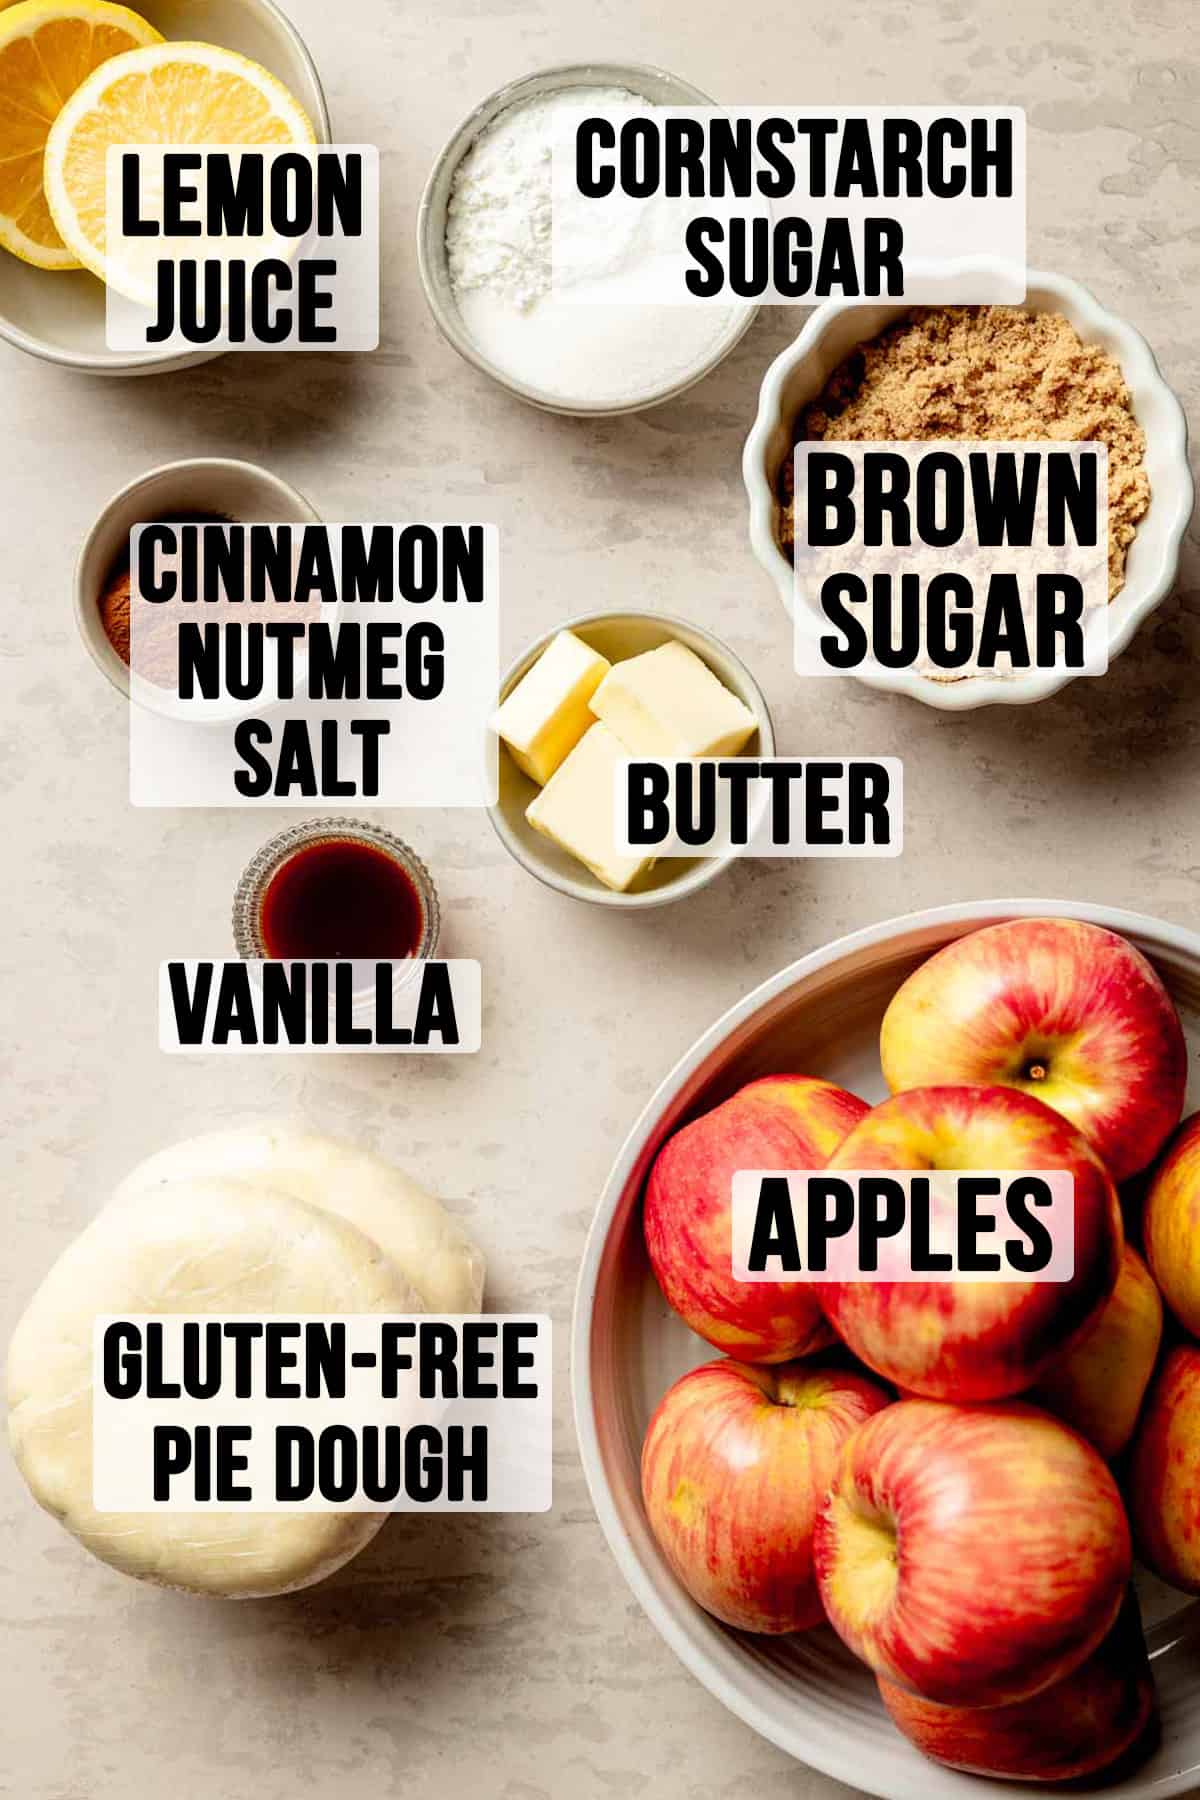
- Apples: Fresh, crisp apples, peeled, cored, and diced, provide the sweet and fruity base for the filling. My favorite varieties of apples to use for pie are: Honeycrisp, Golden Delicious, or Granny Smith Apples. Use one variety or a combination.
Whatever you choose, do not use Red Delicious, McIntosh, Gala, or Fuji. They are not good apples for pie, they either lack in flavor or get too mushy during baking. - Brown Sugar: Adds a rich, caramel-like sweetness that complements the apples' natural flavor. Brown sugar is gluten-free and safe to use in your baking recipes. Use it to make an easy 2-ingredient coffee syrup and use it in this delicious brown sugar shaken espresso!
- Butter: Provides a creamy, buttery richness that enhances the overall taste and texture. Substitute Earth Balance Vegan Buttery Sticks for a dairy-free option in both the crust and filling.
- Cornstarch: Used as a thickening agent to create a smooth, luscious filling. You can substitute tapioca starch in an equal amount if desired.
- White Sugar: Adds sweetness and balances the flavors of the filling.
- Fresh Lemon Juice: Adds a touch of acidity to brighten the flavors and prevent the apples from browning.
- Cinnamon: Infuses warm and aromatic spice notes, a quintessential element of apple pie. Cinnamon is gluten-free.
- Nutmeg: Offers a hint of earthy, nutty spice, complementing the cinnamon.
- Salt: Regular table salt enhances all the flavors in the filling and balances the sweetness.
- Pie Dough: You can use homemade crusts or buy pre-made refrigerated or frozen pie crusts. I recommend Cup4Cup Multipurpose flour for gluten-free pie dough. King Arthur Measure for Measure is a good substitute for a dairy-free option.
Should You Pre-Cook Apple Pie Filling?
You might share the hesitation I've had in the past when it comes to pre-cooking apple pie filling. We've all had those thoughts like, "It's too much work!" or "Won't the apples cook anyway?" or even, "That's not how my mom did it!" However, it's time to embrace the idea of pre-cooking apple pie filling because it offers several advantages:
- Consistent results: When you pre-cook the filling, it ensures that every apple reaches the same level of doneness, eliminating any risk of over or under-cooked apples in your pie.
- Eliminates excess moisture: Some apples are juicier than others. Pre-cooking the filling allows you to ensure the filling is the proper thickness before it goes into the pie. Eliminating excess moisture beforehand prevents a soggy crust.
- Better flavor: Pre-cooking allows the apples to absorb the flavors of spices, sugar, and other ingredients, resulting in a more flavorful filling. It also gives you the chance to taste the filling beforehand and adjust as needed before baking.
- Eliminate the gap: A common problem with apple pies is that the crust sets while the filling continues to cook and break down, the result is a gap between the filling and the crust in the finished pie. Pre-cooking the filling completely eliminates this problem.
How to Make Gluten-Free Apple Pie
Step 1: Make the Gluten-Free Pie Crust
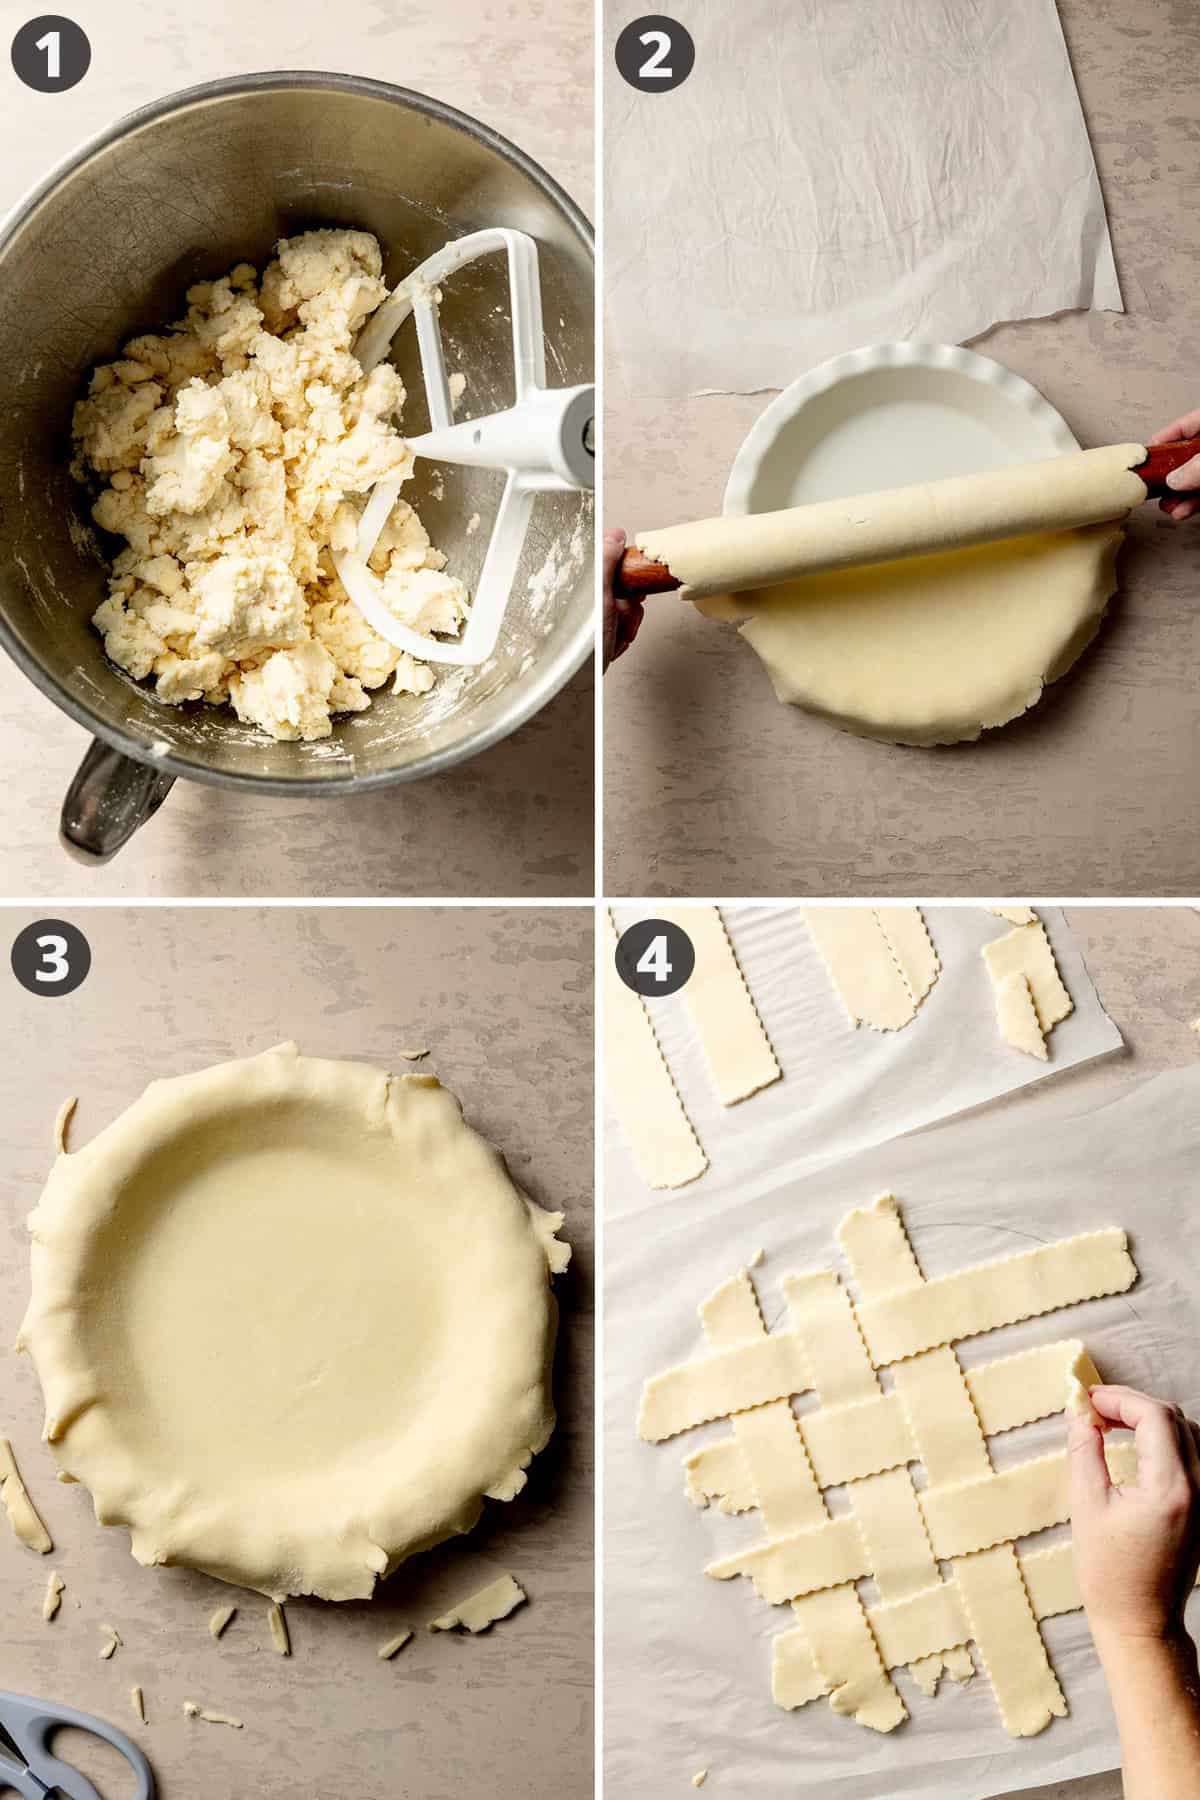
- Make the pie dough and chill for at least 30 minutes before rolling. Hop over to the gluten-free pie crust post for all the tips and tricks for making a perfectly flaky gluten-free pie crust.
- Roll the dough out on a piece of lightly floured parchment paper. Use the rolling pin as an aid to transfer your crust to the pie plate.
- Once in your pie plate, trim the edges to about a 1-inch overhang.
- Create your lattice top on a piece of parchment paper.
- Chill the bottom crust and lattice top crust in the refrigerator until you are ready to assemble the pie.
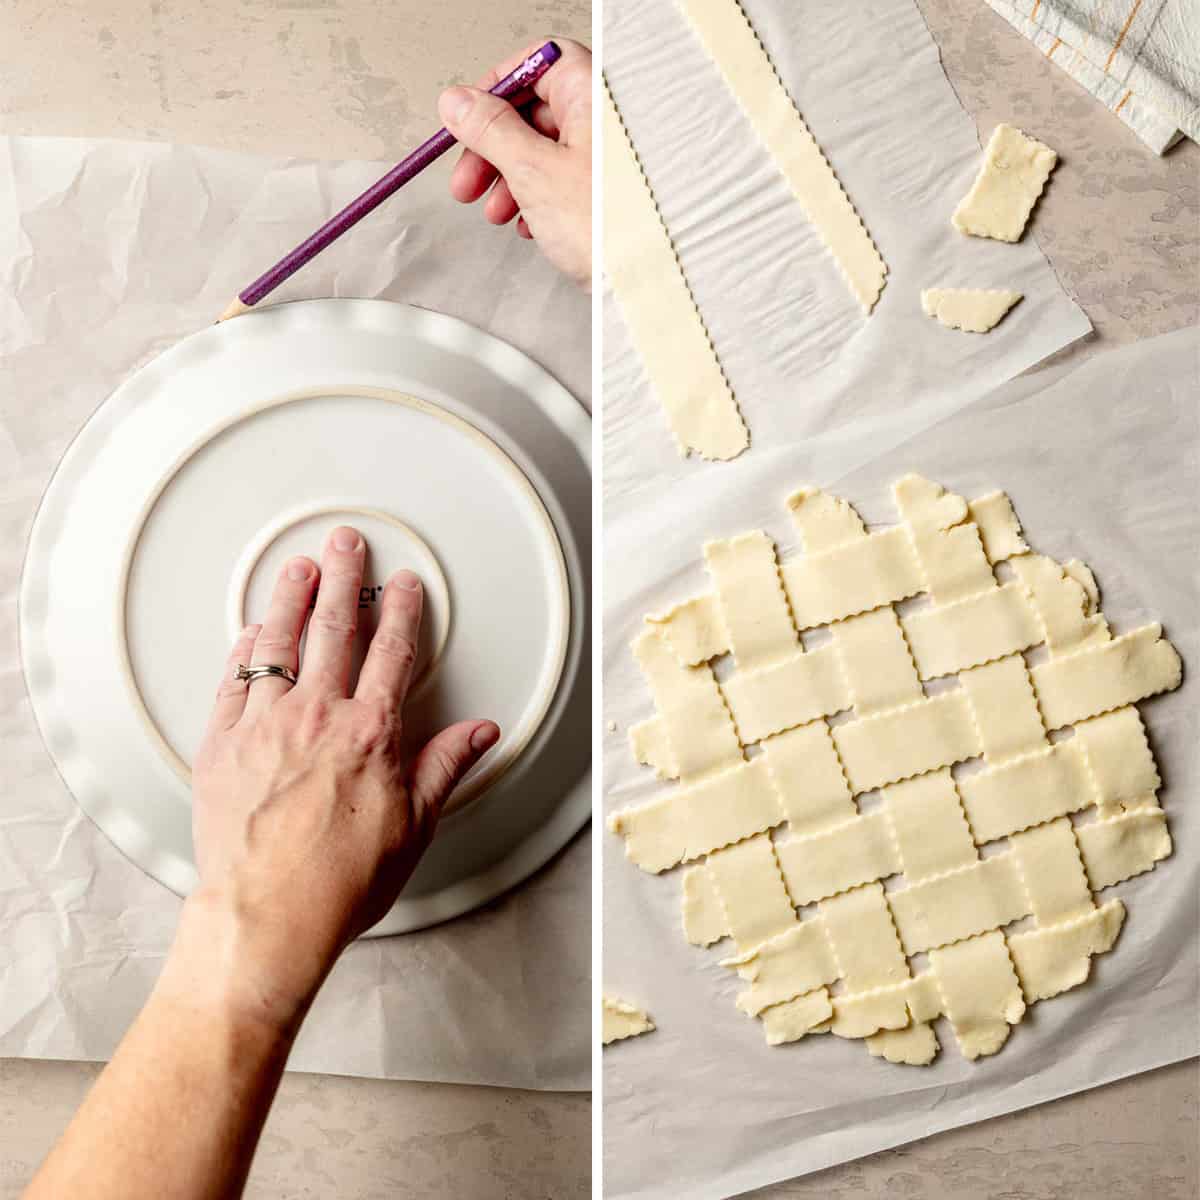
How to Create Lattice Crust:
- Roll out the remaining pie dough to form a thin sheet.
- Cut it into even strips using a knife or a pastry cutter.
- Create a lattice pattern by placing half of the strips horizontally on the parchment paper.
- Then, fold back every other strip halfway and lay a strip vertically over the unfolded strips.
- Repeat this process, alternating strips, until you have a lattice top. Wait to trim any excess dough until you've placed it on the pie.
Lattice Crust Tips:
- Trace your pie plate on the back of your parchment paper so you can have a visual representation of how large your lattice top needs to be.
- Assemble the lattice crust on that piece of parchment paper. This will allow you to create it perfectly before it's actually on the pie.
- Make sure the lattice top is not stuck to the parchment.
- Then to make it easier to transfer, chill the lattice top before placing it on the pie.
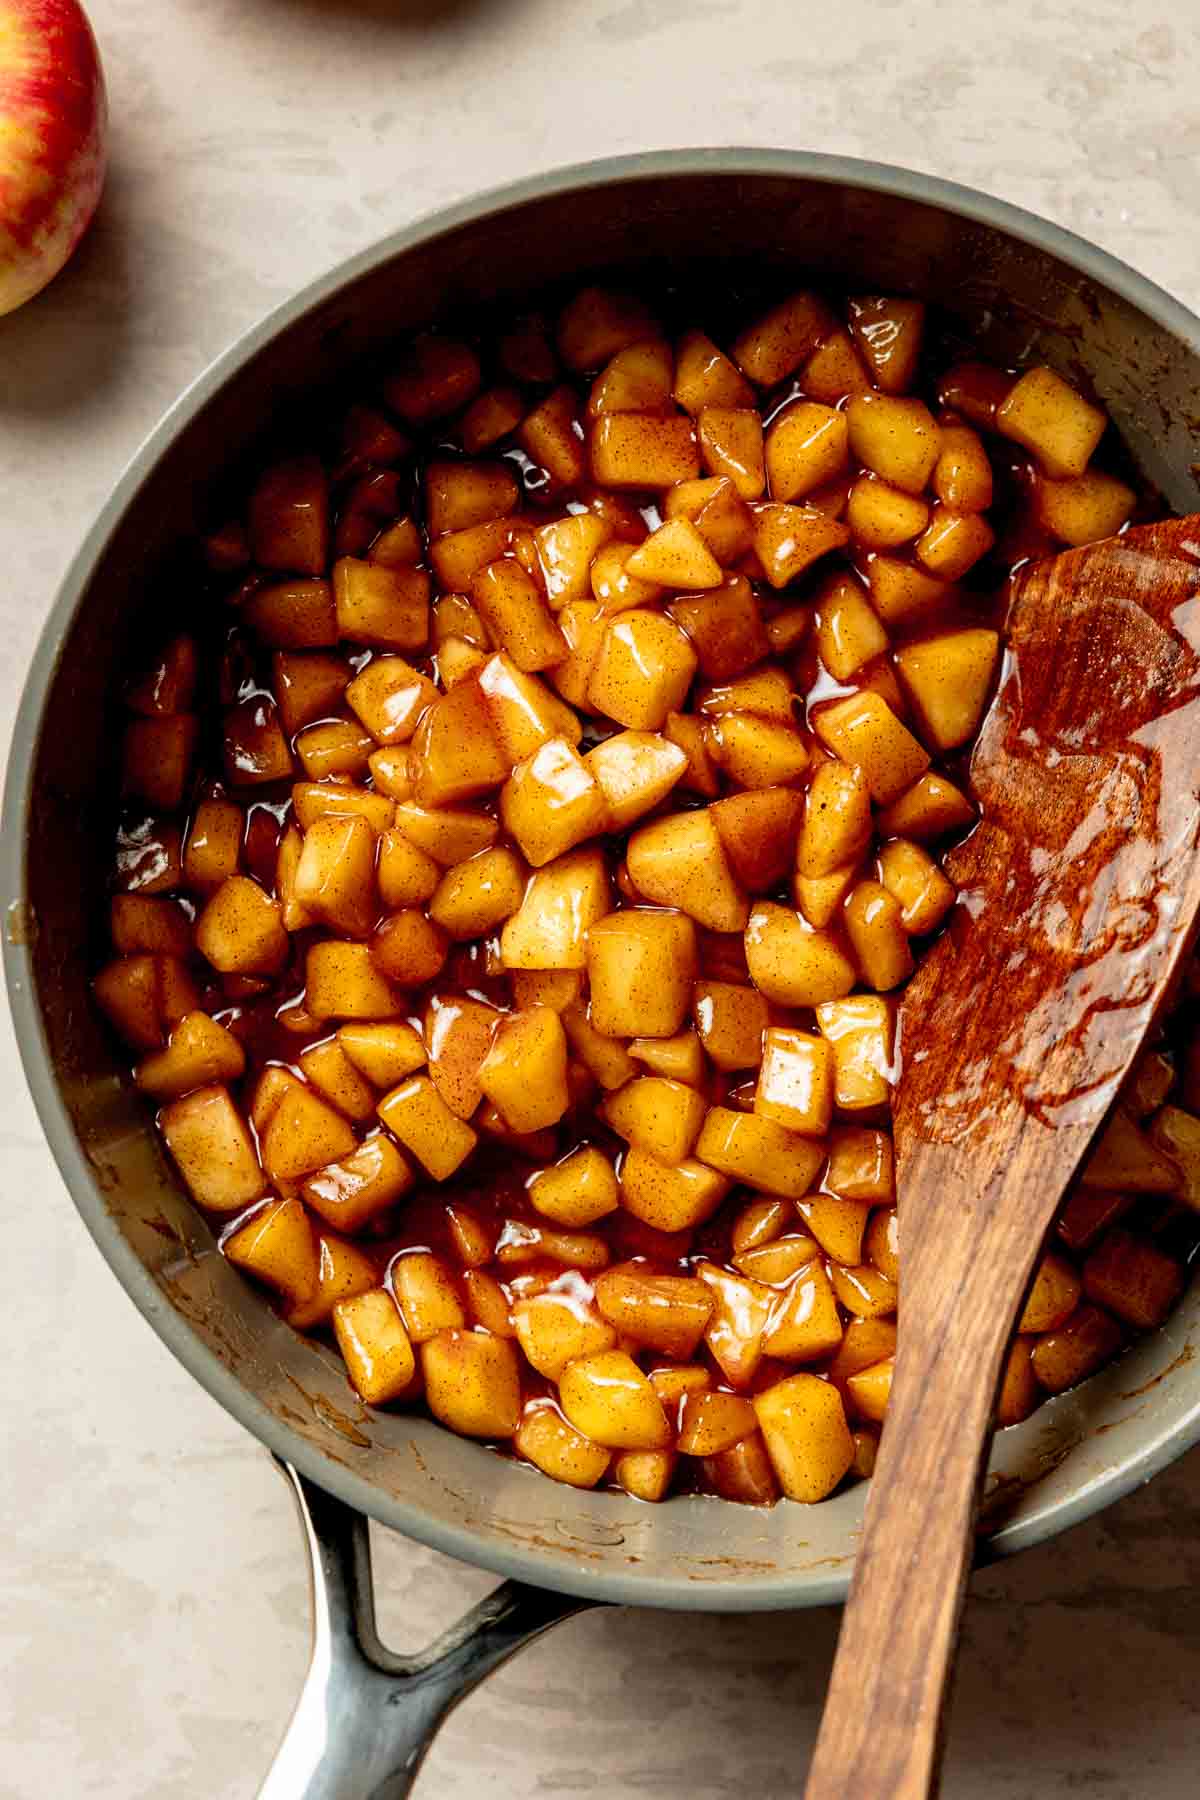
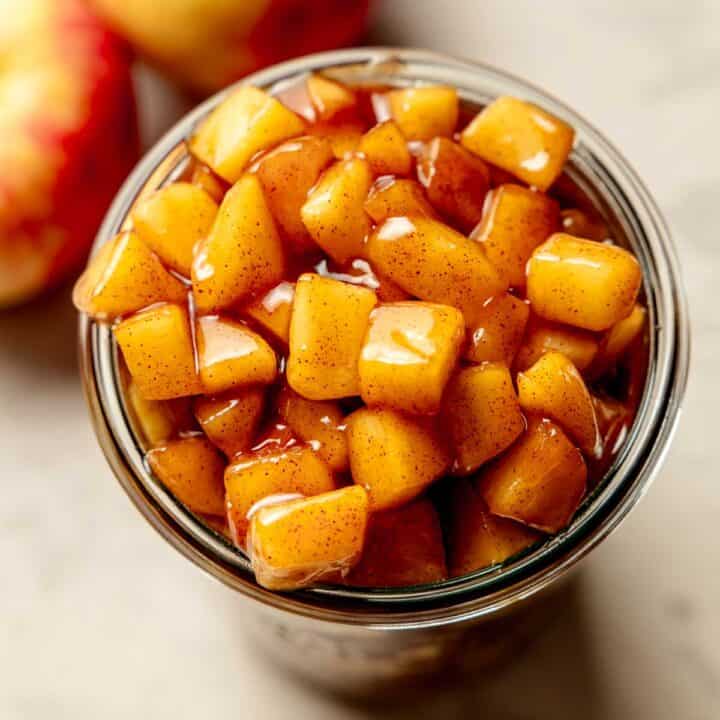
Step 2: Make the Filling
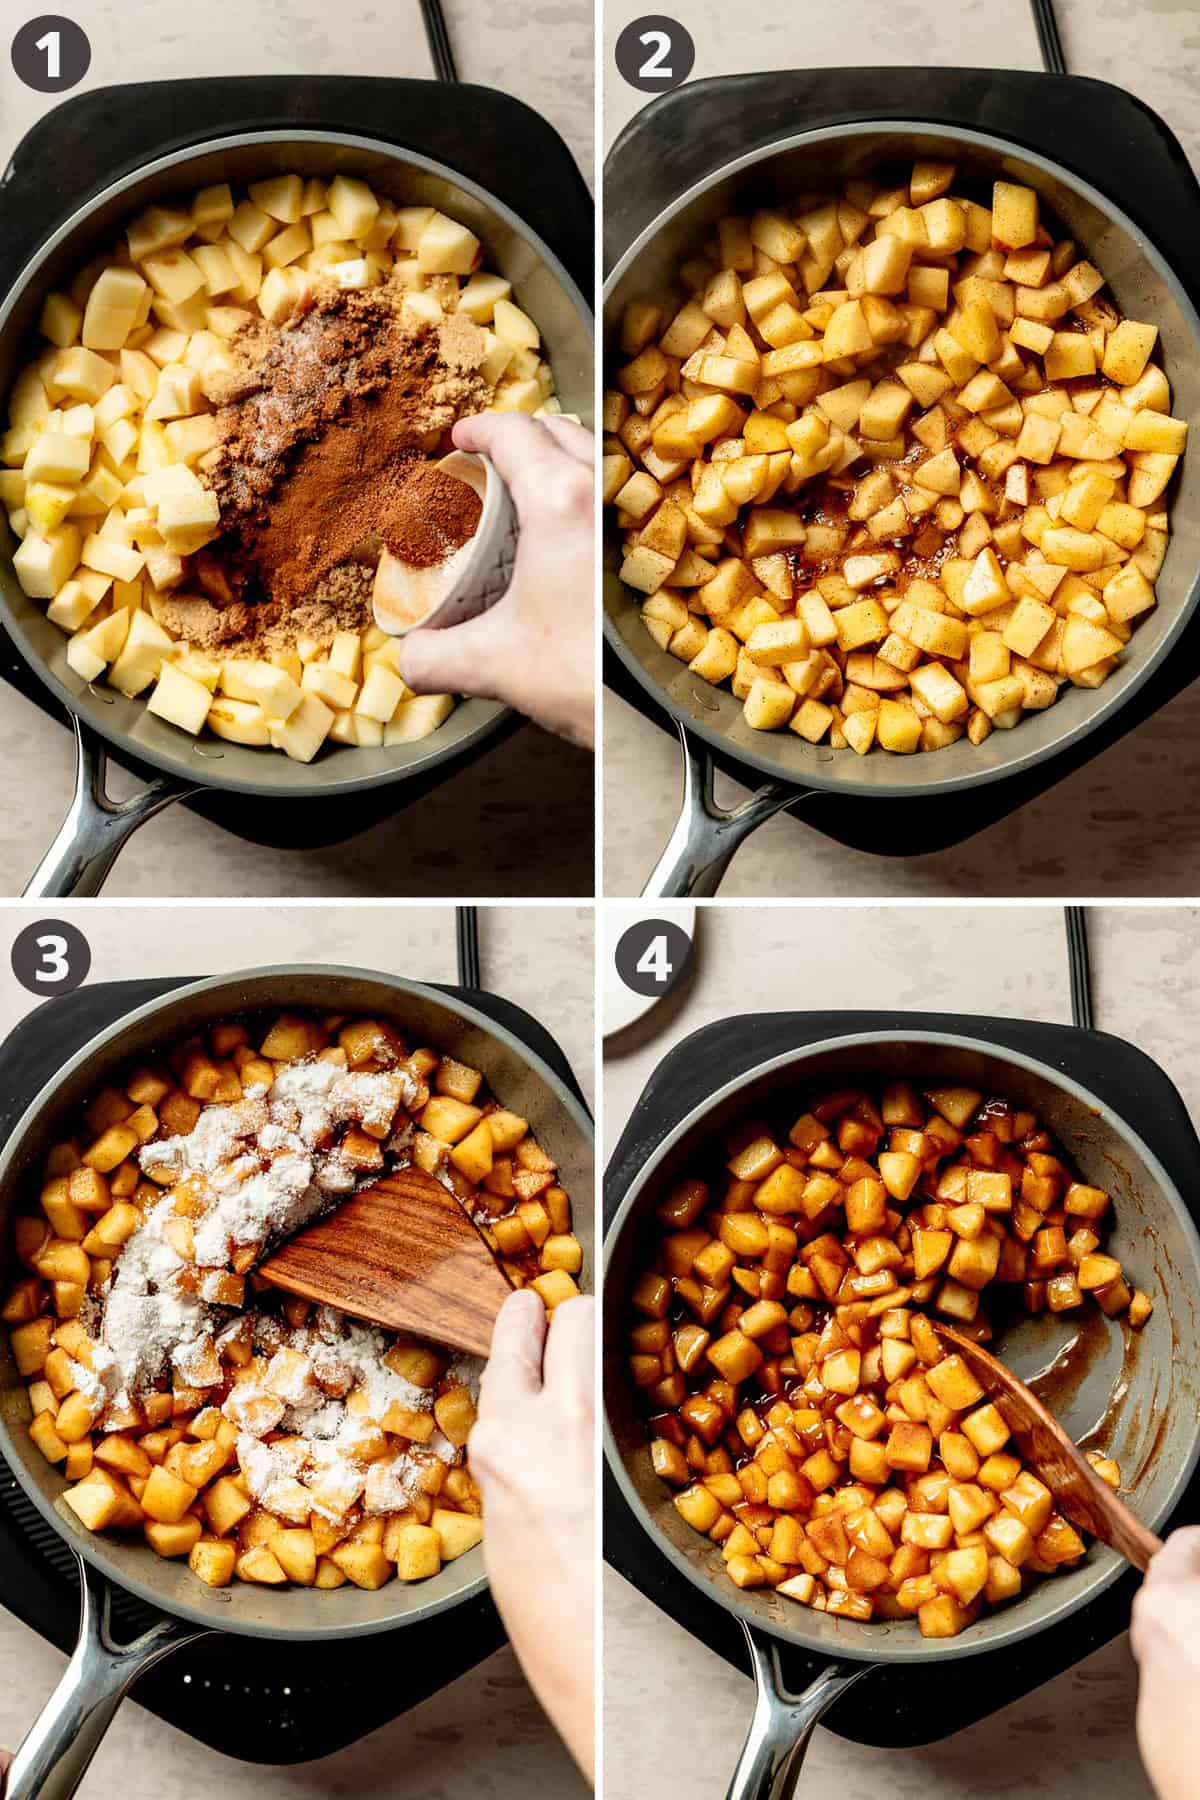
- In a large sauté pan, cook the apples in melted butter with the brown sugar, cinnamon, nutmeg, salt, and lemon juice.
- Allow the apples to simmer about five minutes or just until they begin to soften and take on a deeper golden hue.
- Next, sprinkle the cornstarch and white granulated sugar over the apple mixture and stir it into the apples.
- Allow the filling to cook until thick, just a few more minutes is all that's necessary. Stir occasionally. Then remove from heat and allow the filling to cool completely before assembling your pie.
Save This Recipe!
Step 3: Assemble the Pie and Bake
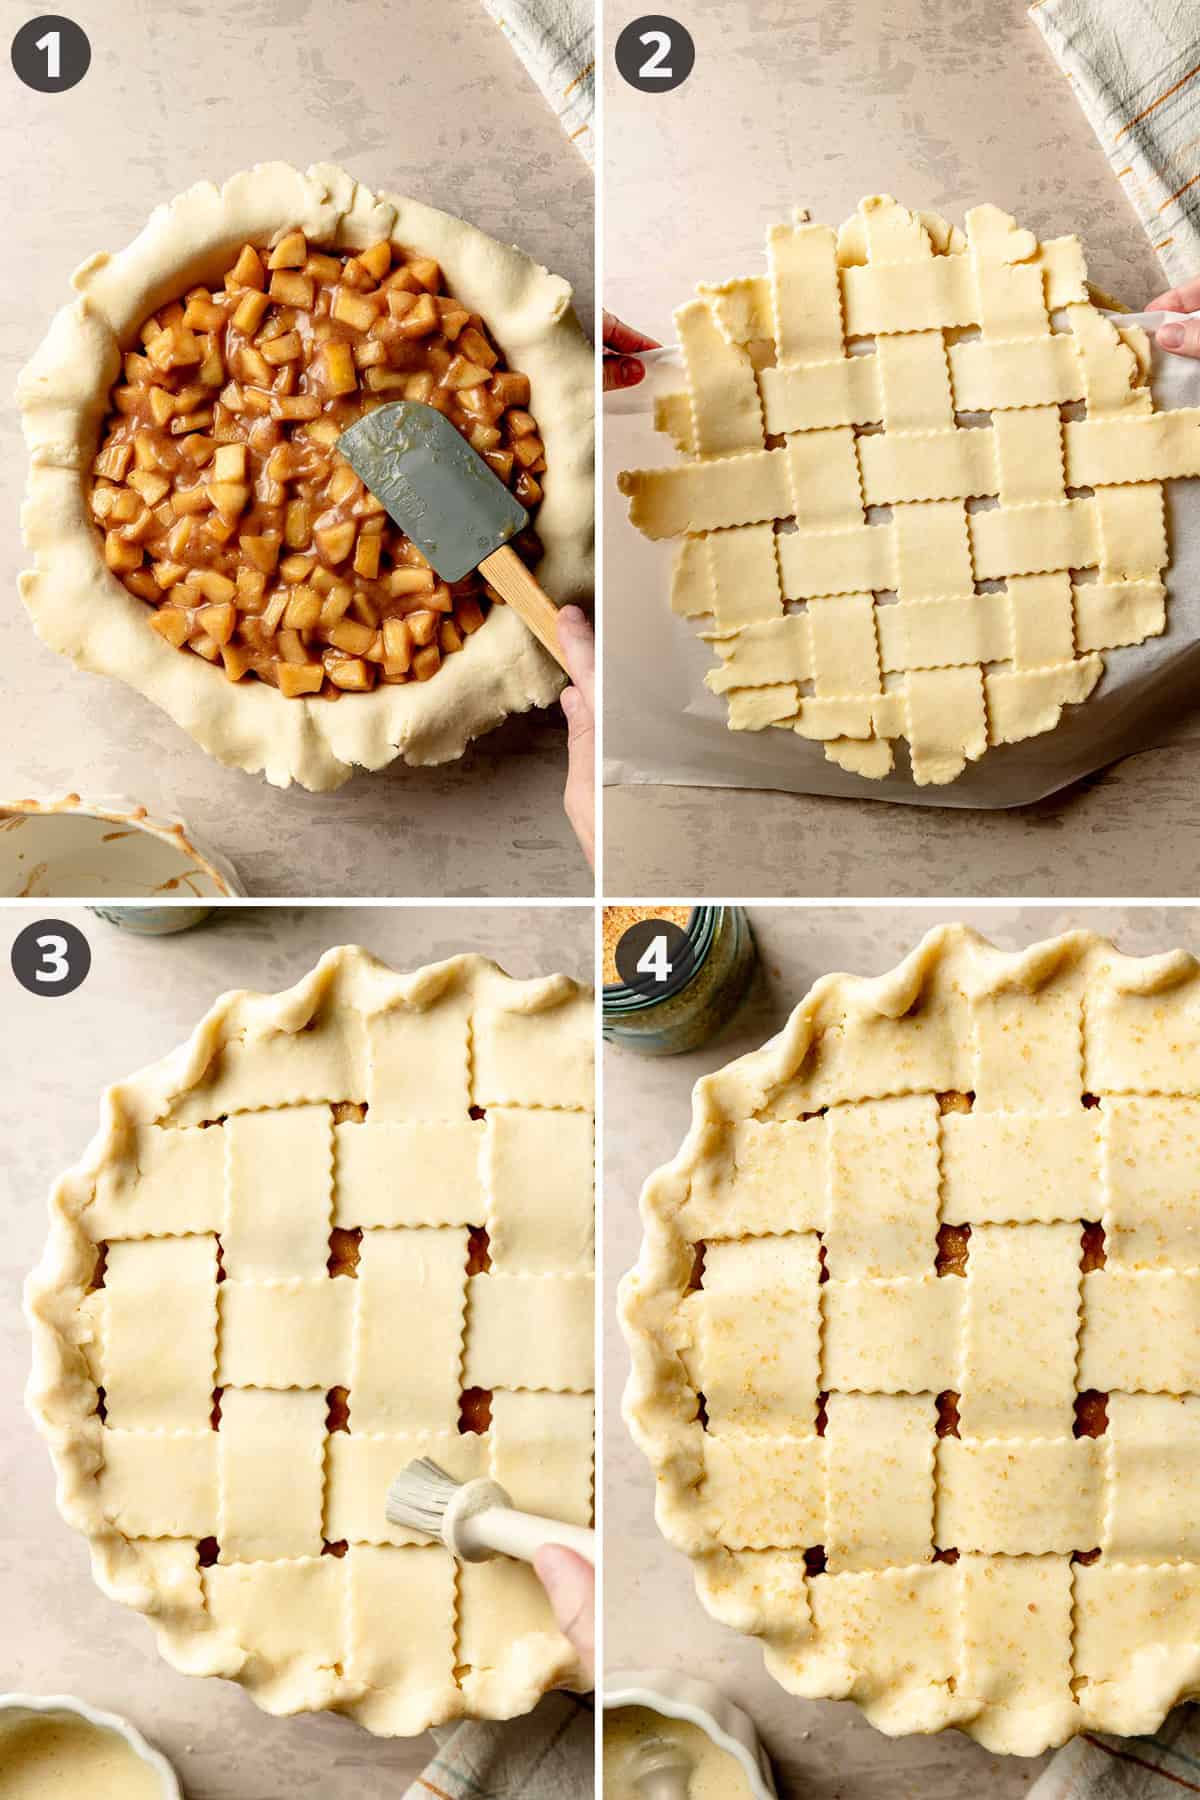
Now that you have both chilled apple pie filling and pie crust, you can assemble the pie. Here are the steps to assemble an apple pie, starting with the pie crust already in the pie plate:
- Spread the cooked and chilled apple filling evenly into the prepared pie crust in the pie plate. Ensure it's evenly distributed and fills the crust without overflowing.
- With the aid of the parchment paper, lift and lay your chilled lattice top over the pie filling. Gently pull the parchment out from underneath the lattice or roll it under, continuing to roll until you can fully remove the parchment.
- Roll the edges of the pie up and over, instead of underneath, and crimp as desired. In a small bowl, beat an egg with a tablespoon of water. Gently brush the egg wash over the lattice crust. This will give your pie a beautiful golden-brown finish when baked.
- Sprinkle turbinado sugar evenly over the egg-washed lattice crust. The sugar will add a delightful crunch and sweetness to the pie's top layer.
Your apple pie is now assembled and ready for baking. Follow the baking instructions in the recipe card below!
Make Ahead and Storage
- Make Ahead: You can prepare the pie crust and the apple filling separately 1-3 days in advance. Keep the crust wrapped in plastic wrap in the refrigerator and store the apple filling in an airtight container in the fridge.
- For the best results, enjoy the pie on the same day it is baked.
- Storage: After baking, let the pie cool completely on a wire rack. Once cooled, cover it loosely with aluminum foil or plastic wrap and store it at room temperature for up to 2 days. For longer storage, refrigerate it for up to 4-5 days. Enjoy leftover slices at room temperature or gently warm them in the oven or microwave.
Top Recipe Tips
- Chilled dough is easier to work with! Keep it cold throughout the process, even if that means taking a break to put it back in the refrigerator. If you are struggling with your pie dough, it could be that it is simply too warm.
- On that note, use ice cold water and very cold butter when making your pie dough.
- The gluten-free flour blend you choose to make pie dough is very important. I recommend Cup4Cup multipurpose flour. King Arthur Measure for Measure will work for dairy-free. I do not recommend Bob's Red Mill 1:1 flour for my recipe.
- Do not put warm filling into your crust. For proper baking, it is imperative that your filling is at least room temperature or slightly chilled.
- Cover the pie early with aluminum foil. As soon as your crust edges are lightly golden brown, cover them with foil. They will continue to brown as the pie cooks. Covering the edges can help prevent over-browning or burning before the filling is done. Leave the lattice exposed as it takes longer to brown. You can cover the entire top of the pie as soon as the lattice gets more golden, especially if the center is not bubbling yet.
- Check for doneness. Your delicious apple pie is done when the top is deeply golden brown and the filling in the center is bubbling. (The edges will bubble before the center does.) Since the filling is already cooked, you can remove the pie once it is nice and bubbly in the center without worry that the apples will be too firm.
- If making a lattice top seems too daunting, feel free to simply roll the top crust and place it on top and crimp the edges. Cut a few vents in the top to allow steam to escape while baking.

Recipe FAQs
A good gluten-free substitute for flour in apple pie filling is cornstarch. It works as an excellent thickening agent, providing a smooth consistency to your filling without compromising on flavor, making it a perfect choice for gluten-free baking. Tapioca starch is also a good substitute if you cannot tolerate cornstarch.
Traditional crusts rely on gluten to keep the dough from falling apart. The lack of gluten in delicate recipes, like pie crusts, makes them a bit more difficult to master. To create a gluten-free pie crust that holds together well, it's essential to follow a trusted gluten-free pie crust recipe, use the recommended flour blend and binding agents, handle the dough gently, and ensure it's properly chilled before rolling and baking. These measures help mimic the binding and structure-building properties of gluten, resulting in a more successful gluten-free pie crust.
While the taste may vary depending on the specific gluten-free flour used, many find gluten-free crusts to taste very similarly to regular pie crust. Avoid strong flavored flours such as chickpea, soy, or bean flours.
More Gluten-Free Apple Recipes

*This post was originally written for gluten-free apple crisp cups made with Chebe bread mix, you can still get that recipe over on the Chebe bread website linked here.
Recipe

Gluten-Free Apple Pie
Equipment
- 1 9-inch Pie Plate
Ingredients
- 1 recipe for gluten-free double-crust pie dough (or 2 (9-inch) store-bought gluten-free crusts.)
Gluten-Free Apple Pie Filling
- 4 Tablespoons butter
- 3-4 pounds apples (About 8 apples; Honeycrisp, Granny Smith, Golden Delicious, or combination of these.)
- ¾ cup brown sugar
- 2 Tablespoons lemon juice
- 1 ½ teaspoon cinnamon
- ½ teaspoon nutmeg (or apple pie spice)
- ¾ teaspoon table salt
- ¼ cup white granulated sugar
- 2 Tablespoons cornstarch
- 1 teaspoon vanilla extract
Egg Wash
- 1 large egg
- 1 Tablespoon water
- Turbinado sugar (for sprinkling on the top crust.)
Instructions
Make the Pie Crust
- Follow your recipe's instructions to make the pie dough and chill it.
- Roll out one piece of dough to line a 9-inch pie plate with the bottom crust.
- Roll the remaining dough for the top crust on a piece of parchment paper, creating a lattice if desired. Keep the top crust on the parchment for easy transfer to the top of the pie.
- Chill both crusts while you prepare the filling.
Make the Filling
- Peel, core, and dice the apples.
- In a large sauté pan, melt butter over medium heat and add apples, brown sugar, lemon juice, cinnamon, nutmeg, and salt. Cook for 5-7 minutes, stirring frequently.
- Sprinkle granulated sugar and cornstarch over the apples. Cook for an additional 2-3 minutes until the filling thickens.
- Remove from heat and stir in the vanilla. Let filling cool completely before assembling the pie.
Assemble the Pie
- Preheat the oven to 350°F and place a rimmed baking sheet on rack in lower third of the oven.
- Remove the chilled dough from the refrigerator.
- Spread the cooled apple filling evenly into the prepared pie crust.
- Gently position the lattice top over the filling, using parchment paper to assist, if necessary. Then, carefully remove the parchment by pulling it from beneath the top crust.
- Roll the edges of the pie up and over the lattice and crimp as desired.
- In a small bowl, beat an egg with a tablespoon of water, and brush the egg wash over the lattice crust.
- Sprinkle turbinado sugar evenly over the egg-washed lattice crust.
- Place the pie on the preheated baking sheet and bake at 350°F for 45-60 minutes, or until the center of the filling is bubbling and the top is golden brown. Use aluminum foil as needed to prevent over-browning.
Notes
- Use a 9-inch pie plate; for deep dish, use about 4 pounds of apples.
- Work with chilled dough for ease. If your dough becomes hard to work with, put it back in the refrigerator to chill.
- Ensure your filling is at least room temperature or colder before filling the crust.
- Cover crust edges with foil when lightly golden; leave lattice exposed until it is properly browned.
- If a lattice top seems challenging, simplify by using a rolled top crust, cut a few vents to allow steam to escape.
Save This Recipe!
Estimated Nutrition
* Nutritional information is provided as a courtesy and should be used as an estimate only. See the nutrition policy for more information.

Lindsay says
I’m so happy I found this recipe! I love pie and have failed at every GF recipe I’ve tried. The crust part definitely took a few tries (and in total about 3 hours for me LOL) but it’s the best pie I’ve ever made and my husband (who is GF by marriage, not choice lol) said it’s the best apple pie he’s ever had.
Highly recommend. This will be my go to crust and apple pie.
Kathy says
Great tips on precooking the filling! I’ll do that from now on. Not sure why I didn’t think of that before.
Erin says
The best apple pie! The cooked filling is an extra step but so worth it! This is now my go-to recipe!