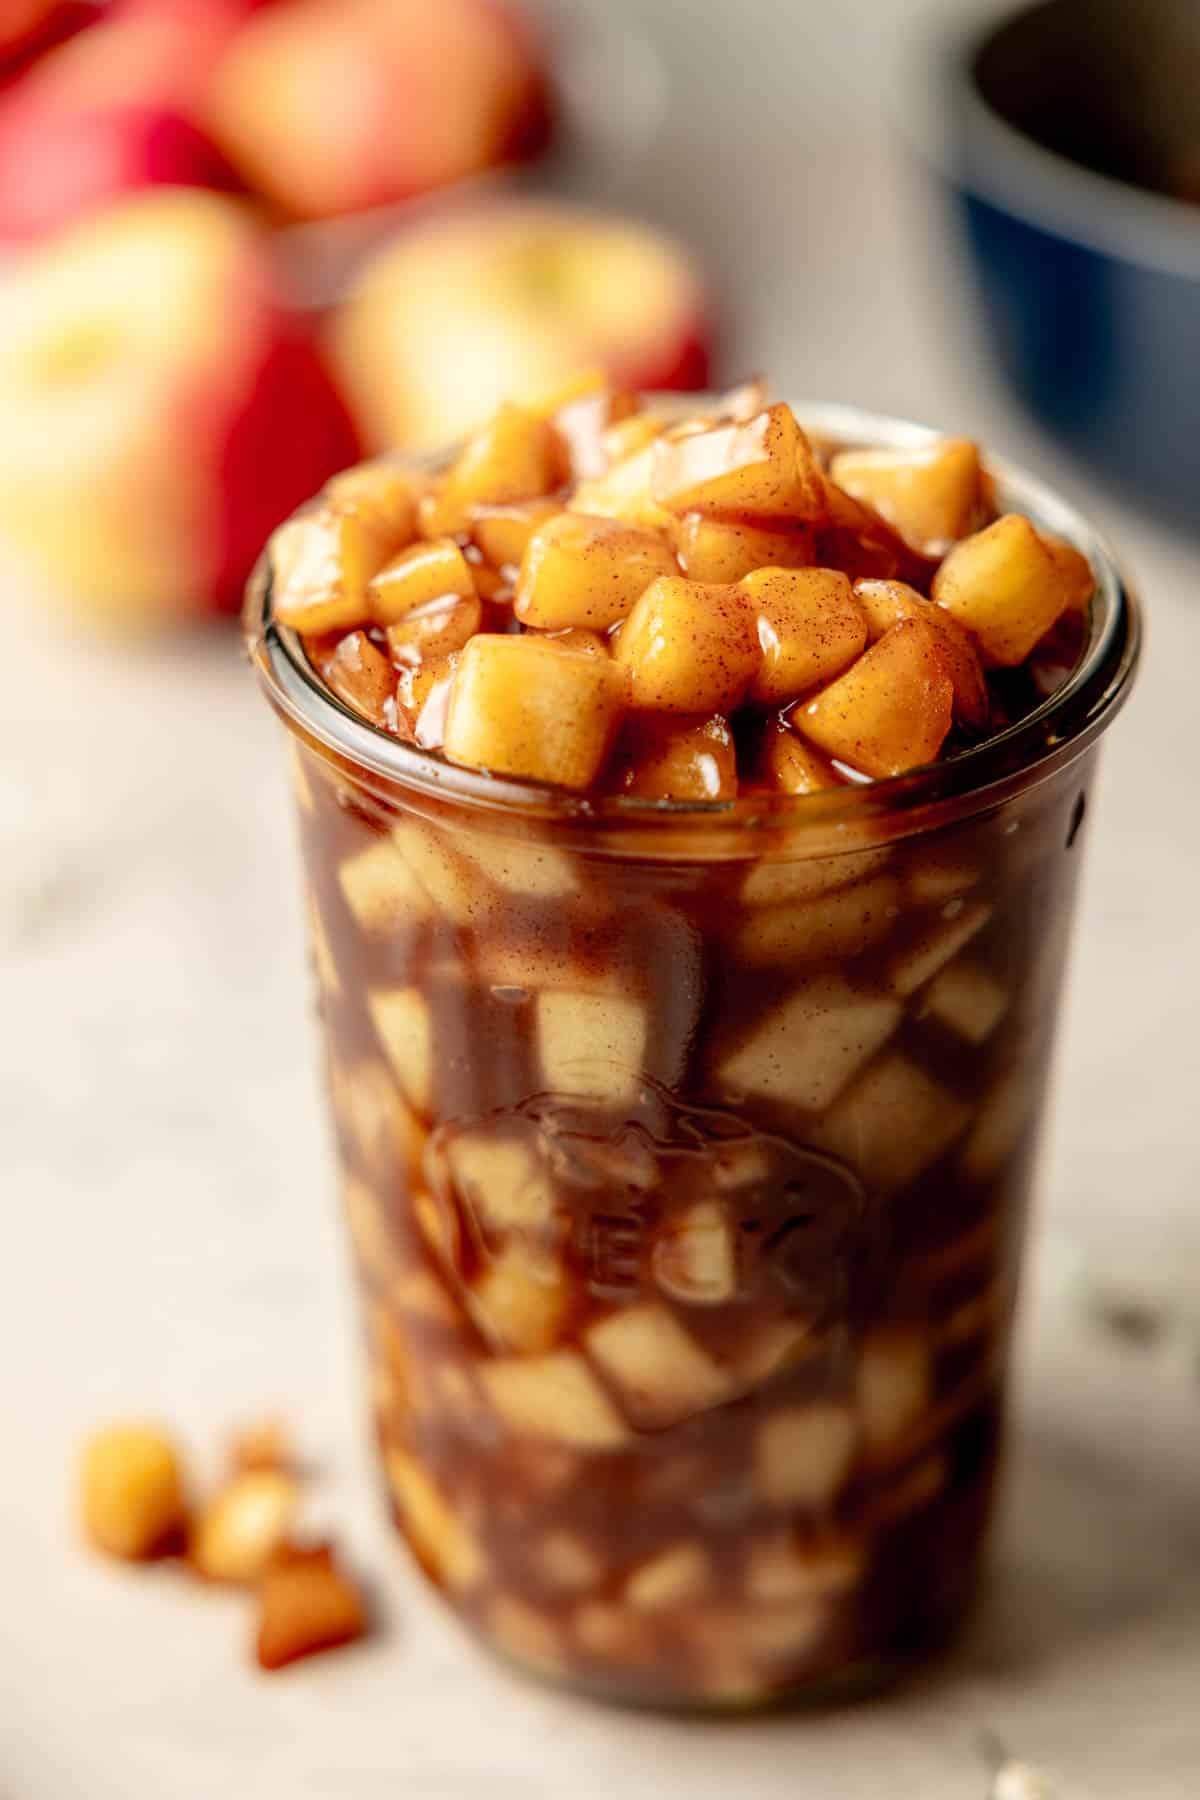
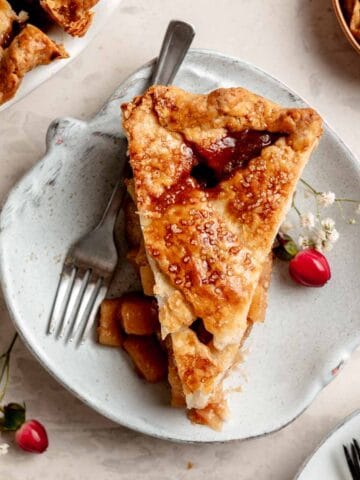
Make the perfect apple pie with this pre-cooked apple pie filling. Apples are consistently tender and the filling is thick, avoiding a soggy crust or pie gap! This quick and easy recipe comes together in under 30 minutes, make-ahead and freezer friendly! This recipe is naturally gluten-free.
💌 Want to Save This?
Unsubsribe at any time.
Jump to:
- Why You Need This Recipe
- Benefits of a Cooked Filling
- Best Apples for Apple Pie Filling
- Simple Ingredients
- How to Make Apple Pie Filling without Cornstarch
- Is Apple Pie Filling Gluten-Free?
- How to Make Apple Pie Filling
- How to Freeze Apple Pie Filling
- How to Bake an Apple Pie with Pre-Cooked Apple Pie Filling
- Top Recipe Tips
- Recipe FAQs
- More Gluten-Free Pie Recipes
- Recipe
- Comments and Ratings
Why You Need This Recipe
If you want to make the best apple pie, you need the best apple pie filling. Give it a try and you'll see the difference pre-cooked filling makes in the quality of your homemade apple pie!
- Quick and easy!
- Perfect every time with consistently cooked apples and a thick filling.
- Easily adjust to your tastes before you bake!
- Pre-cooked filling can be made ahead and stored in the refrigerator or freezer for later use.
- Classic apple pie filling with tart apples, warm spices, and sweet brown sugar.
- A great way to use up an abundance of apples in the fall months. Got more apples? Try this two-ingredient peanut butter caramel apple dip or this gluten-free apple cake!
Put it all together in the perfect gluten-free apple pie using this no-fail gluten-free pie crust recipe. Not gluten-free? That's ok! Use your favorite pie crust recipe or even a store-bought crust!
Or make some delicious gluten-free apple biscuits! They are a perfectly cozy breakfast treat!
While you're here, check out the ever popular, three-ingredient Starbucks copycat pumpkin spice sauce, perfect to make your own PSL's right at home!
Benefits of a Cooked Filling
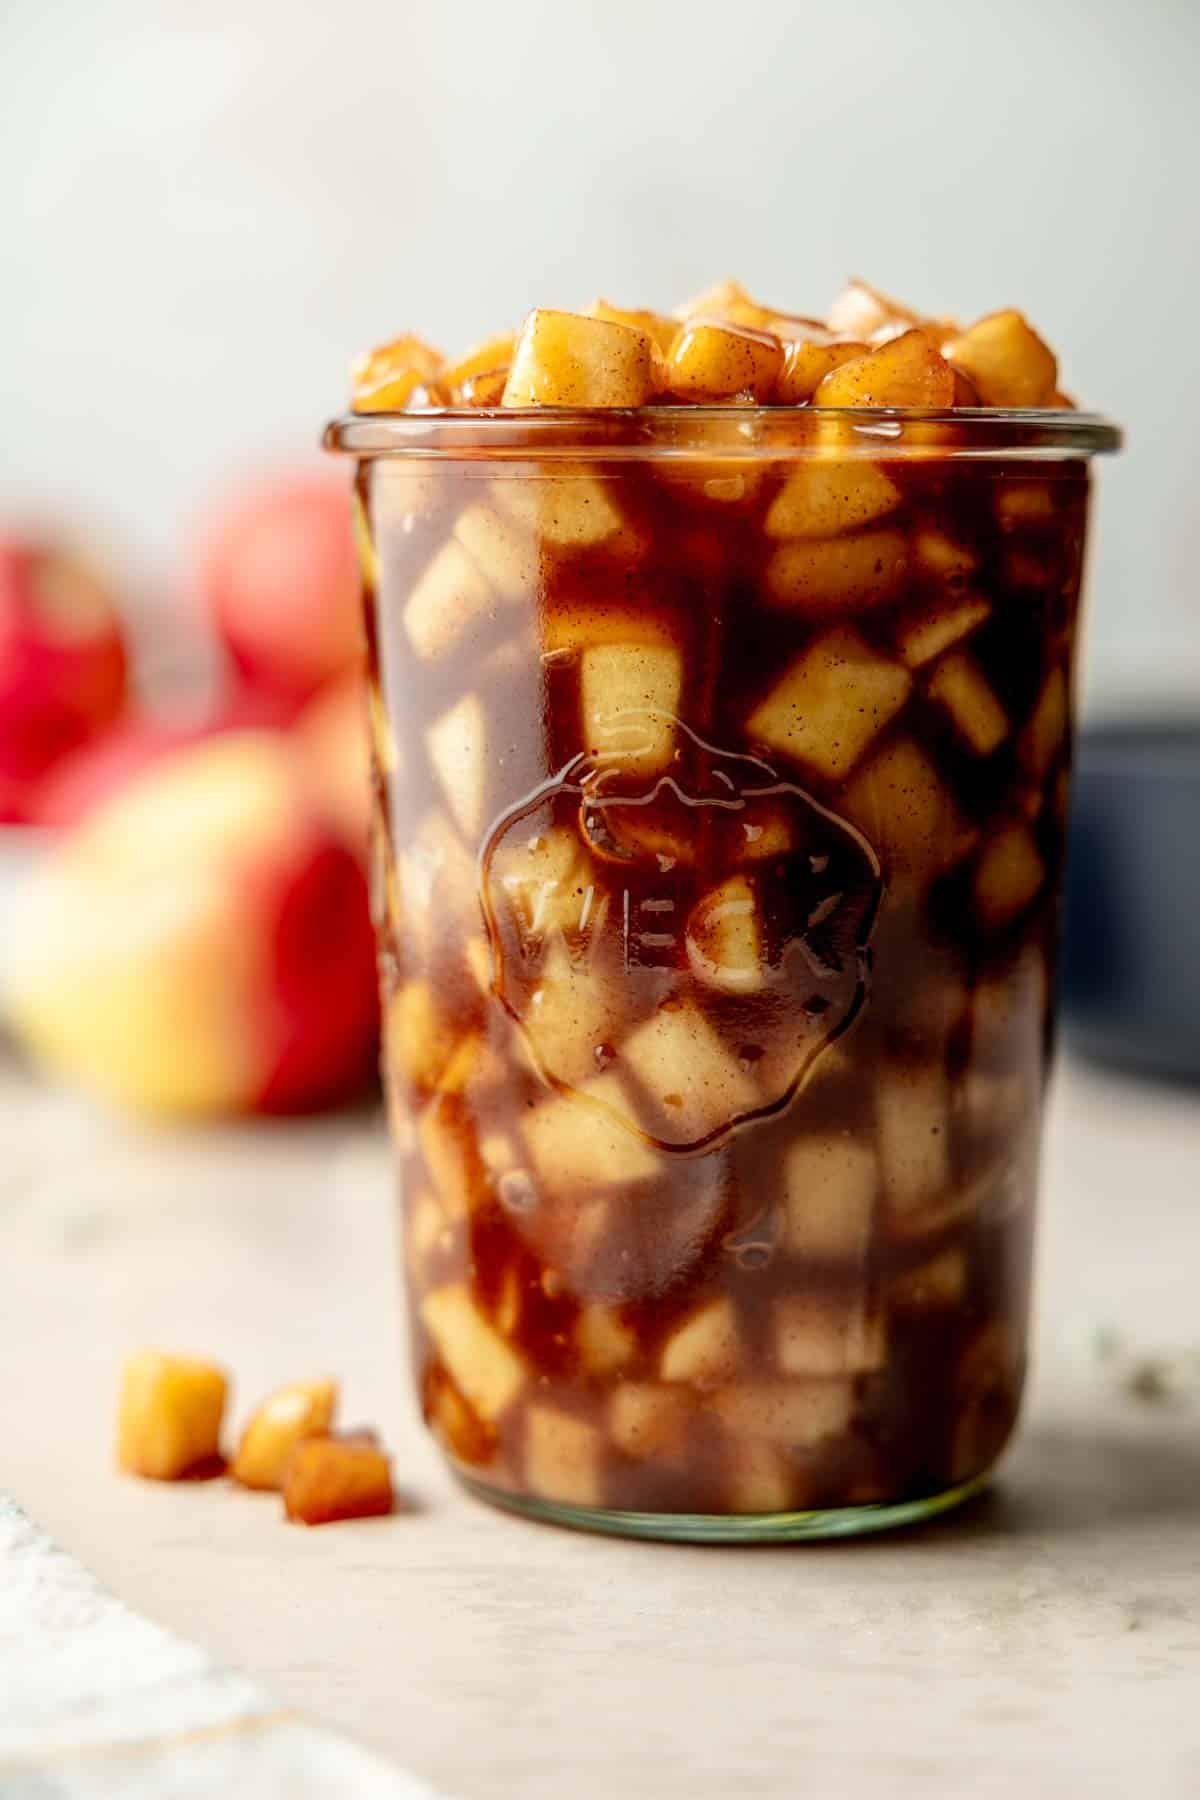
While pre-cooking your apple pie filling might seem like an unnecessary step, it offers significant benefits. Here's why you should be using a cooked apple pie filling:
- Consistent results: When you pre-cook the filling, you ensure the filling has the right consistency with every apple equally tender.
- Eliminates excess moisture: You ensure the filling is the desired thickness before it bakes with less risk of watery filling or a soggy bottom crust.
- Best apple flavor: The apples to absorb the flavors of spices, sugar, and other ingredients for a more flavorful filling. You can taste the filling and adjust as needed before baking.
- Eliminate the gap: A common issue in apple pies is a gap between the crust and filling. This happens when the crust sets but the filling continues to cook and break down. Pre-cooking the filling eliminates this problem.
Best Apples for Apple Pie Filling
There are so many kinds of apples, but did you know that not all of them are good for baking? It's true! The type of apple you choose for your pie greatly impacts how your pie will turn out. The best varieties are the ones that hold their shape and still taste delicious after some time in the oven.
The following apple types are good choices:
- Granny Smith
- Honeycrisp
- Golden Delicious
- Jonagold
- Braeburn
- Pink Lady
There are some common apple varieties that you should avoid for pie making. These varieties either lack in flavor or become too soft when baked in a pie: Red Delicious, McIntosh, Fuji, Gala, and Cortland.
Simple Ingredients
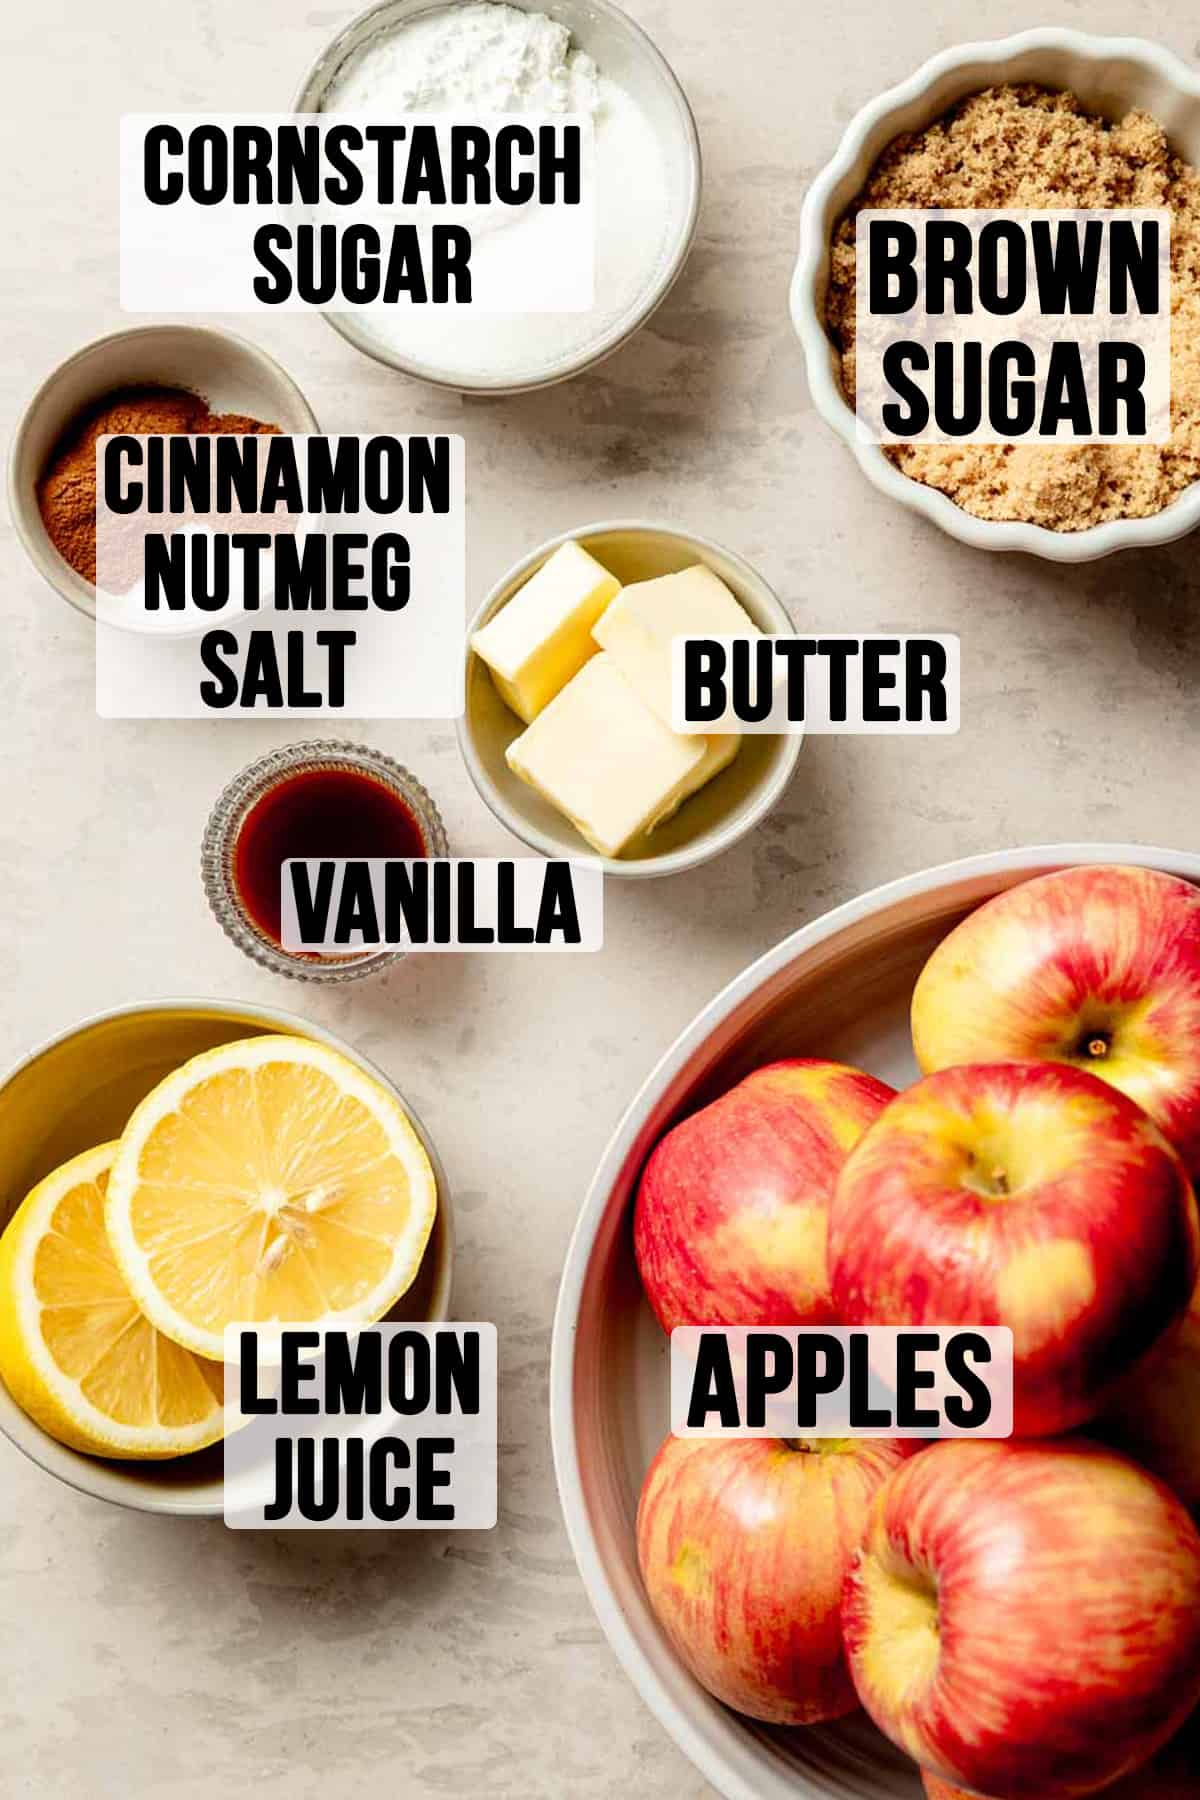
- Fresh Apples: My personal favorite varieties of apples to use for pie are: Honeycrisp apples, Golden Delicious apples, or Granny Smith apples. Use one variety or a combination of apples.
- Brown Sugar: Adds a rich, caramel-like sweetness that complements the apples' natural flavor. You can also use brown sugar to make an easy 2-ingredient coffee syrup and use it in this delicious brown sugar shaken espresso!
- Cornstarch: The thickening agent needed to create a smooth filling.
- Fresh Lemon Juice: Adds a touch of acidity to brighten the flavors and prevent the apples from browning.
- Cinnamon: This warm spice is a quintessential element of apple pie.
- Nutmeg: Offers a hint of nutty spice, the perfect complement to the filling.
- Salt: Salt is necessary in baking to balance sweetness and bring out flavors.
- Vanilla: Also, make this easy Starbucks vanilla syrup!
*Refer to the recipe card below for full ingredient information.
How to Make Apple Pie Filling without Cornstarch
While cornstarch is affordable and easy to find, some cannot tolerate this ingredient. To make this apple pie filling recipe without cornstarch, you can simply substitute the cornstarch with tapioca starch in an equal amount.
Is Apple Pie Filling Gluten-Free?
Apple pie filling typically consists of apples, sugar, spices, and a thickening agent. Cornstarch is commonly used as a thickening agent in store-bought filling; it is gluten-free. Wheat flour is commonly used in homemade apple pies; it is not gluten-free.
If you have celiac disease or a gluten-intolerance, always be cautious about potential sources of gluten in store-bought or homemade apple pie filling.
When making apple pie filling from scratch, use a gluten-free thickening agent, like cornstarch or tapioca starch, and verify that all other ingredients used are also gluten-free. This means, no wheat flour, barley, rye, or regular oats in the filling, crust, or topping.
For store-bought pie fillings, always check the label for a gluten-free claim or read the ingredient list to look for any sources of gluten.
How to Make Apple Pie Filling
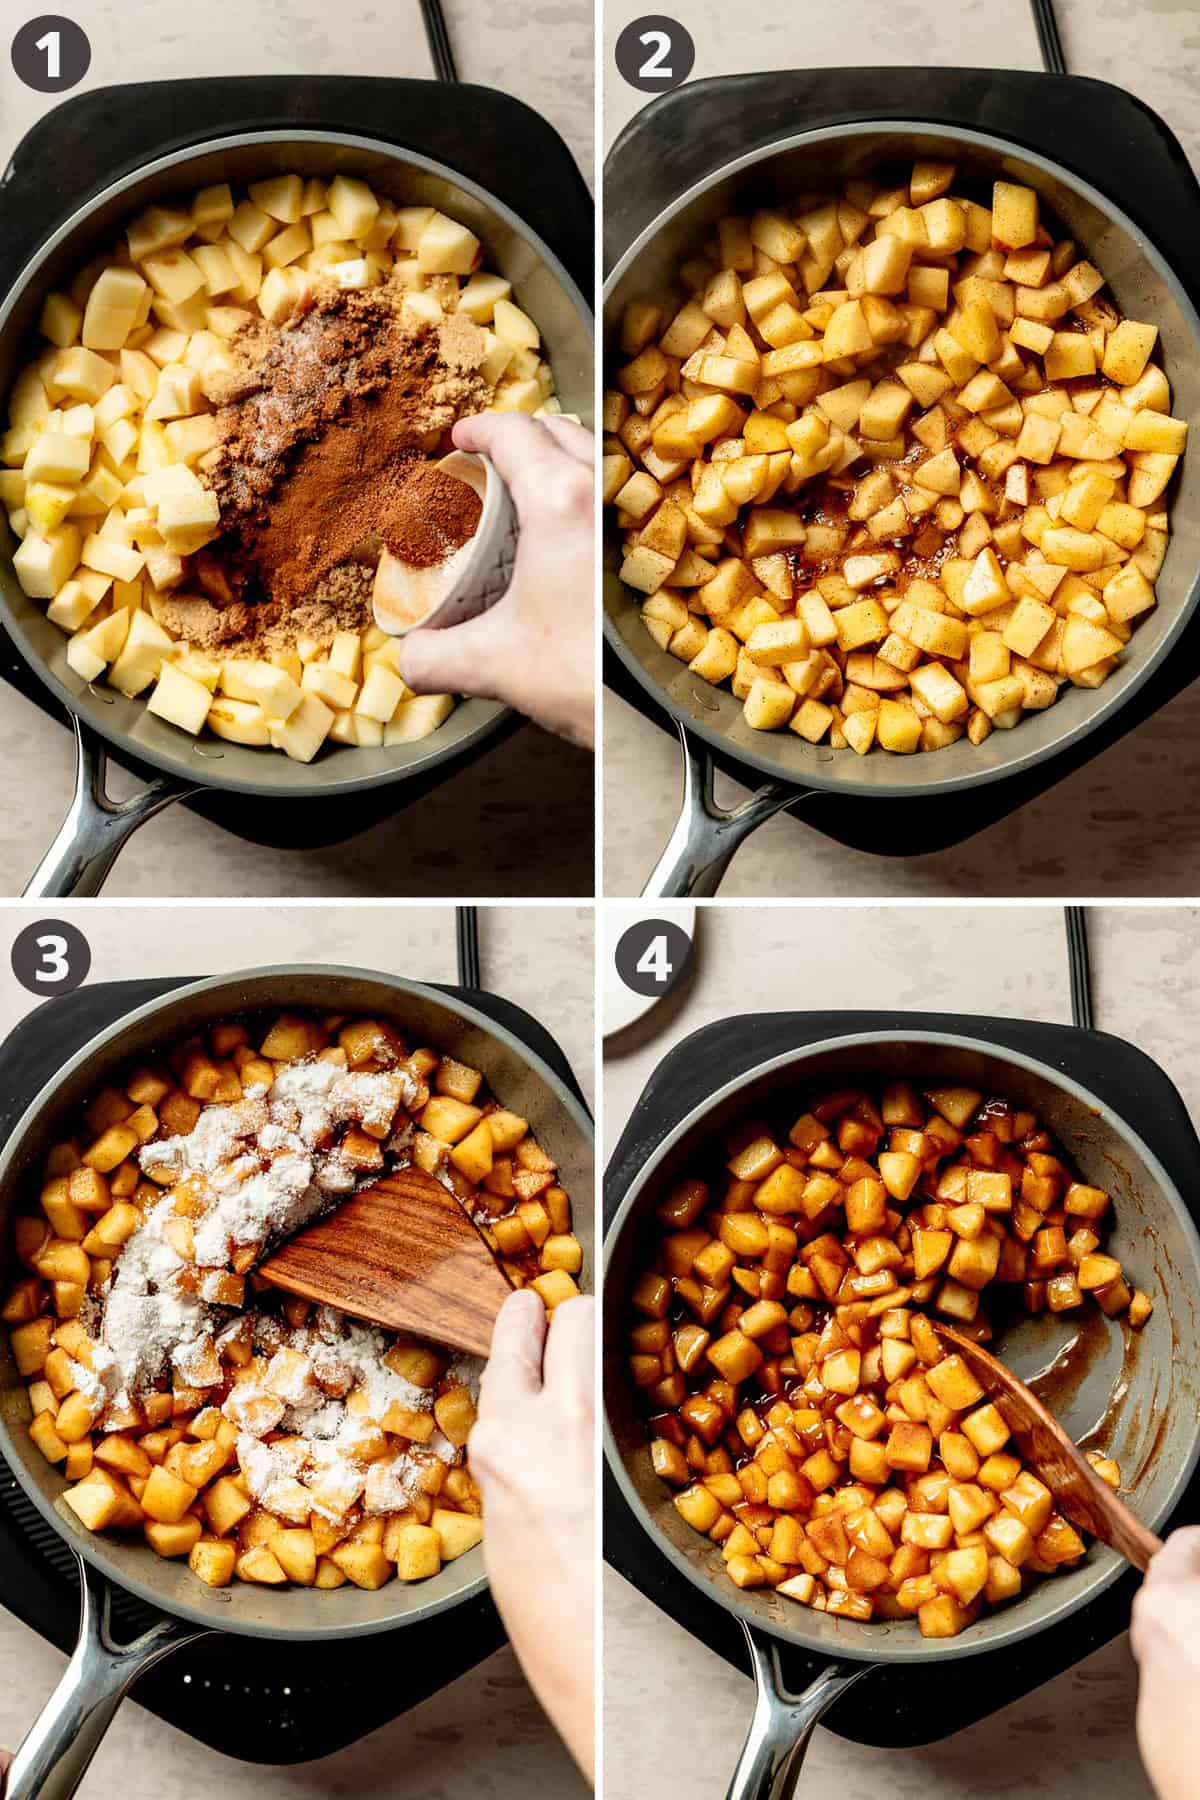
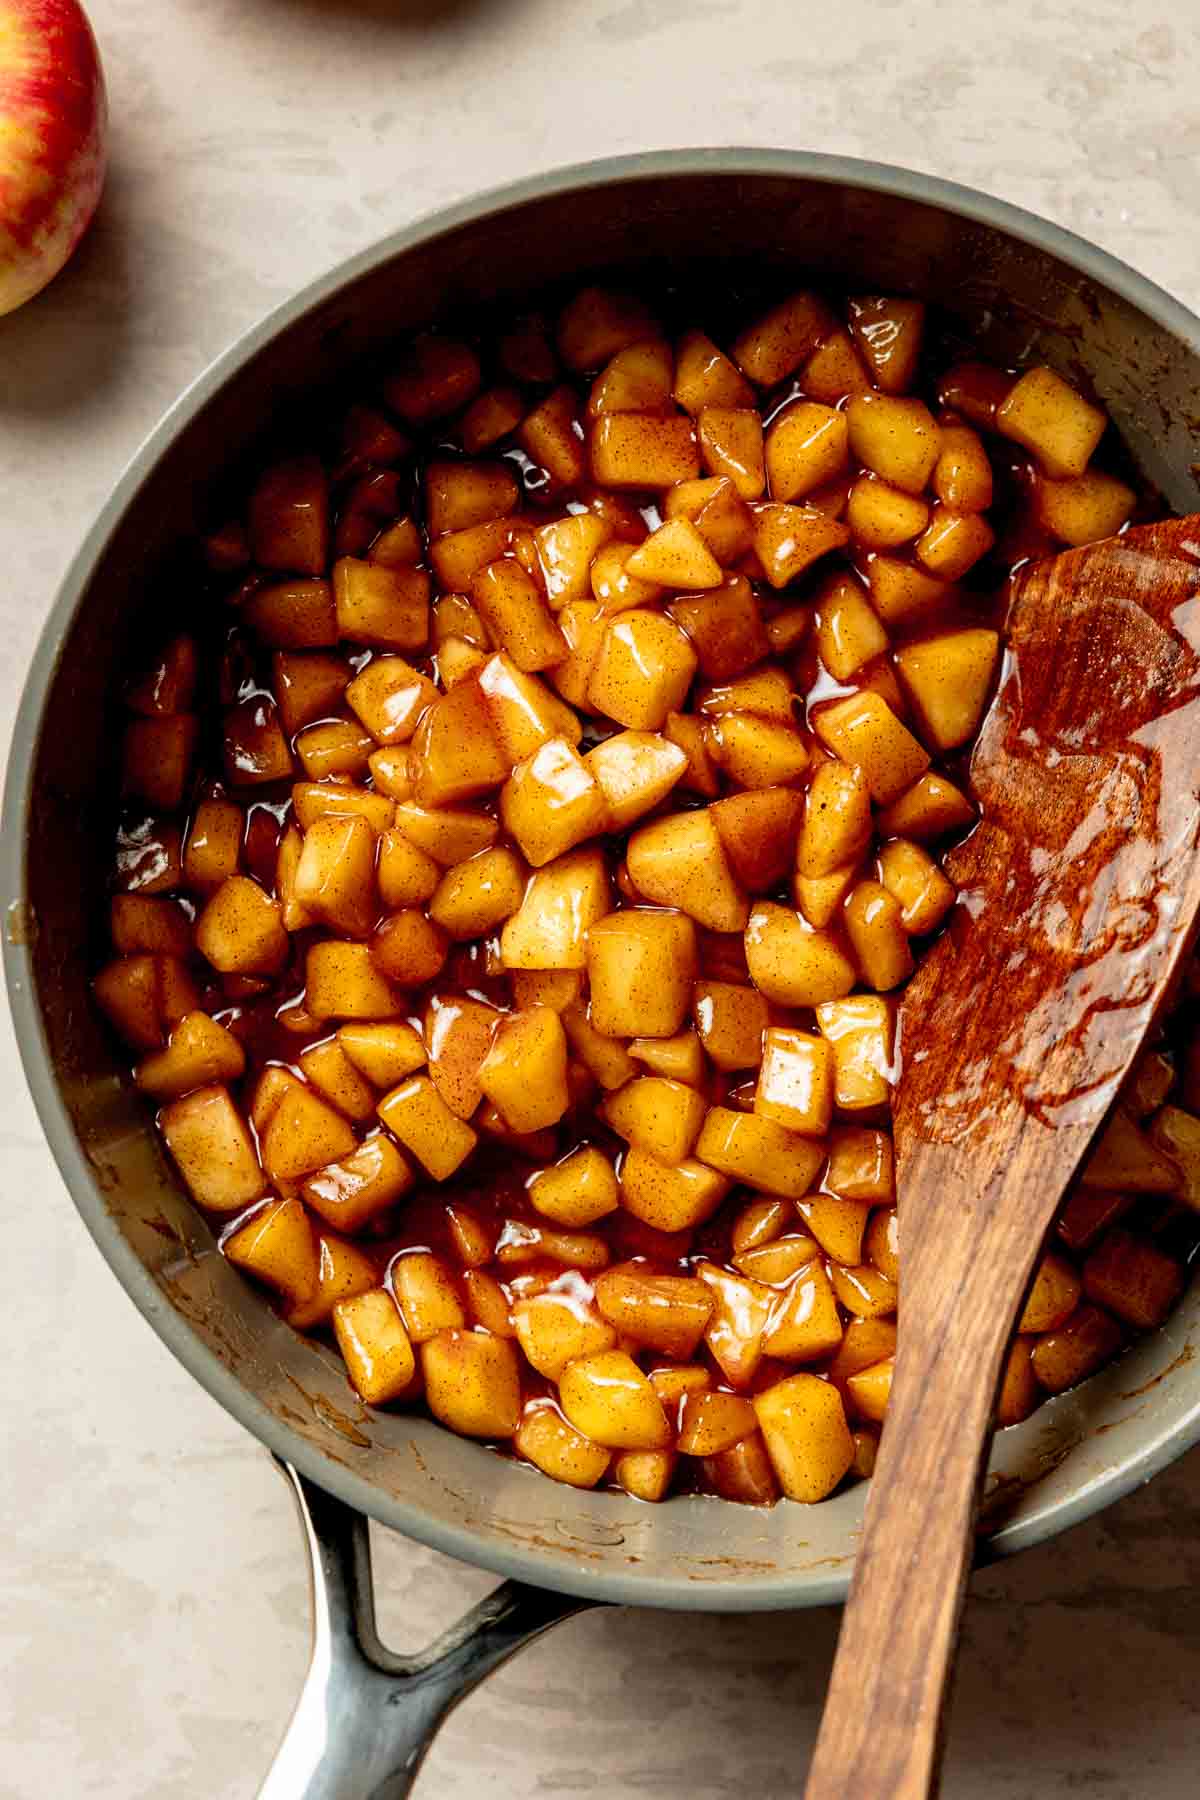
- Sauté diced apples in melted butter for a few minutes before adding in the brown sugar, lemon juice, cinnamon, nutmeg, and salt.
- Continue to cook the apples in the brown sugar mixture until they begin to soften, about 5-7 minutes.
- Sprinkle the remaining sugar and cornstarch over the apples.
- Cook and stir for another few minutes until the apple pie filling has thickened. Remove from heat and stir in the vanilla.
- Cool completely before adding the filling to a prepared pie crust.
How to Freeze Apple Pie Filling
This apple pie filling is easy to make-ahead and refrigerate or freeze for later use. For the best results, store the apple pie filling separately from the crust and assemble when you're ready to bake. The filling can be refrigerated for up to 4 days, if you want to keep it for a longer period, follow these freezing instructions:
- Cool the filling completely.
- Transfer the cooled filling into an airtight container, mason jar, or a zip-top freezer bag. Seal it tightly and remove as much air as possible. Alternatively, use a vacuum sealer.
- Freeze for 3-4 months. Thaw the filling overnight in the refrigerator before use.
- When you're ready to use it, take the filling out of the refrigerator about an hour beforehand. Allowing it to warm slightly makes it easier to spread into the pie shell.
How to Bake an Apple Pie with Pre-Cooked Apple Pie Filling
- Preheat the oven to 350°F. Place a rimmed baking sheet on a rack in the lower third of your oven.
- Roll pie dough for the bottom crust and fit it into a 9-inch pie plate.
- Spread the cooled apple pie filling evenly into the bottom crust.
- Cover the filling with the second crust, crimping the edges to seal and add a few slits for venting.
- For a beautiful golden brown finish, brush the top crust with an egg wash and sprinkle with turbinado sugar.
- Place the pie on the preheated baking sheet to catch any potential spills. Bake until the top of the pie is golden brown and the center of the filling is bubbling.
- Cover the pie as needed to prevent over-browning of the edges or top crust.
Top Recipe Tips
- Choose the Right Apples: Opt for firm apple varieties like Granny Smith or Honeycrisp, as they hold their shape well during cooking.
- Uniform Dicing: Dice the apples uniformly to ensure even cooking and a consistent texture in the filling. If you prefer apple slices, an apple-peeler-corer-slicer is the best way to achieve uniform apple slices.
- Adjust Sugar: You may adjust the amount of sugar based on the sweetness of your apples and your personal taste.
- Cool Completely: Allow the filling to cool to at least room temperature before using it in your pie. This helps it set and prevents a soggy crust.
- Label and Date: If freezing, label the container with the date to ensure you use it within a reasonable timeframe.
- Thaw Before Use: If using a frozen filling, make sure to thaw it overnight in the refrigerator before adding it to your pie crust. If the filling is too cold or still frozen, the pie will not bake properly.
Recipe FAQs
Yes, pre-cooking apple pie filling is a smart move. It ensures that your pie filling is perfectly cooked and won't end up too runny or underdone. Plus, it helps prevent the dreaded gap between the crust and the filling.
Never add hot filling to your pie crust. Doing so can compromise the bottom crust, leading to sogginess and a loss of the desired flakiness. Ensure the filling is adequately cooled to allow the crust to cook properly.
For a well-cooked bottom pie crust, consider using a metal pie pan and baking the pie on a preheated baking sheet in the lower third of your oven. These steps promote better heat transfer to the bottom of the pie, ensuring a perfectly cooked crust.
Greasing the pan is generally not necessary, as there is usually enough butter or fat to prevent the crust from sticking. However, if you're making a pie with a particularly sticky or juicy filling, you can lightly grease the bottom of the pie pan to help prevent any potential issues.
More Gluten-Free Pie Recipes
'Tis the season for holiday baking! Check out my gluten-free Christmas cookie recipes while you're here!
Recipe
Pre-Cooked Apple Pie Filling (Gluten-Free)
Ingredients
- 4 Tablespoons butter
- 3-4 pounds apples, about 6-8 apples; use Honeycrisp, Granny Smith, Golden Delicious, or combination of these.
- ¾ cup brown sugar
- 2 Tablespoons lemon juice
- 1 ½ teaspoon cinnamon
- ½ teaspoon nutmeg, or apple pie spice.
- ¾ teaspoon table salt
- ¼ cup white granulated sugar
- 2 Tablespoons cornstarch
- 1 teaspoon vanilla extract
Instructions
- Peel, core, and uniformly dice the apples.
- In a large skillet, melt butter over medium heat and add apples, brown sugar, lemon juice, cinnamon, nutmeg, and salt. Cook for 5-7 minutes, stirring frequently.
- Meanwhile, whisk together the granulated sugar and cornstarch. Sprinkle the mixture over the apples. Cook for an additional 2-3 minutes, or until the filling thickens.
- Remove from heat and stir in the vanilla. Let the filling cool completely before assembling the pie or storing for later use.
Notes
- This recipe makes enough apple pie filling for 1 (9-inch) pie. For a deep dish pie, use 4 pounds of apples.
- Refrigerate up to 4 days, freeze up to 4 months.
- For a standard double crust pie, bake at 350°F for 45-60 minutes, or until the center of the filling is bubbling and the top is golden brown.
Nutrition
* Nutritional information is provided as a courtesy and should be used as an estimate only. See the nutrition policy for more information.







Karole Johnson says
This is the best recipe for hand pies. Made it 3 times already.
T Moen says
This is delicious. The vanilla is a great addition; this is so easy and will now be my go to apple filling for pies, hand pies, Dutch baby topping, ice cream topping, etc., etc., etc!! Thank you!
Karole Johnson says
Tried this and it is the best apple pie filling I have ever had. 😋
Kathryn Hannon says
This recipe was awesome! Everyone loved it and I was so happy with results! Exactly all they say is true! This is definitely a keeper!!
Lisa says
Does this filling need to cook longer if using it as a topping for ice cream instead of baking it in a pie? Wondering if it will be crunchy still if it doesn’t have its second bake.
Katie Olesen says
Feel free to cook it until the apples are your desired tenderness. I wouldn’t say the apples are crunchy but they are still firm to the bite.
Melanie says
I followed the tip to dice the apples uniformly and it really paid off. The texture of the filling was consistent and smooth, with no overly soft or crunchy bits. It made the pie look and taste great!
Bri says
My son loves apple pie and this is just about the easiest way for me to make it. Thanks!
Kehlani says
It doesn't even taste gluten-free! I love this recipe! This filling is so rich and delicious the whole fam loved it! Will definitely be making this again for Father's day.
Rachel says
My family loved this! We made turnover with this filling.
Bribby says
How long do I cook the pie if I use this filling, which has been precooked?
Katie Olesen says
Bake at 350°F for 45-60 minutes, or until the center of the filling is bubbling and the top is golden brown.
Vladka says
I follow this recipe when I have an abundance of apples. It always works.