

This gluten-free pumpkin swirl cheesecake is the fall crossover dessert you never knew you needed-the perfect blend of creamy, rich cheesecake and pumpkin pie flavor. A stunning alternative to traditional pumpkin pie, it's sure to be a showstopper on your Thanksgiving table!

Jump to:
- Recipe Testing Notes
- Ingredient Notes
- Equipment
- Prepare the Cheesecake Crust
- Prepare the Fillings
- Assemble the Cheesecake
- How Do I Know When It's Done?
- How To Remove The Cheesecake From the Pan
- Serving Suggestion
- Storage
- More Gluten-Free Pumpkin Desserts
- Top Recipe Tips
- Recipe FAQs
- More Gluten-Free Cheesecake Recipes
- Still Hungry? Subscribe Here!
- Recipe
- Comments and Ratings
If you love pumpkin and pumpkin spice flavors, you are going to love this cheesecake. When I first made this recipe, my family said it was the best cheesecake I've ever made-I took that as high praise since it was even coming from my husband who is not a fan of cheesecake in general!
The texture and flavor is reminiscent of pumpkin pie and in my opinion, I'd choose a slice of this creamy, spiced deliciousness over pumpkin pie any day, especially on Thanksgiving! It's just that good!
If you are like me and you just can't get enough pumpkin, try my gluten-free pumpkin cinnamon rolls for your next fall baking adventure!
Recipe Testing Notes
One thing to note, I used a whole can of pumpkin purée in this recipe because I wanted to be able to just use up the whole can. Using the full can of pumpkin purée does make for a softer cheesecake than my classic gluten-free cheesecake recipe. That said, it is really creamy and delicious and has a texture similar to pumpkin pie. If you're feeling brave, you can squeeze the pumpkin of excess moisture before adding it to the recipe, and the cake may firm up a bit more.
I call for gluten-free graham crackers in the crust. If you can find crunchy gluten-free gingersnap cookies, feel free to use those. I tried them in one of my test bakes and found they add another layer of flavor that was really tasty!
I didn't initially include cornstarch in the filling. After making the cheesecake several more times and experimenting with adding a bit of cornstarch, I liked how it helped the filling to set up more firmly. If you can't tolerate cornstarch, you can omit it, but the texture of the cheesecake may end up being a bit softer.
Ingredient Notes
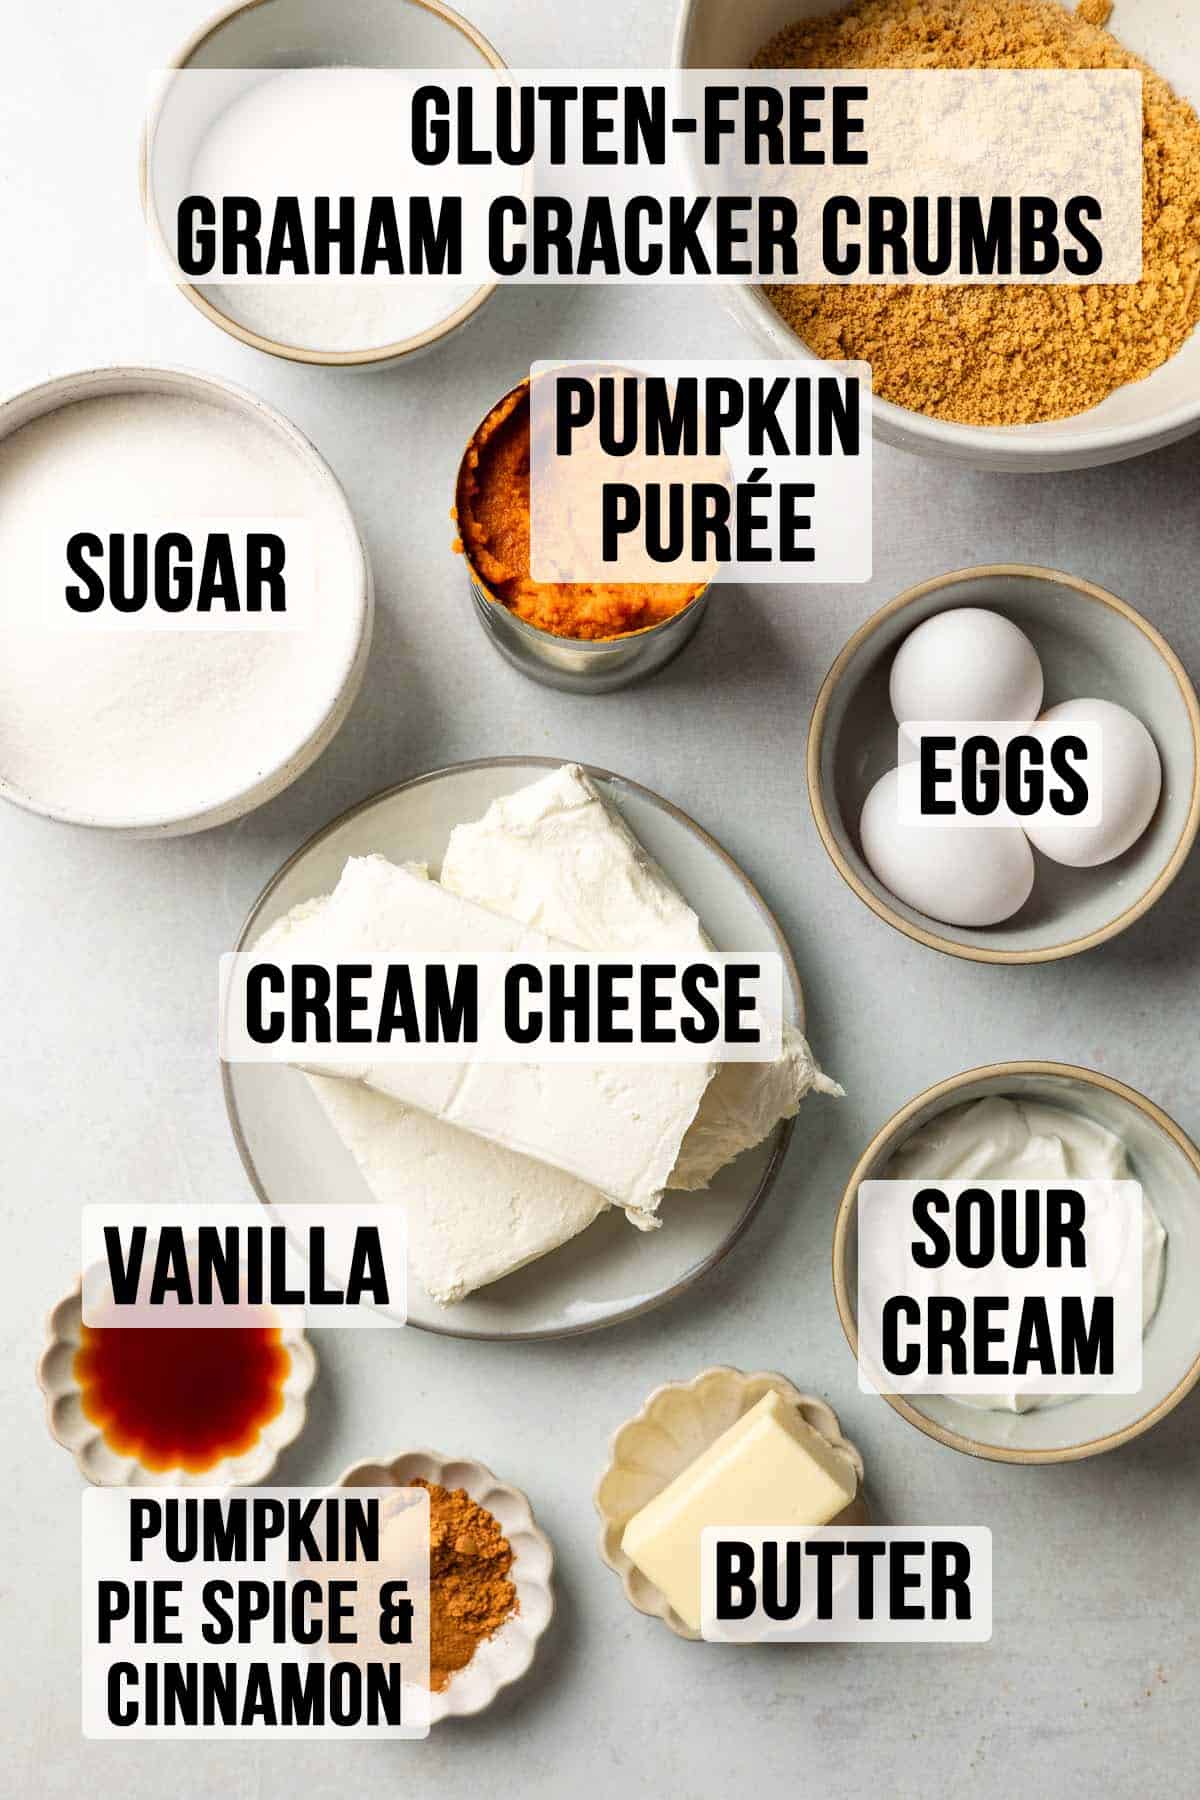
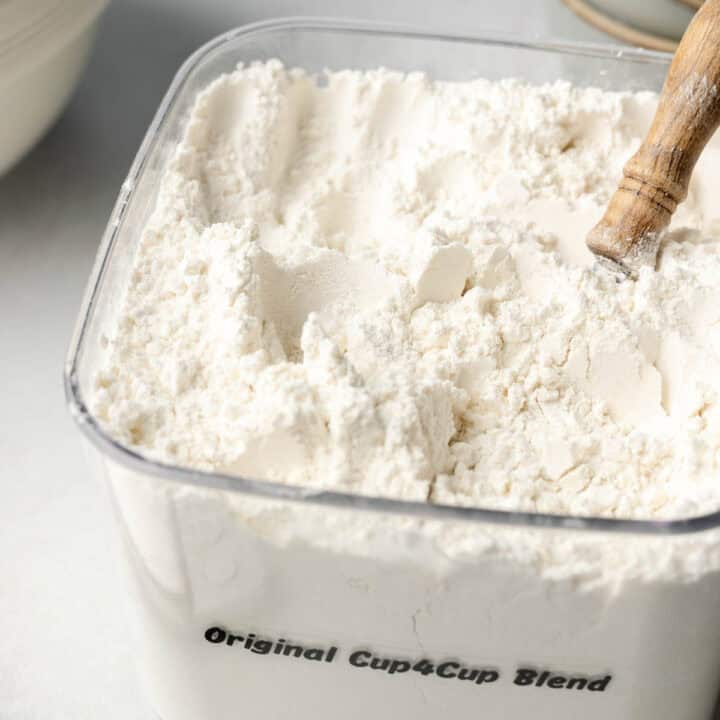
- Gluten-Free Graham Cracker Crumbs: I have used many different brands of gluten-free graham crackers in my cheesecake crusts and they all work great. My suggestions for this recipe are Simple Mills Honey Cinnamon Sweet Thins, Pamela's Gluten-Free Graham Crackers, or Partake Gluten-Free Gingersnap Cookies. You will need about 7.5 - 8 ounces of crumbs, so check the package weight to see how many boxes you need to buy.
- Cream Cheese: Most brick-style cream cheese is gluten-free. I used Philadelphia here, but any brand is fine.
- Pumpkin Purée: Use pure pumpkin purée, not pumpkin pie filling. The only ingredient on the label should be pumpkin and it should therefore be gluten-free.
- Cornstarch: This ingredient helps the cheesecake to set up more firmly. It thickens the filling, which isn't usually needed in my standard cheesecake recipe. Since this recipe has an entire can of pumpkin puree, the cornstarch is very helpful in the structure.
*Refer to the recipe card for full ingredient information.
Equipment
- A good quality 9-inch springform pan.
- Heavy duty aluminum foil that is large enough to cover the bottom and sides of the pan with one sheet.
- Parchment paper discs or a piece of parchment paper cut to size for the bottom of the pan.
- Food processor or rolling pin to make graham cracker crumbs.
Prepare the Cheesecake Crust
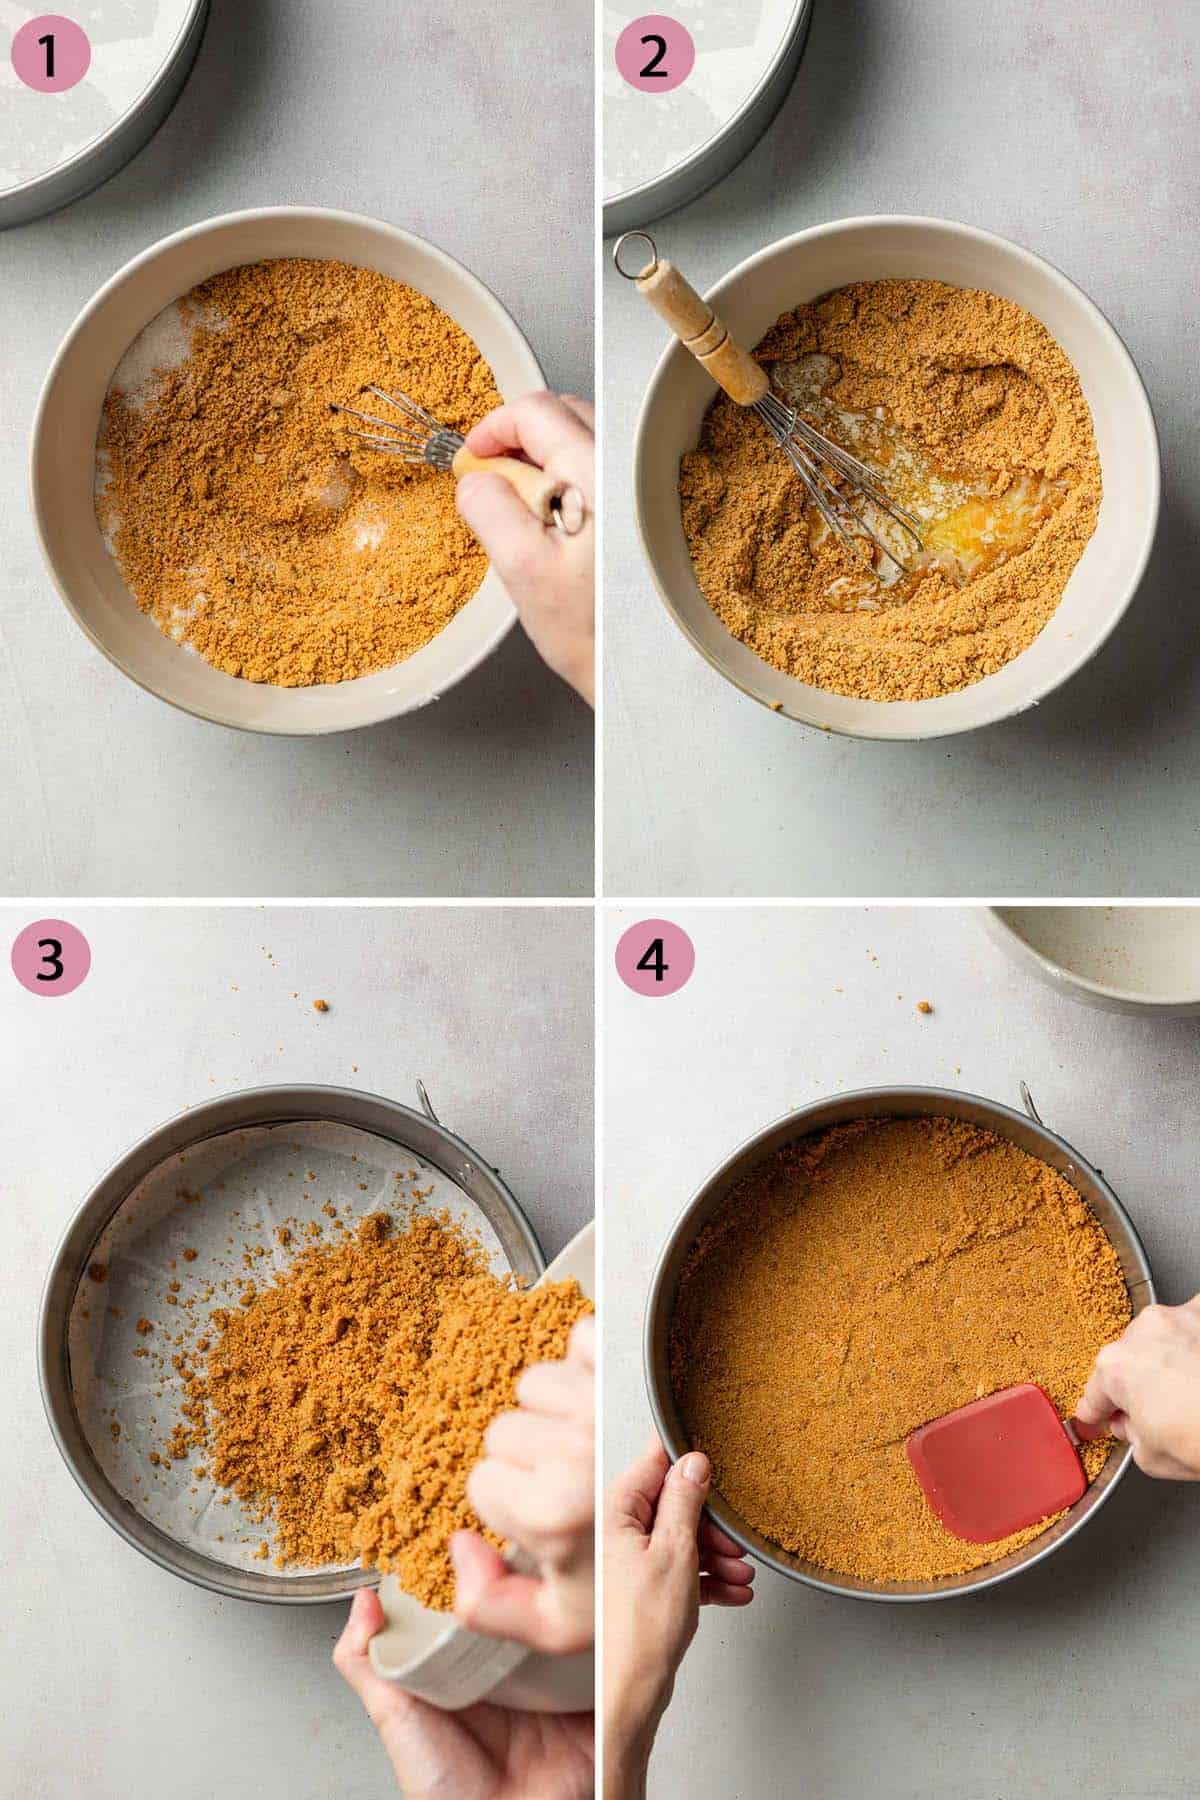
- In a small bowl, combine the graham cracker crumbs and sugar.
- Add the melted butter and stir until the texture resembles wet sand.
- Pour the mixture into a springform pan lined with parchment paper.
- Firmly press the crumbs into an even layer. Bake for 10 minutes, then set aside to cool.
Prepare the Fillings
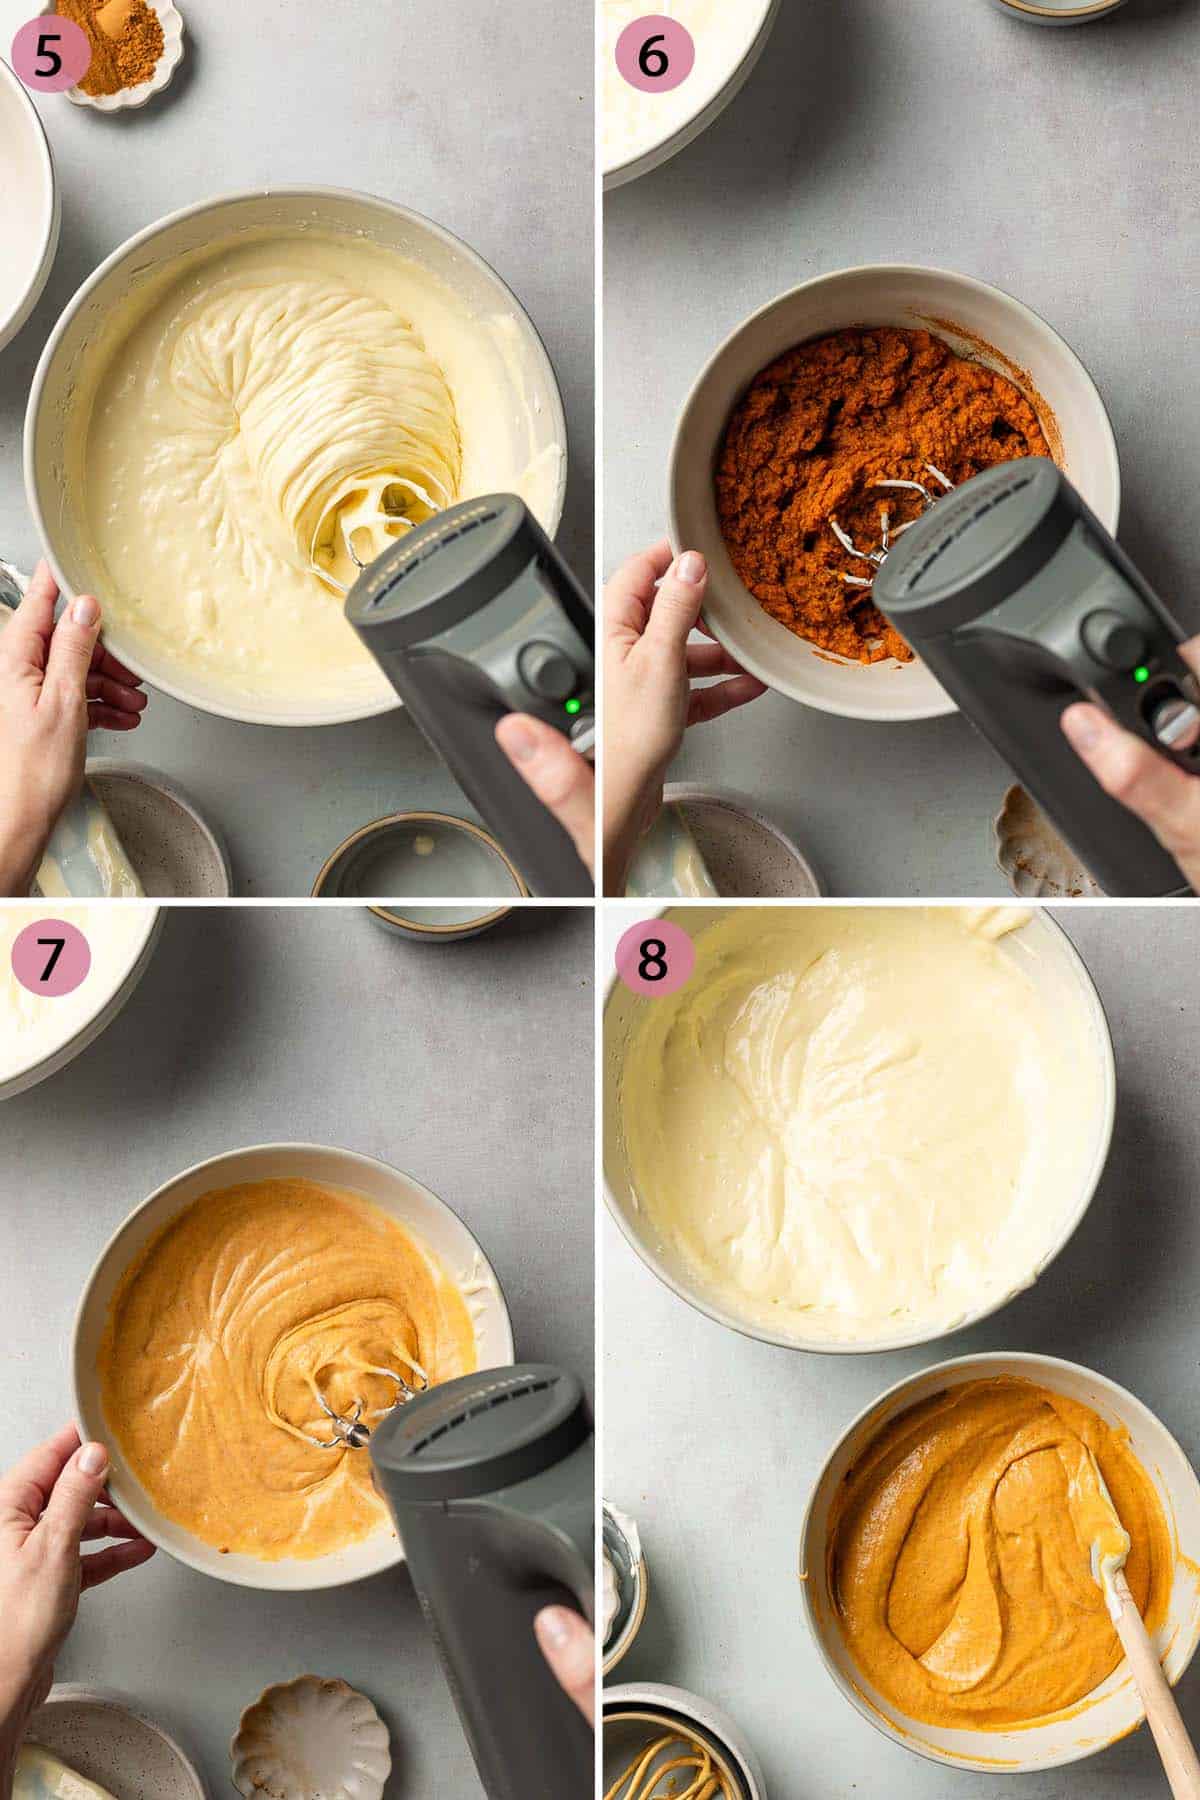
- In a large bowl, blend the softened cream cheese, sugar, cornstarch sour cream, eggs, and vanilla extract. Set aside.
- In another small bowl, mix the pumpkin puree with cinnamon and pumpkin pie spice.
- Stir 2 cups of the cream cheese mixture into the pumpkin puree.
- Now that you have your two mixtures, it's time to assemble the cheesecake!
Assemble the Cheesecake
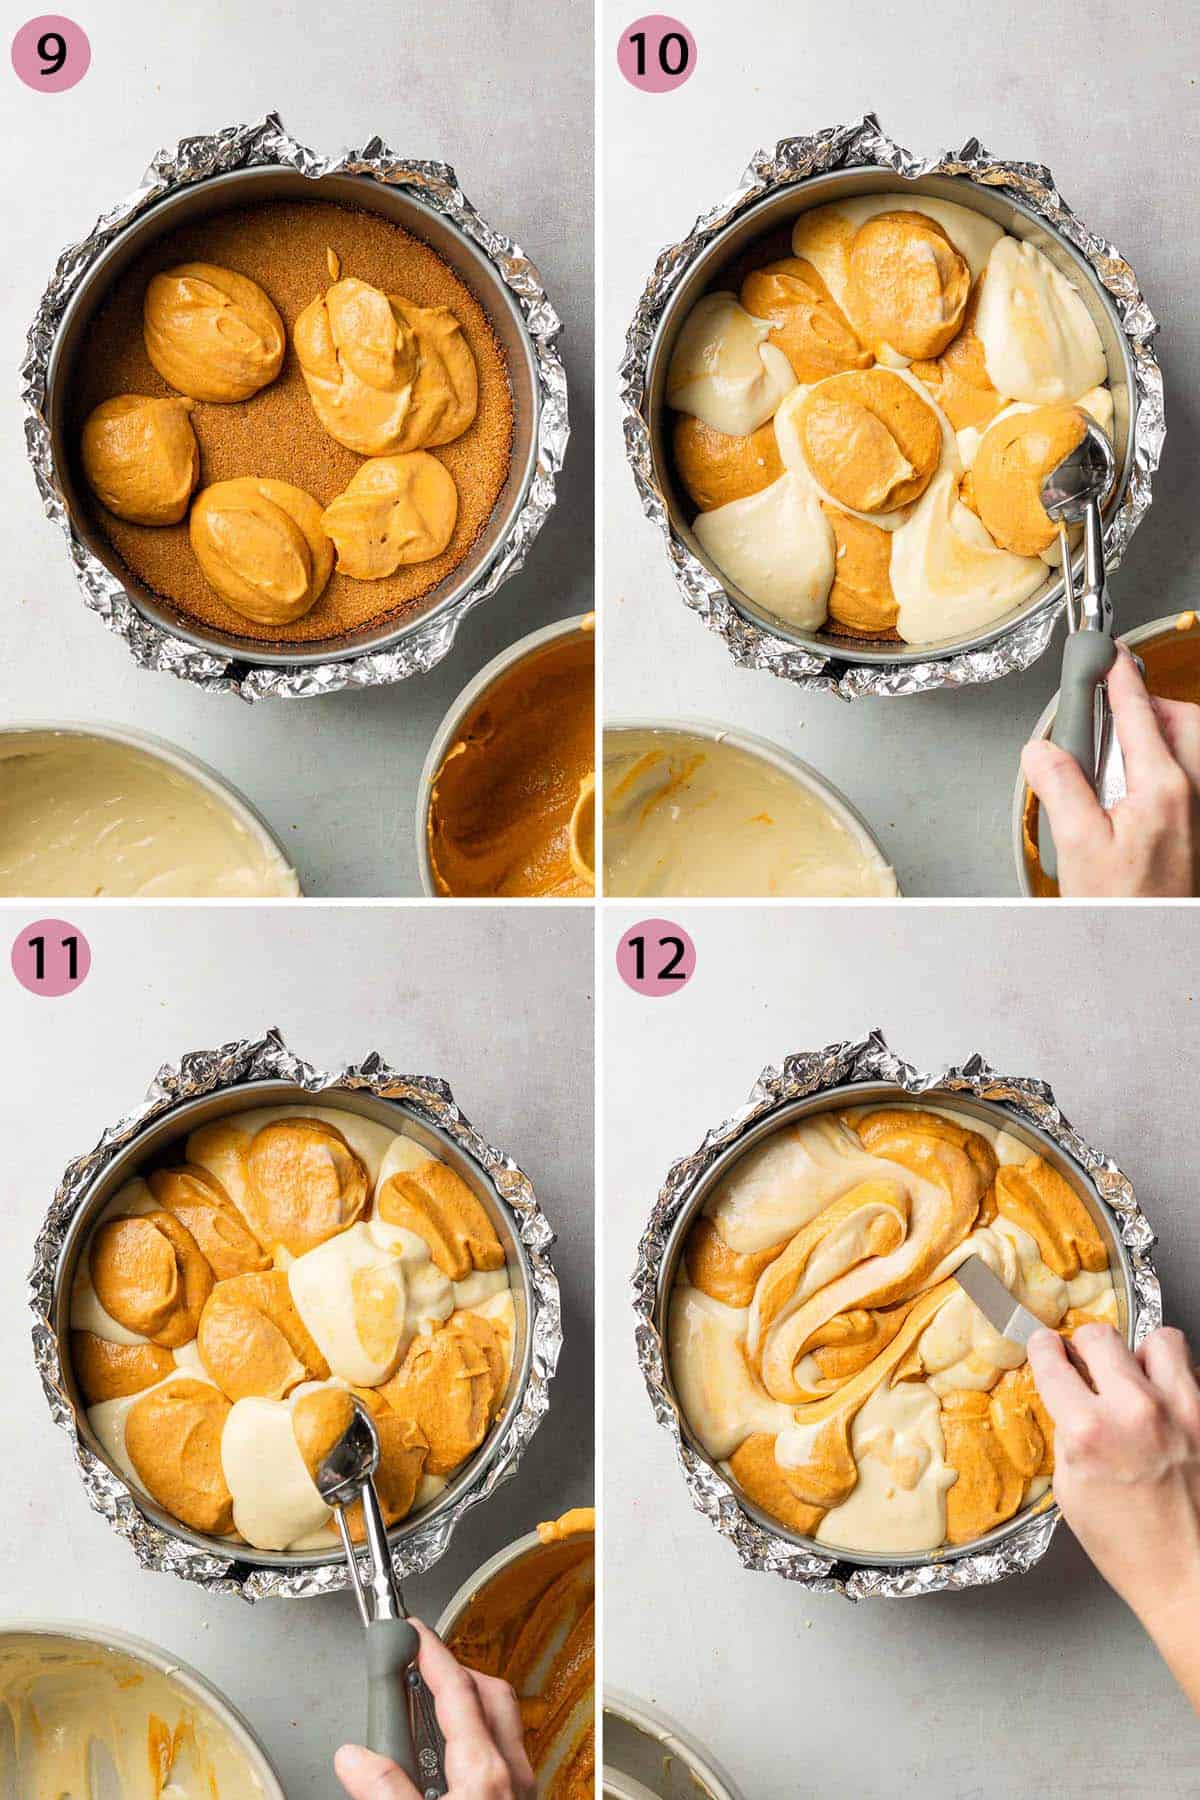
- Using a large cookie scoop, dollop both the pumpkin mixture and cream cheese mixtures onto the crust.
- Alternate scoops of pumpkin and cheesecake mixtures across the crust.
- Continue until all of the filling has been added to the pan.
- Gently swirl the mixtures together with an offset spatula, taking care not to scrape the crust.
- Bake and cool the cheesecake as directed in the recipe card below.
Save This Recipe!
Love a good pumpkin swirl? Try my easy gluten-free pumpkin cheese danishes next!
How Do I Know When It's Done?
It can be hard to tell when a cheesecake is fully baked but here are some tips:
- Don't open the oven door while cheesecake is baking. This will keep the heat in the oven and give you a more accurate bake time.
- When the time is up, check the jiggle! Give the cheesecake pan a gentle shake and see how wobbly it is. If the entire top is shaking like jello, continue to bake for another 30 minutes. If the edges look set but the center still has a slight wobble, then it is likely done. Go ahead and turn the oven off.
- Cool the cake in the oven with the door shut and the oven off for 1 hour after it has finished baking. This will allow the cake to gently finish the cooking process.
How To Remove The Cheesecake From the Pan
If you'd like to remove the bottom of the springform pan from your cake before serving, follow these steps below.

- Gather two flat plates; one for flipping the cake over and one for serving. Remove the chilled cheesecake from the fridge. Run an offset spatula around the edges if needed, then remove the sides of the springform pan. Cover the cheesecake fully with parchment paper.
- Place a plate (the one you don't want to use for serving) over the top of the cheesecake and flip it over.
- Gently remove the bottom of the springform pan. If it seems stuck, gently pry the edge with your offset spatula.
- Remove the parchment paper from the crust.
- Place your serving plate upside down on top of the crust and flip the cake back over onto the plate.
- Gently remove the parchment paper from the top of the cake. Voila!
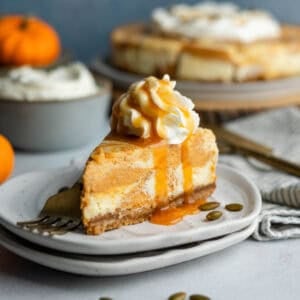
Serving Suggestion
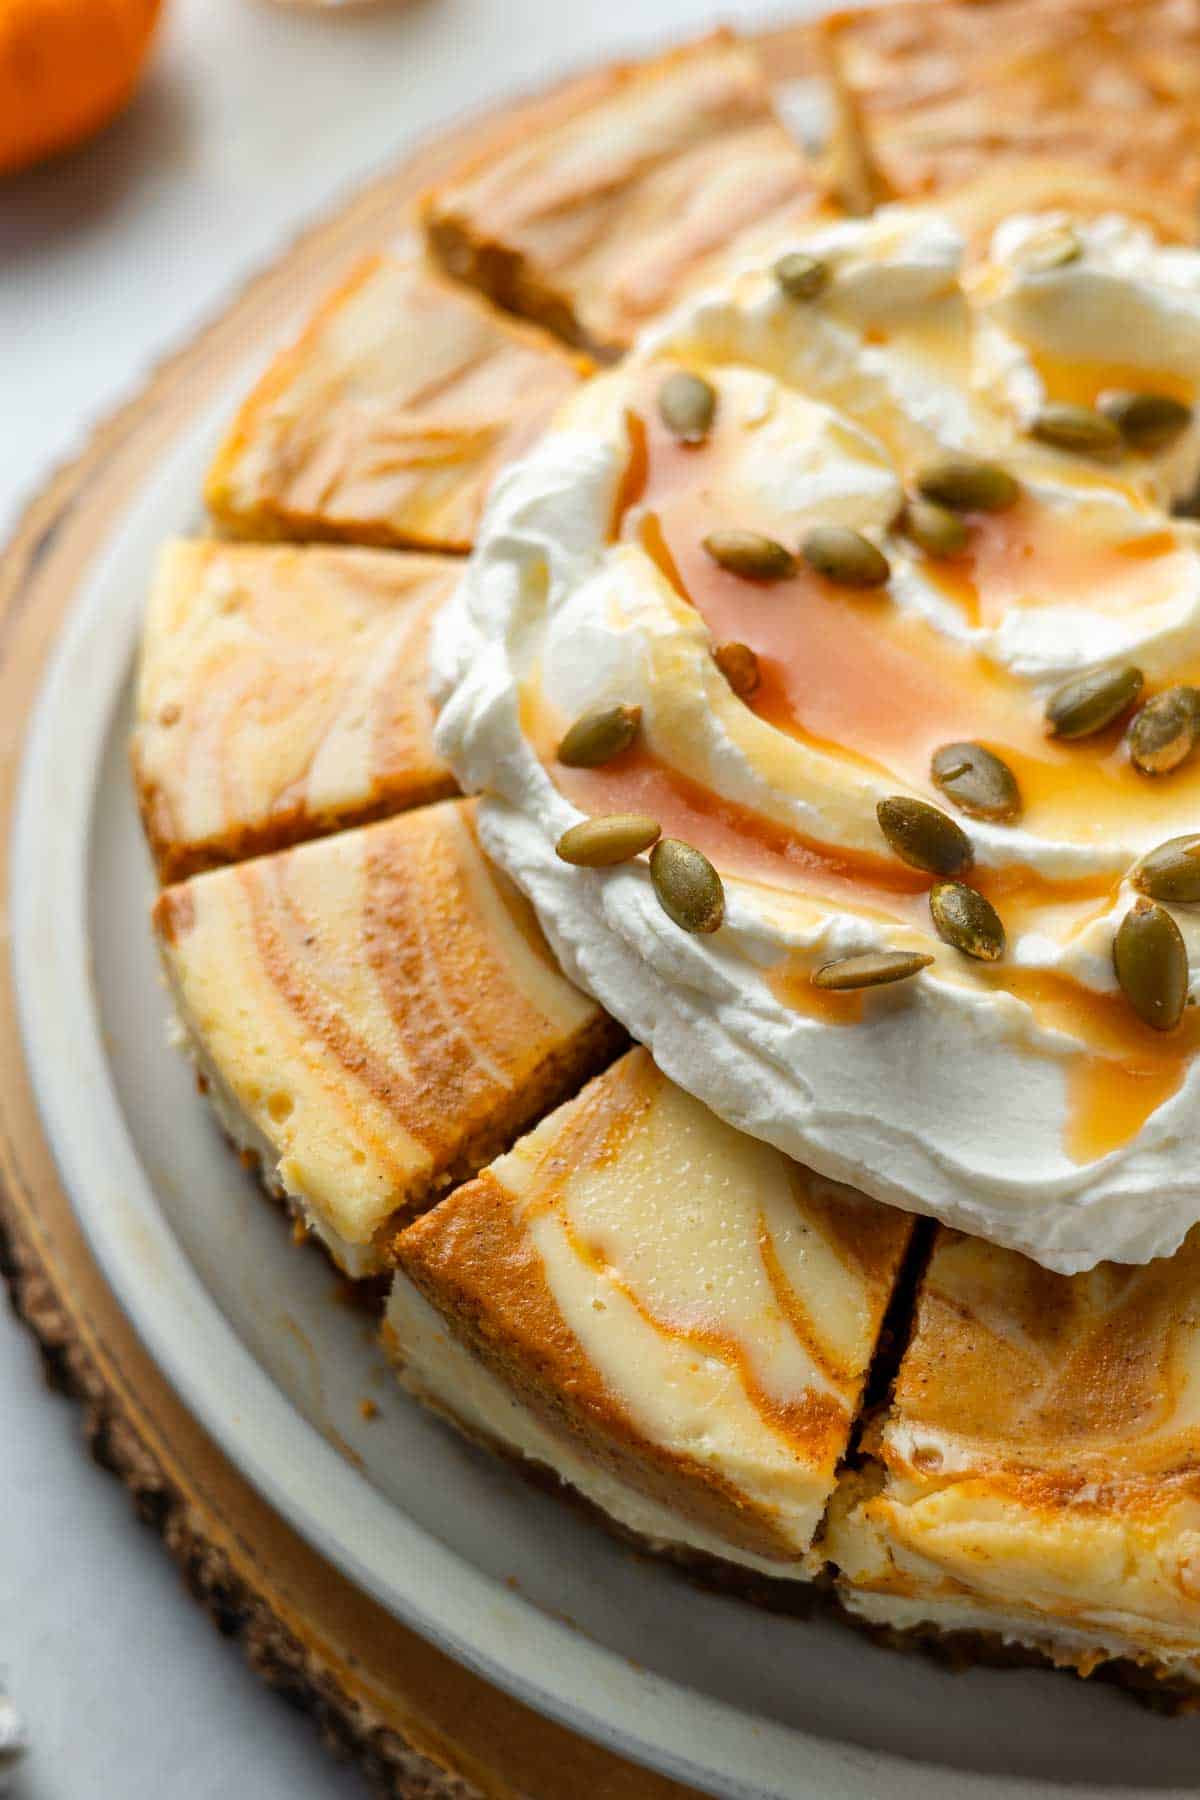
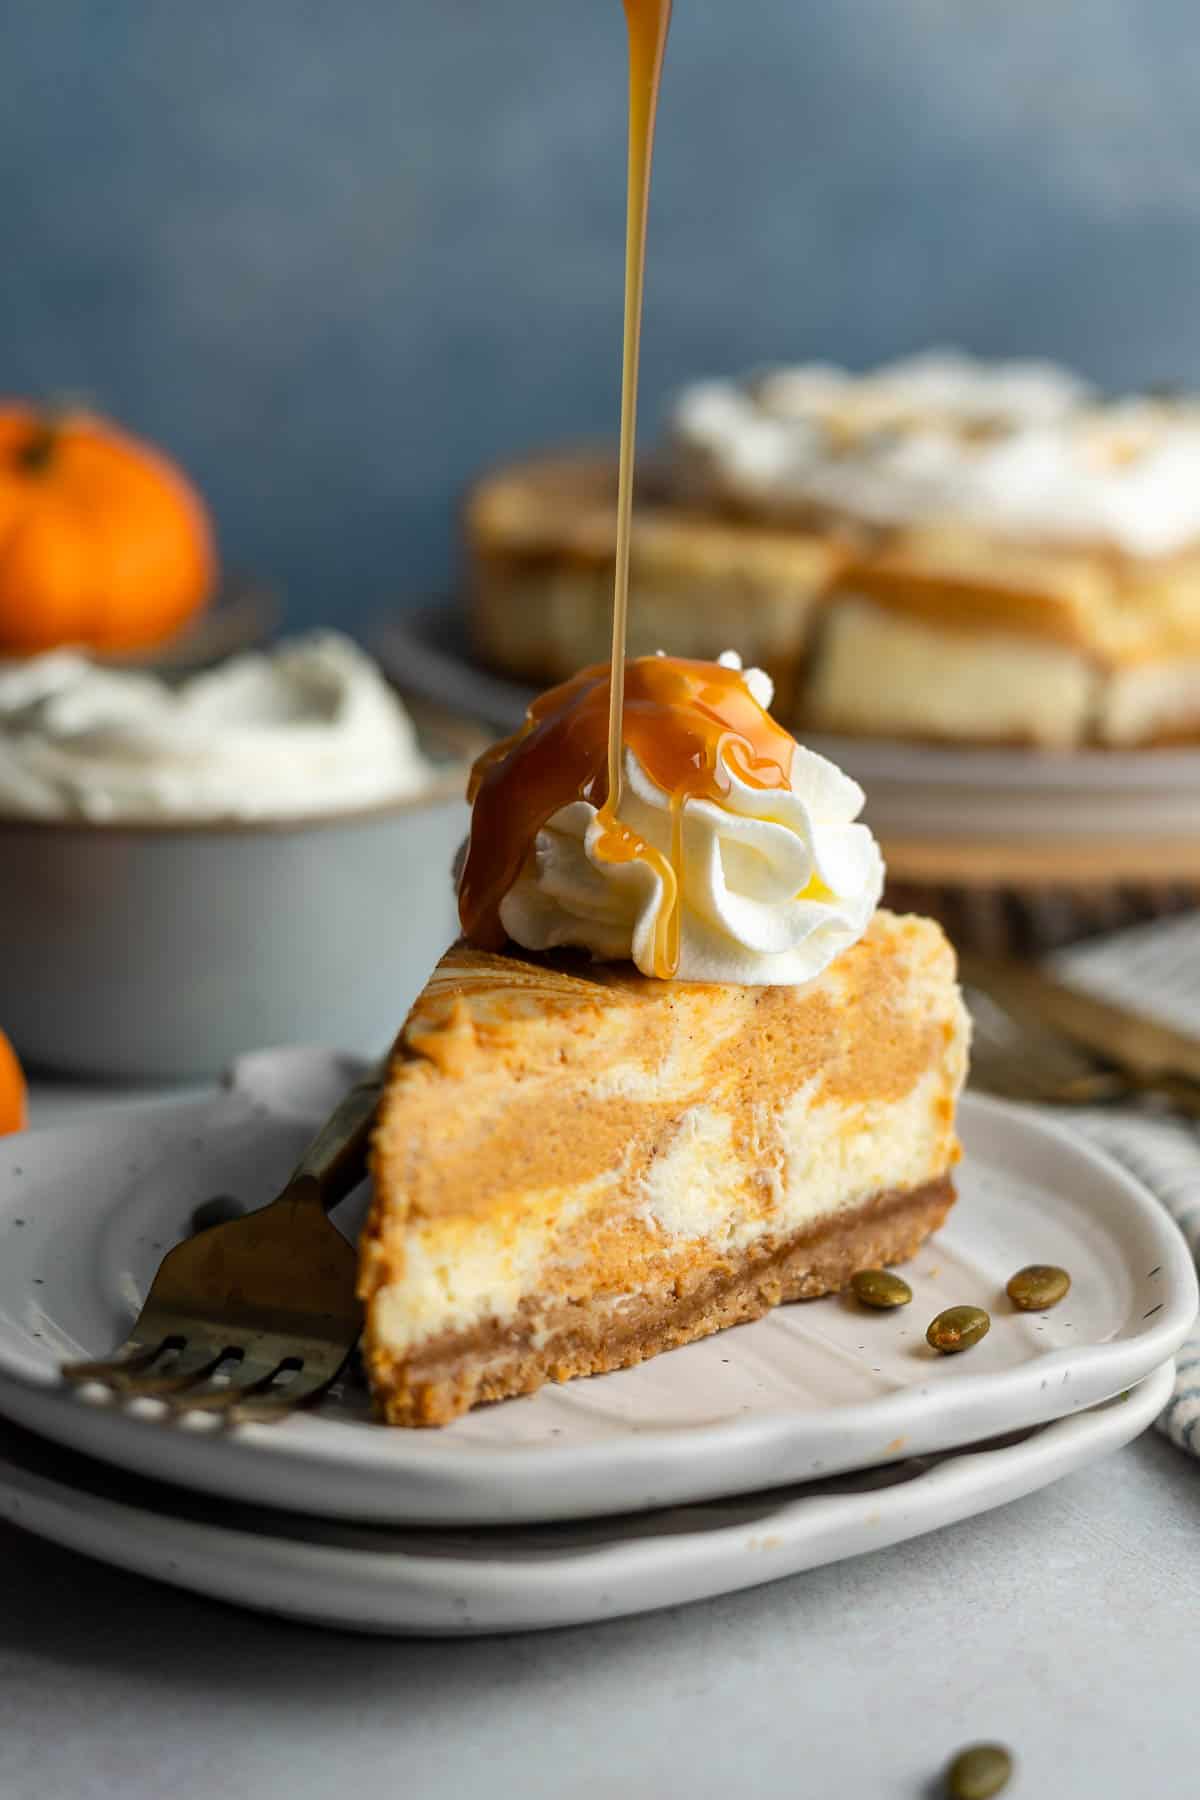
This cheesecake, with its beautiful swirls of pumpkin, is fine served plain, but if you'd like to wow your guests, add this simple garnish to jazz it up even more.
Place a large dollop of fresh whipped cream in the center of the cheesecake. Give the whipped cream a few swirls with an offset spatula. Drizzle caramel sauce over the whipped cream and finish with a sprinkle of roasted pepitas.
Storage
To store this cheesecake, cover it with plastic wrap or place it in an airtight container. It will keep well in the refrigerator for 3-5 days.
You can also freeze individual slices. Wrap each slice in plastic wrap or separate them with a piece of parchment paper, then place them in a freezer-safe bag or container. The slices will stay fresh in the freezer for several months.
More Gluten-Free Pumpkin Desserts
If you are looking for even more gluten-free pumpkin desserts, here's a few of our favorites!
I've got some pumpkin drinks too, like my homemade pumpkin spice sauce, pumpkin spice latte, and a pumpkin cream chai latte that's unbelievably good!
Top Recipe Tips
- This cake takes a while to make and is broken down into several steps. Be sure to read the instructions and plan ahead for the timing.
- Be sure your cream cheese is very soft and that your remaining ingredients are at room temperature to avoid lumps.
- Grease the pan before adding the filling. This will prevent the edges of the cake from sticking to the pan as it cools, which helps prevent uneven edges or cracks in the cake.
- Be sure to follow all of the baking and cooling steps, as they are indeed important to the final outcome of the cake. The gradual cooling process is what helps the cake to finish baking and also helps to keep it from cracking.
Recipe FAQs
Yes, you need a water bath. Never listen to anyone who tells you otherwise! I've personally tested this with my cheesecake recipes and a water bath makes all the difference. The warm water surrounding the pan provides a more even and gentle bake, allowing the center a chance to cook before the sides are set. The water bath also adds moisture to the environment, which results in a smoother and creamier cheesecake that never cracks!
Cheesecakes can crack for a variety of reasons, which is why it's important to follow the recipe instructions exactly. Overbaking, cooling too quickly, incorporating too much air during mixing, or skipping the water bath are the main factors that can lead to those frustrating cracks. If your cheesecake does crack, it's ok-it will still taste delicious! You can always garnish the cheesecake with whipped cream or some other topping to hide any cracks.
Using a springform pan is best for cheesecakes because it allows for easy removal without damaging the sides. If you must use a standard pan, choose a 9-inch round cake pan since it is similar in size and shape. Just keep in mind that the presentation may not be as clean as with a springform pan.
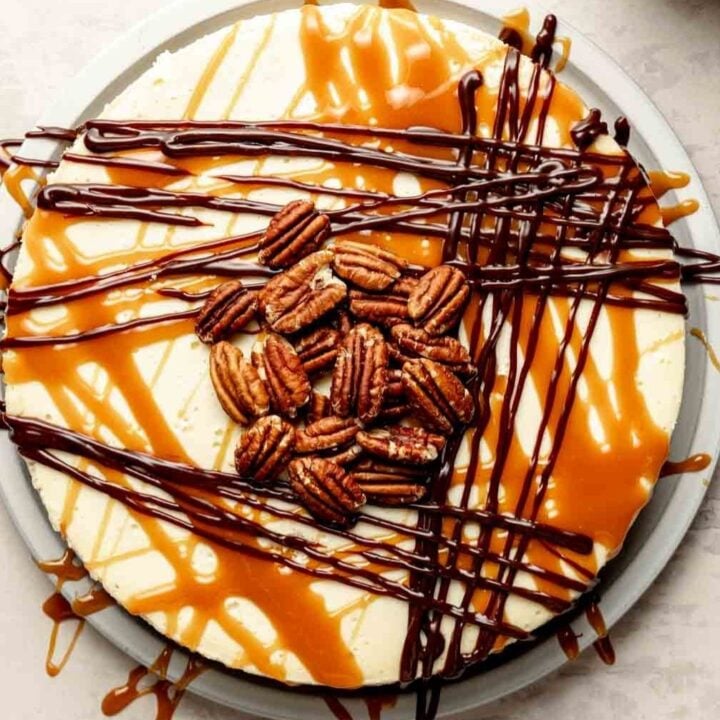
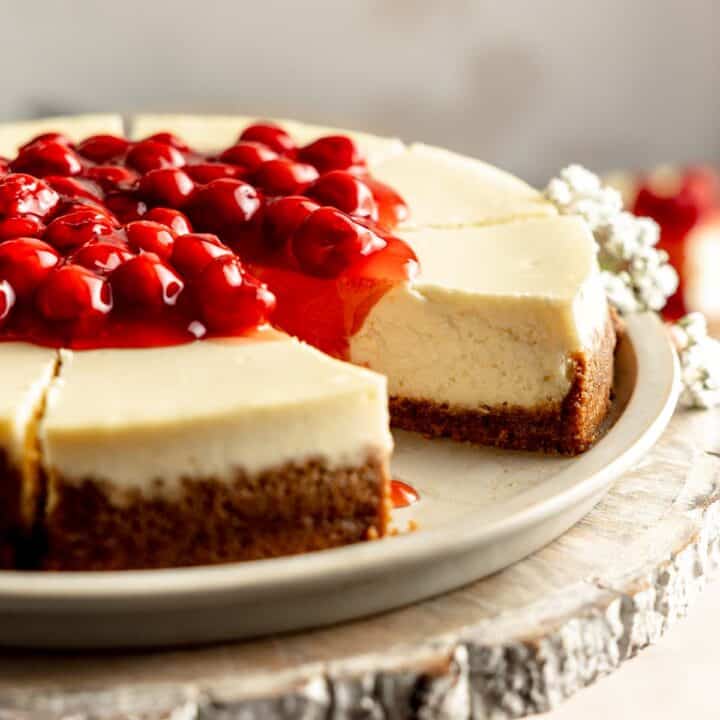
More Gluten-Free Cheesecake Recipes
We LOVE cheesecake around here! Check out even more of my creamy and delicious gluten-free cheesecake recipes!

Still Hungry? Subscribe Here!
Recipe
Gluten-Free Pumpkin Swirl Cheesecake
Equipment
- 9-inch springform pan
- 2 pieces heavy duty foil large enough to cover the bottom and sides with one sheet
- Large roasting pan big enough to fit the springform pan
Ingredients
Graham Cracker Crust
- 2 cups gluten-free graham cracker crumbs (or gluten-free crunchy gingersnap crumbs)
- ¼ cup granulated sugar
- 6 tablespoon butter
Cheesecake Filling
- 24 ounces cream cheese (3(8-ounce) packages, softened)
- 1-½ cups granulated sugar
- 3 tablespoons cornstarch (can be omitted if needed)
- ½ cup sour cream
- 3 large eggs
- 1 Tablespoon vanilla extract
Pumpkin Filling
- 15 ounces pumpkin puree
- 1-½ teaspoon ground cinnamon
- 1-½ teaspoon pumpkin pie spice
- fresh whipped cream, caramel sauce, and roasted pepitas (optional for garnish)
Instructions
For the Crust:
- Preheat oven to 350°F and line a 9-inch springform pan with parchment paper. Spray pan with non-stick spray.
- Combine the gluten-free graham cracker crumbs and ¼ cup sugar, then stir in the melted butter.
- Press the mixture evenly into the prepared pan and bake for 10 minutes.
- Remove the crust from the oven and let it cool slightly while preparing the filling. Reduce oven temperature to 250°F.
Make the Cheesecake Filling:
- Blend the softened cream cheese, sugar, and cornstarch until smooth.
- Add sour cream, eggs one at a time, and vanilla extract-mixing after each addition just until combined.
- In a separate bowl, mix pumpkin puree with cinnamon and pumpkin pie spice.
- Stir 2 cups of the cheesecake mixture into the pumpkin mixture until smooth.
Assemble the Cheesecake:
- Wrap the cooled springform pan in two layers of heavy-duty foil, making sure it's tightly sealed around the bottom and up the sides without gaps or holes.
- Place alternating dollops of the plain and pumpkin cheesecake mixtures onto the crust.
- Swirl the mixtures with a spatula or knife, being careful not to disturb the crust.
Bake the Cheesecake:
- Bring a large pot of water to a boil.
- Place the foil-wrapped pan into a large roasting pan. Pour enough boiling water to reach halfway up the sides of the springform pan, taking care not to get it into the cheesecake.
- Carefully transfer the roasting pan to the oven. Bake at 250°F for 1-½ to 2 hours, until the edges are set but the center is still slightly jiggly.
- Turn off the oven and leave the cheesecake inside to cool for 1 hour.
- Refrigerate for 4-6 hours or overnight before removing the cake from the springform pan. Keep cake chilled until ready to serve. Garnish with whipped cream, caramel sauce, and roasted pepitas if desired.
Notes
- 11/23/24: Edited to add cornstarch to list of ingredients. It helps to thicken the filling allowing it to set more firmly. Can be omitted but the cheesecake may have a softer texture.
- This cake takes a while to make and is broken down into several steps. Be sure to read the instructions and plan ahead for the timing.
- Make sure your cream cheese is very soft to avoid lumps. It is also helpful if the sour cream and eggs are room temperature.
- Be sure to follow all of the baking and cooling steps. The gradual cooling process is will finish the baking process and prevent cracks.
Nutrition
* Nutritional information is provided as a courtesy and should be used as an estimate only. See the nutrition policy for more information.
Thomas BeBroker says
Great article! The cheesecake sounds delicious and perfect for Thanksgiving. I've never combined pumpkin and cheesecake before, and I'm intrigued by the gluten-free crust options you recommended. Are there any tips for keeping the cost down while sourcing these ingredients? I'm curious how this fits with the rising food prices these days. Looking forward to trying out the recipe!
Katie Olesen says
I love my Costco membership for this reason. They had the simple mills sweet thins for a great price.