Discover an easy and delicious gluten-free sourdough bread recipe! Perfect for beginners, my straightforward approach demystifies the process, cutting out unnecessary steps. Crafted with Caputo Fioreglut for an unbelievable texture, this is a must-try recipe!
💌 Want to Save This?
Unsubsribe at any time.
Jump to:
- Why You'll Love This Recipe
- Recipe Testing Notes
- Ingredients
- Caputo Fioreglut
- Substitutions
- Equipment
- Use Active Starter
- How To Make Gluten-Free Sourdough Bread
- Baking the Bread
- Cool Completely After Baking
- Storage
- Recipe FAQs
- Top Recipe Tips
- More Gluten-Free Bread Recipes
- Got Discard?
- Need a Gluten-Free Sourdough Starter?
- Join My Newsletter!
- Recipe
- Comments and Ratings
Why You'll Love This Recipe
If you've been around here a while, it's no doubt you are aware I've created many recipes that use Caputo Fioreglut gluten-free flour, like my gluten-free brioche bread, gluten-free cinnamon rolls, and the best gluten-free pizza you'll ever make! I'm excited to dive into the world of sourdough using this same flour! Here's what you'll love about my recipe:
- Simple steps. No need for stretch and folds since there is no gluten! Just mix, let rise, and bake.
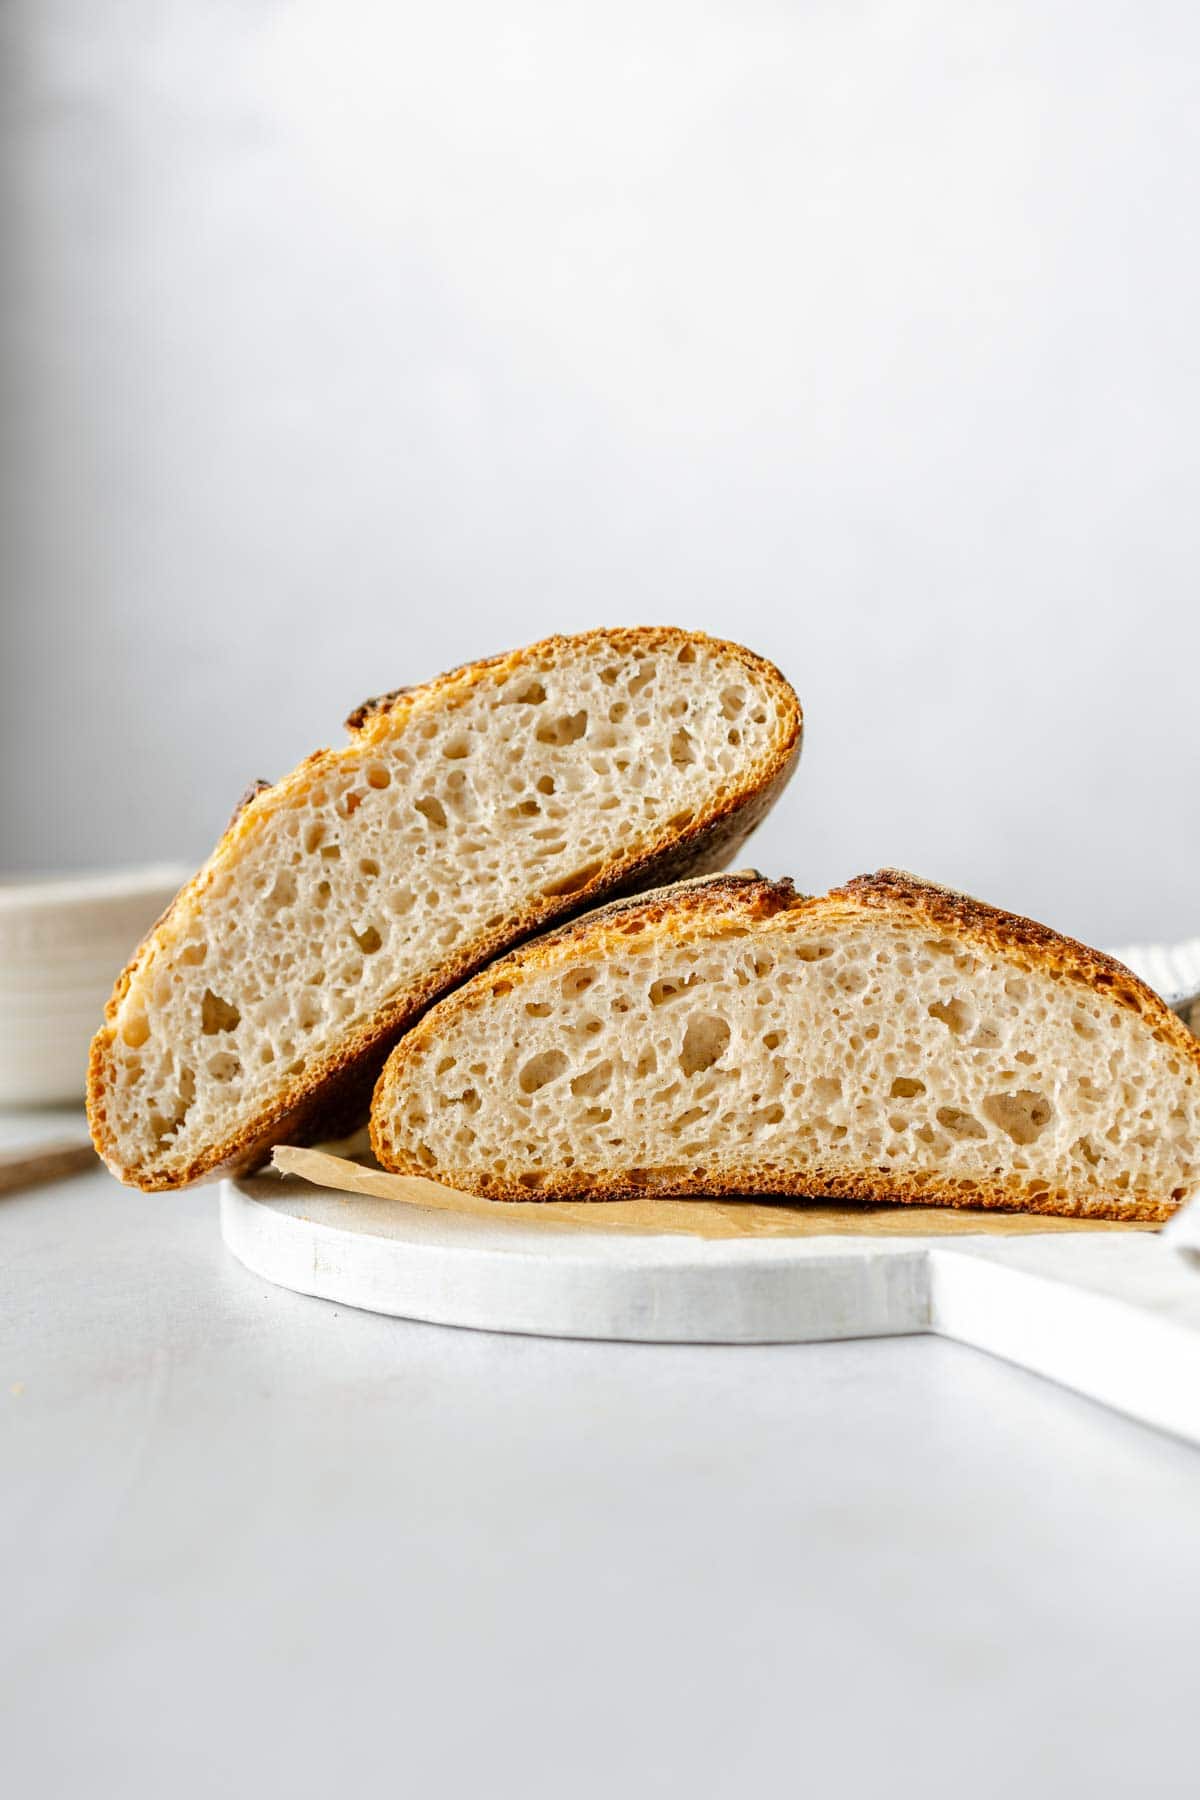
- Light, open crumb. This bread is about as light and airy as you'll get with gluten-free bread. I've made a lot of dense loaves, and this is not one of them!
- Easy to understand recipe with tips and tricks along the way!
- Short list of ingredients. You won't need a bunch of different flours. All ingredients are easy to find and use!
If you end up enjoying this recipe, be sure to check out my gluten-free sourdough sandwich loaf made with Caputo Fioreglut as well!
Recipe Testing Notes
I made so many loaves of bread in the process of testing this recipe. Here are a few of the trials and errors I encountered along the way to perfecting this gluten-free bread recipe:
- 100% Fioreglut: I tried this loaf using all Caputo Fioreglut. While it was good, very light and airy, in the end I felt it was too light and oddly spongey. The next round I tried adding a bit of whole grain sorghum flour for its depth of flavor and nuttiness. It was the perfect combination of lightness yet hearty texture.
- Whole husk vs. psyllium husk powder: Many people rave about using whole husks over psyllium husk powder. I have tried both many times, as I did in this recipe as well. I much prefer the psyllium husk powder for several reasons:
- It creates a stronger gel with less psyllium.
- The powder blends easily within the dry ingredients; no need to make a gel first. This eliminates a step and saves time.
- The powder creates a smoother dough compared to the use of whole husks.
- Oven temperature: Most sourdough recipes call for baking at 450°F, or higher, to develop a nice, hearty crust. It does work, but I kept finding that this bread was too crusty and almost impossible to slice. By the time I sliced through it, there wasn't enough soft interior and the crust was so hard it was not even enjoyable to eat. I reduced the oven temperature to 400°F and that did the trick! Perfectly crusty, without being too hard. Still fully cooked without being gummy. The crust was evenly browned, without a burnt bottom.
- Honey: You don't need a sweetener in this recipe, it works fine without it. But the addition of honey, even the small amount used in this recipe, definitely aids in the browning process.
Ingredients
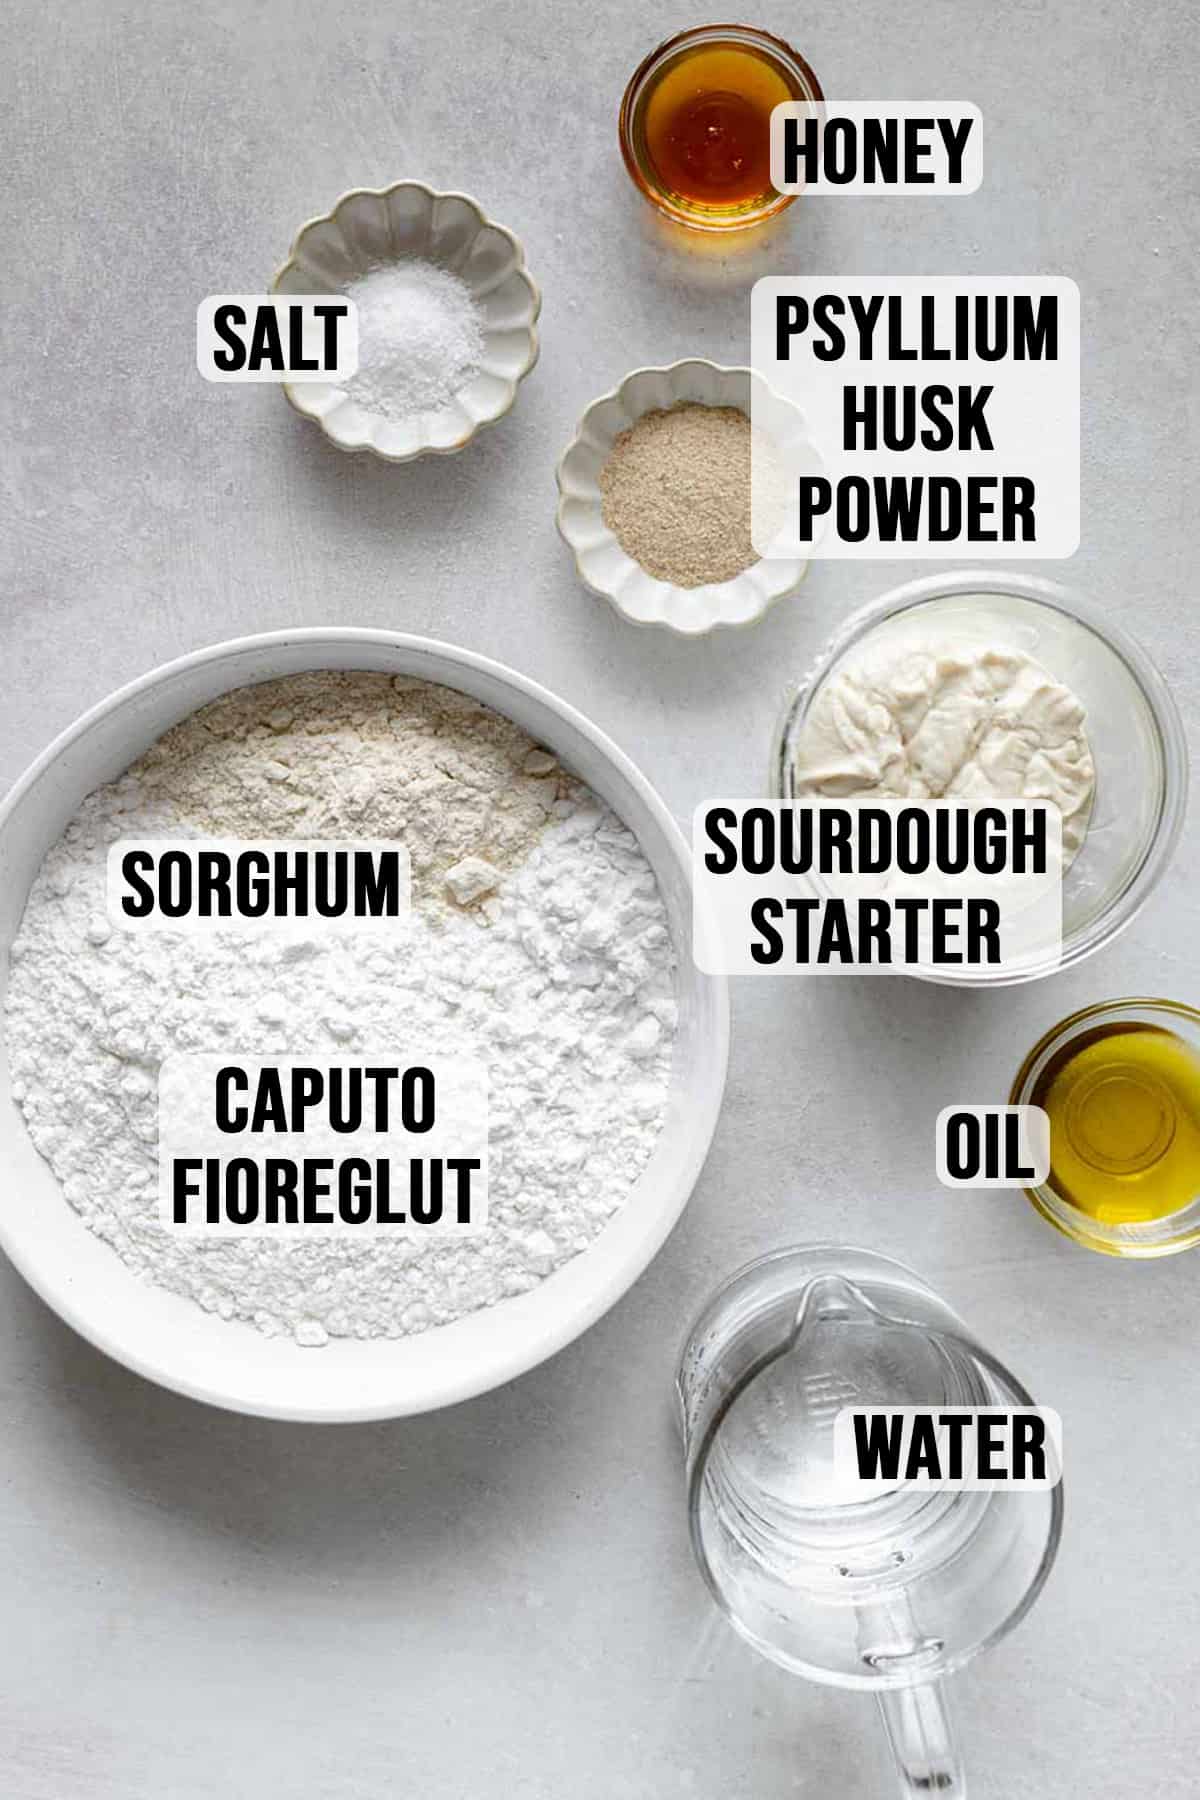
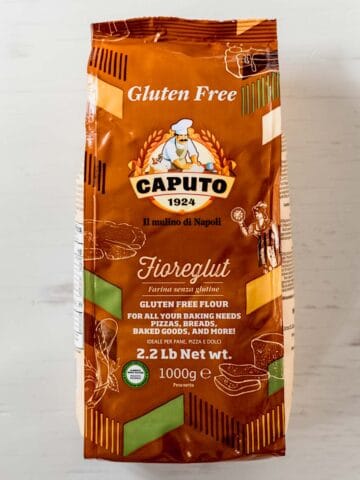
- Caputo Fioreglut: This is the only gluten-free flour blend I recommend for this recipe. It is an Italian gluten-free flour blend that does contain gluten-free wheat starch. Read my article about gluten-free wheat starch if you're new to this product.
**Please note: this flour is certified gluten-free and tests to less than 5ppm; I have contacted the company many times about it. It is not wheat free. This means it will be safe for someone with celiac disease or gluten sensitivity but not for someone with a wheat allergy. - Sorghum Flour: I added sorghum for a boost of whole grains and also nutty flavor. It really makes the recipe so much more delicious!
- Psyllium Husk Powder: I oscillate between whole psyllium husk and psyllium husk powder in my recipes. I find they are both fine to use in most applications. In this recipe I preferred the psyllium husk powder; it incorporates better and produced a better crumb but feel free to use whichever one you have on hand. My psyllium husk conversion calculator can help you with calculating the difference.
- Gluten-Free Sourdough Starter: If you don't already have a gluten-free sourdough starter, you'll need to create one from scratch. You can read through my post to learn how to make a gluten-free sourdough starter in about 7 days! You can also check out these sourdough starter resources from The Gluten-Free Austrian and Bakerita. I found it helpful to read from several sources when learning how to make my own sourdough starter because the topic can quickly become confusing if you're new to the process. It really is more simple than it seems; you just need brown rice flour and water to get started.
- Oil: I used avocado oil or olive oil; any oil should be fine here. It softens the crust just a bit, even though the loaf is still very crusty.
- Honey: You can use sugar if you prefer. The sweetener adds a depth of flavor and enhances the wild yeast, and aids in browning.
- Kosher salt
*Refer to the recipe card for full ingredient information.

Get the Goods!
Caputo Fioreglut
I recommend you buy Caputo Fioreglut from Brick Oven Baker. They have great prices and you can use code: KATIE for 10% off your first order!
Substitutions
- Caputo Fioreglut: I do not have recommendations for an alternative flour as I have only made this bread with this flour. I have yet to try the new King Arthur Bread flour.
- Sorghum Flour: Substitute with an equal amount of Caputo Fioreglut if you'd like to leave it out.
- Psyllium Husk Powder: You can use whole husk if that is what you have. Increase to 3 teaspoons or an equal weight when measured in grams.
- Honey: Substitute an equal amount of sugar when measured by weight.
Equipment
- A stand mixer is helpful for this recipe as it needs to be mixed for 3 minutes on medium speed. A sturdy hand mixer may work as well but it will be harder on the motor. If you need to mix by hand, mix vigorously with a wooden spoon until very well combined.
- A small (7-inch) banneton basket and liner is helpful but not required. I got mine from Breadtopia. If you don't have a basket, a small bowl of a similar size will work as well. Line the bowl with a lint-free, 100% cotton, flour sack towel or tea towel.
- A bread lame, fresh razor blade, or sharp serrated knife is needed to score the dough.
- Parchment paper is essential for transferring the bread into the oven.
- A dutch oven creates the perfect environment for cooking sourdough boules. A 5-quart or 6-quart dutch oven is the perfect size.
- A kitchen scale is easy to use and always accurate. It's the best way to measure ingredients for this recipe. You can get a digital kitchen scale for as little as $10.
- A seed starting mat or bread proofing box may be required if your house is chilly, especially during the winter months. I was having trouble with my starter becoming active and I determined my house was just too cold. I picked up a seed starting mat and my starter and breads have been rising and happy ever since.
Use Active Starter
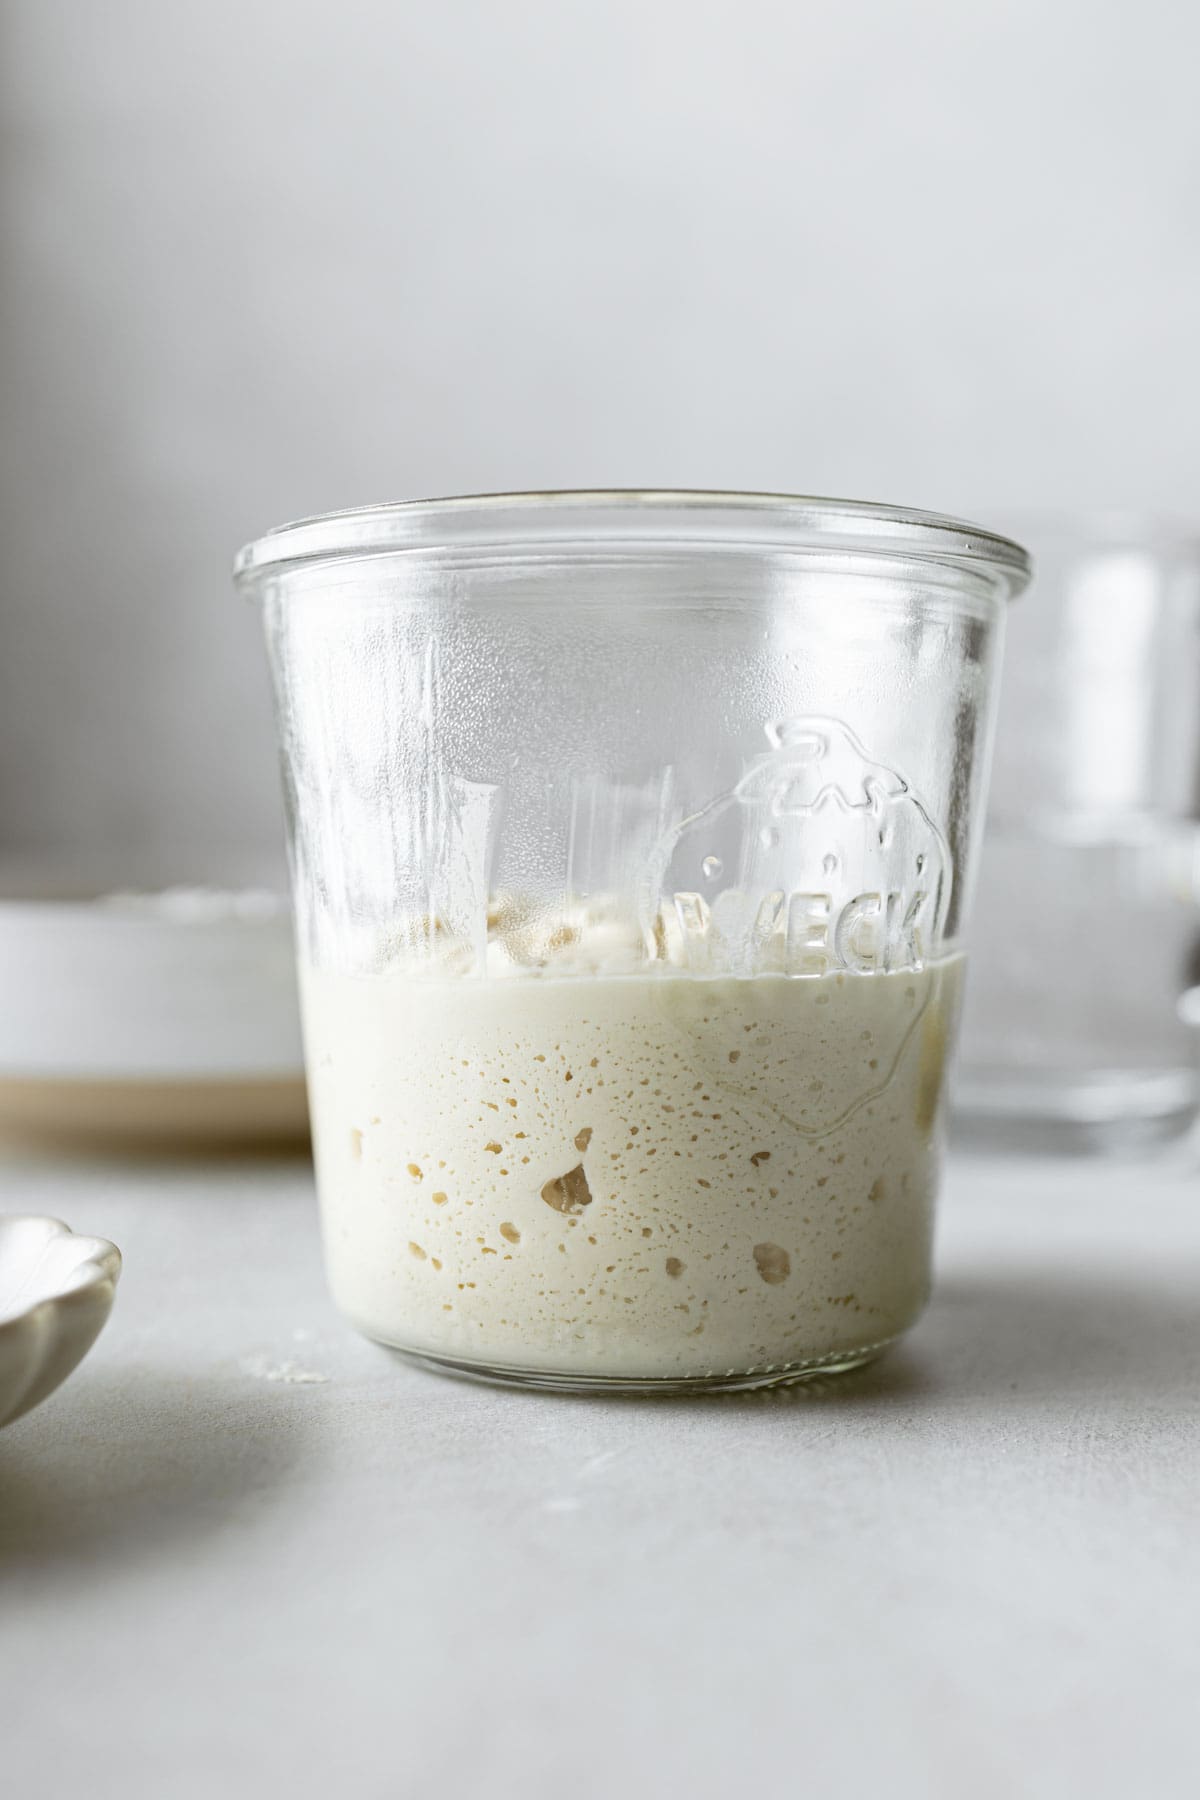
The success of this recipe depends on using active, bubbly starter. A bubbly active starter is one that has been fed within the past 12 hours and is nearly doubled in size.
- If your starter is currently refrigerated, bring it to room temperature and feed the starter at least 2 times to get it active again before using it in the bread. This will build up the yeast and prepare it for baking.
- If your starter has been at room temperature and fed daily, it is likely already strong, so feed the starter 2-4 hours before you're ready to mix the dough using a 1:1:1 ratio. Plan to use the starter just after it peaks.
How To Make Gluten-Free Sourdough Bread
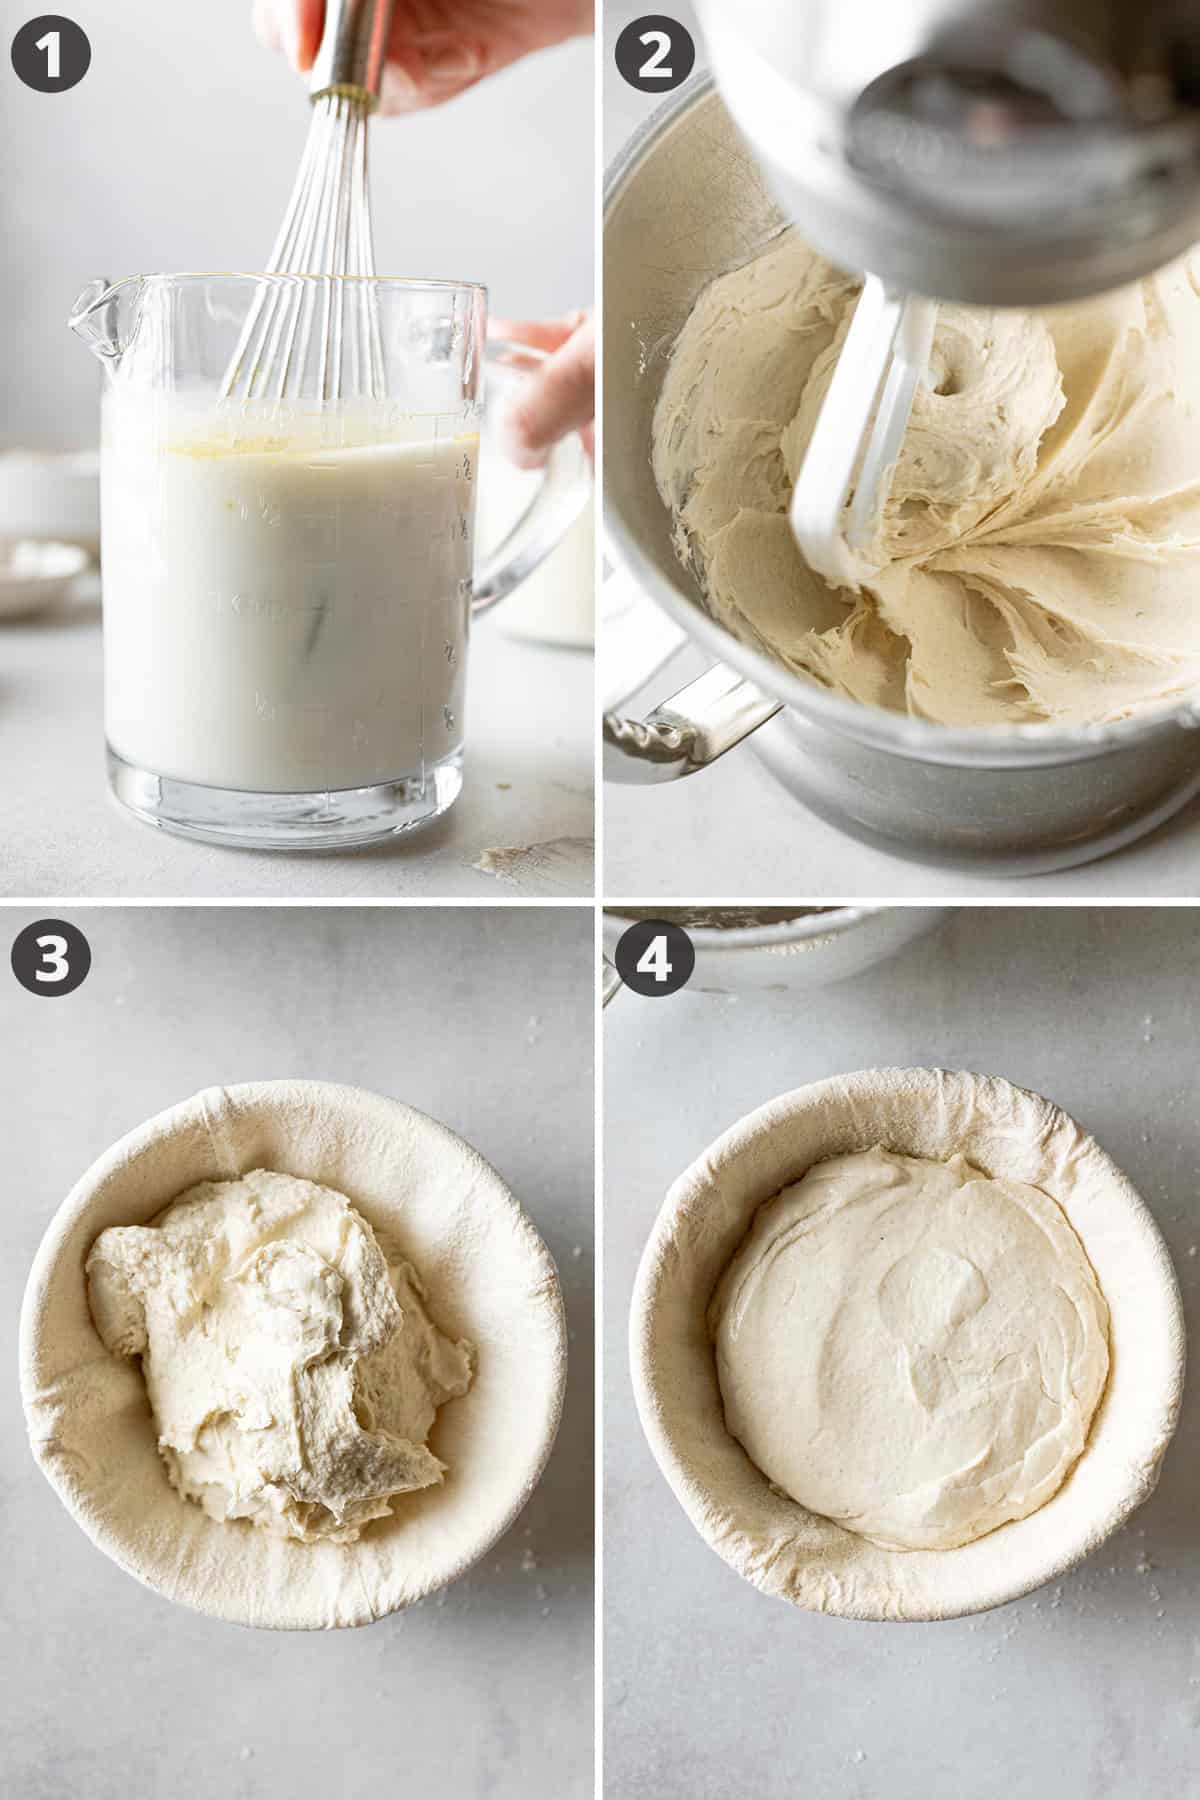
- Whisk together the sourdough starter, warm water, honey, and oil. Whisk together the dry ingredients; Caputo Fioreglut, sorghum flour, psyllium husk powder, and salt.
- In the bowl of a stand mixer, add the wet ingredients to the dry ingredients. Blend on medium speed for 3 minutes, scraping the bowl as needed. I prefer to use the paddle attachment over the dough hook as it does a better job at mixing the ingredients.
- Dust the banneton liner with brown rice flour. Scrape the dough into the prepared banneton basket.
- Smooth the dough out with a spatula or wet hands. Cover with plastic wrap to prevent the dough from drying out. Set aside in a warm place to allow the dough to go through its initial rise, or bulk fermentation.
Baking the Bread
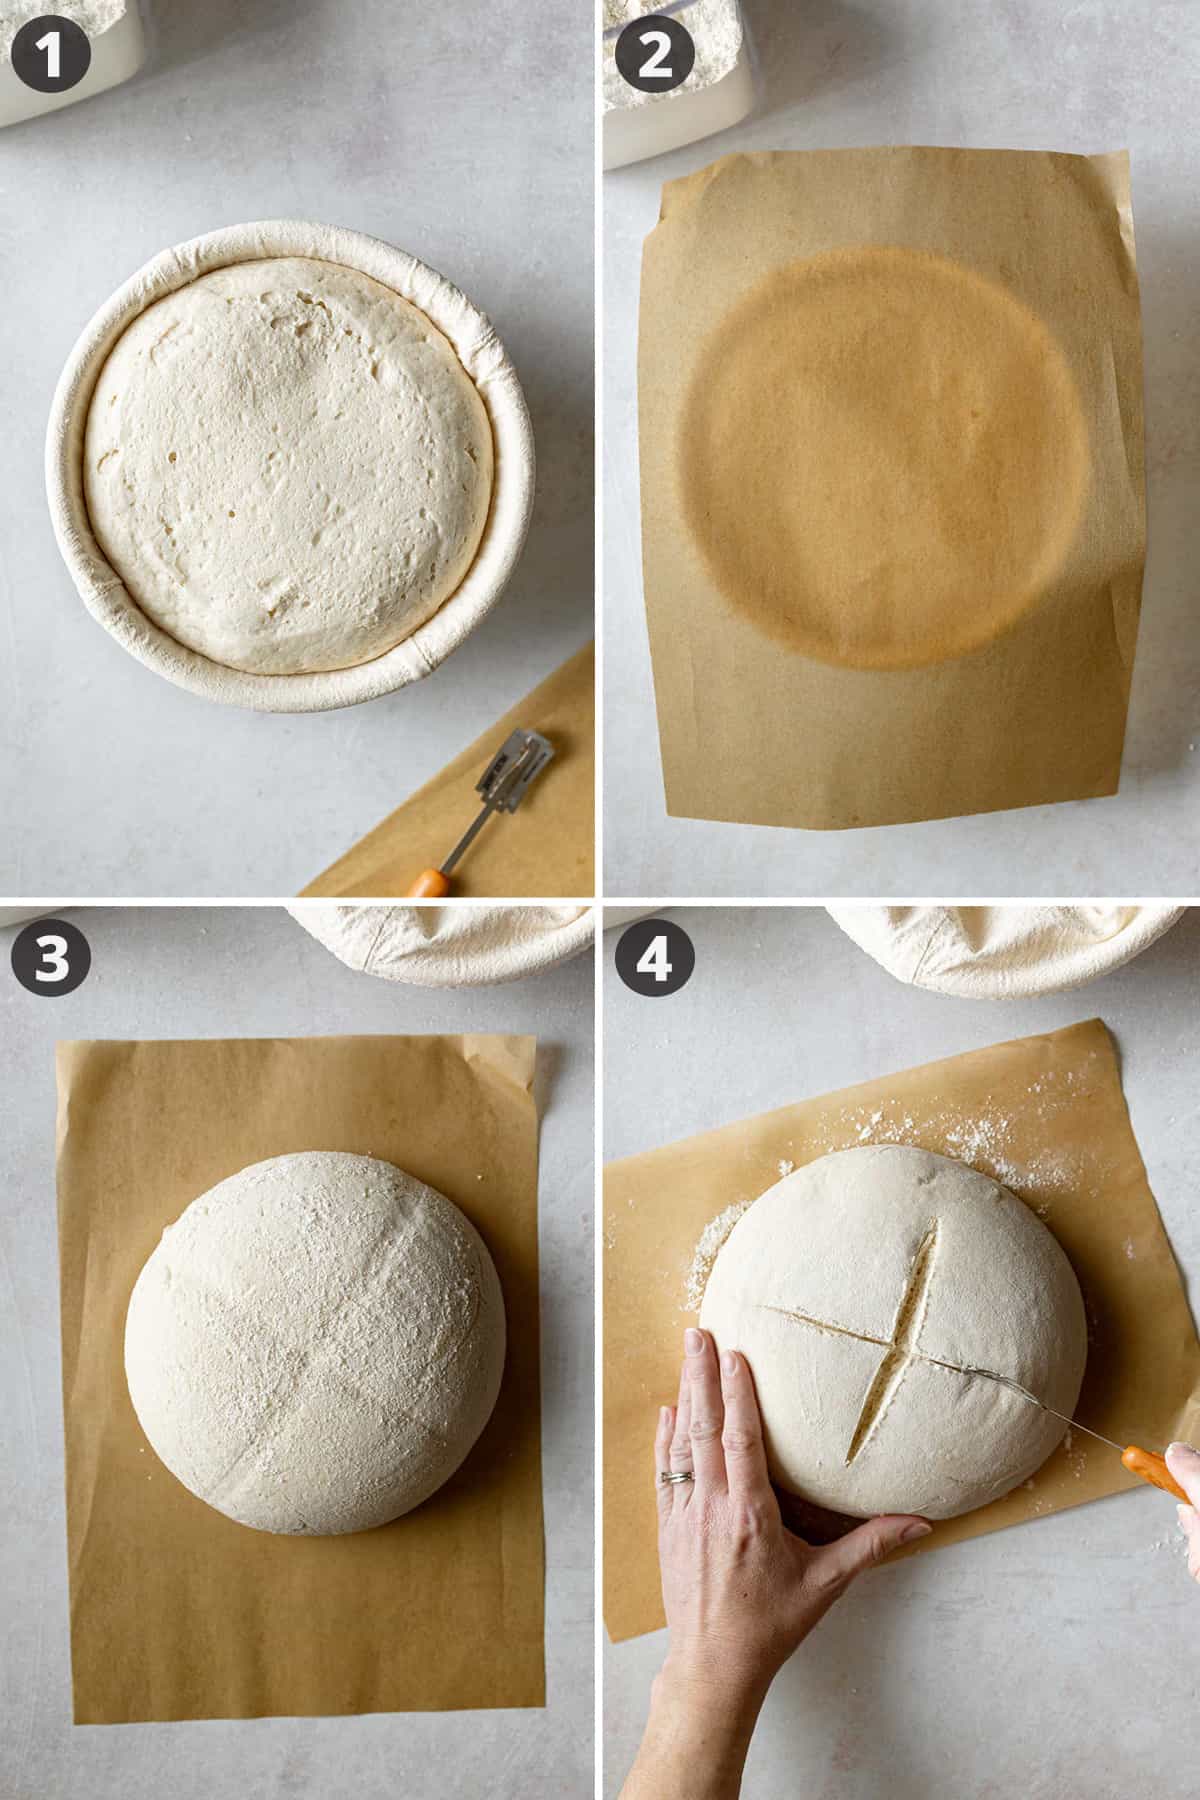
- Once the dough has about doubled in size, you can either bake the bread right away or refrigerate, up to overnight, until you're ready to bake.
- Once you're ready to bake the bread, preheat the oven, with your dutch oven inside, for at least 30 minutes. Place a piece of parchment paper over the bread.
- Flip the bread out of the banneton basket. At this point you can dust with a bit more brown rice flour, if desired.
- Score the bread with a bread lame, clean razor blade, or sharp serrated knife.
- Bake according to the instructions in the recipe card below.
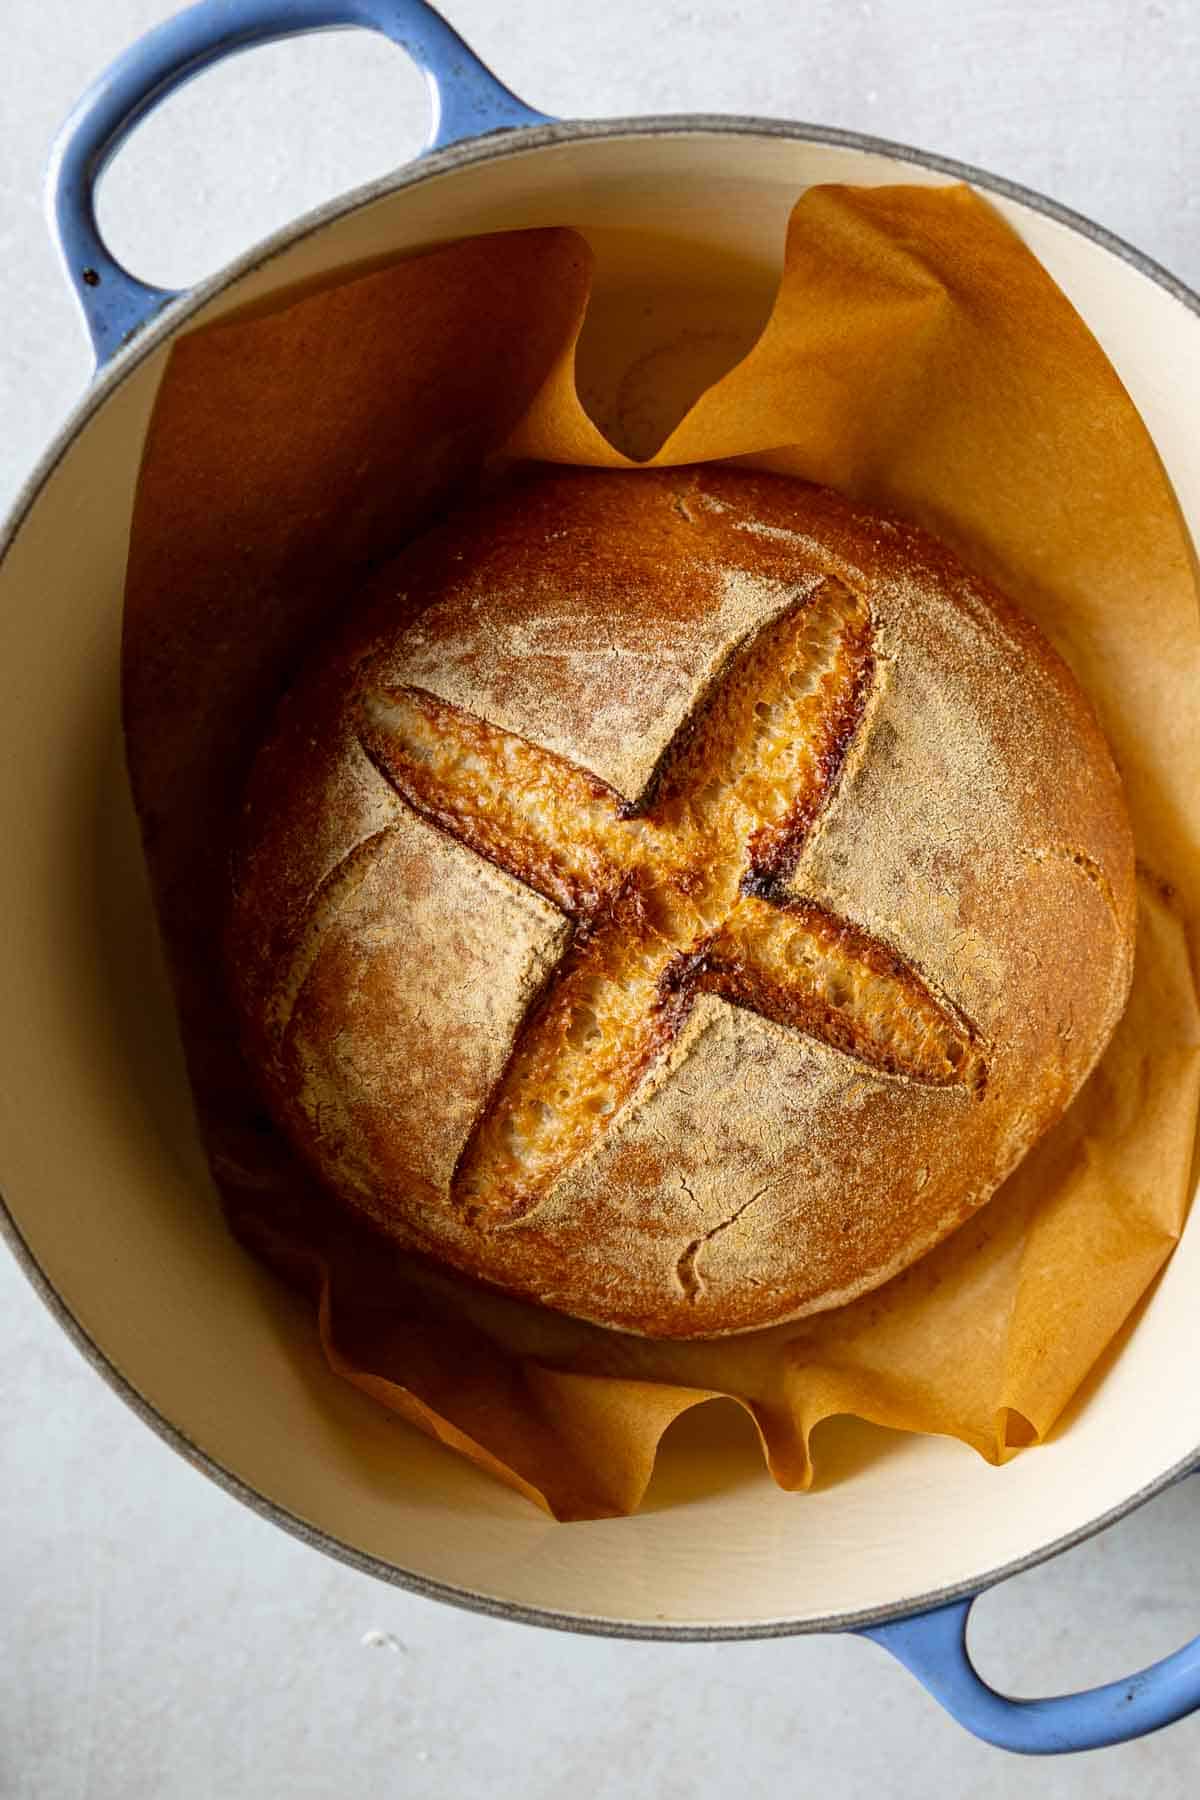
Cool Completely After Baking
Be sure to cool the bread completely after baking. This is a crucial step, as the bread will continue to cook as it cools. Cutting it too soon can result in a gummy interior.
Storage
As with all gluten-free bread, this bread is best eaten as fresh as possible. Store at room temperature for 1-3 days, in an airtight container, or freeze slices to enjoy later on.
Recipe FAQs
Traditional sourdough bread is not gluten-free; it is made with wheat flour. Some people with gluten-intolerance, not celiac disease, report sourdough bread is easier for them to digest, due to the fermentation of the dough.
Be advised, there is still plenty of gluten found in regular sourdough bread and it should not be consumed by someone with celiac disease. If you are strictly gluten-free, you need to pursue a gluten-free sourdough recipe made with strictly gluten-free ingredients, including a gluten-free sourdough starter.
This is a common complaint amongst gluten-free sourdough bread bakers. There are three main reasons why the bread could be gummy:
1. Baking times. The bread was not baked long enough for the moisture to be absorbed by the flours. Believe it or not, it's hard to over-bake a loaf of gluten-free bread, but you can surely under-bake it!
2. Coarse flours. Be sure to use superfine flours, these are finer ground and tend to absorb moisture better.
3. Improper cooling. The bread was not cooled properly before slicing. Be sure to cool completely, at least 2-4 hours, before slicing. The bread will continue to cook and absorb moisture during this time.
If you feel your bread is not rising, there are a few issues that could be causing this.
1. Time. Gluten-free sourdough bread takes much longer to rise than breads made with active dry yeast. This sourdough bread typically takes anywhere from 3-4 hours or more to fully double in size.
2. Temperature. If your kitchen is cold, consider finding a warmer spot to allow your dough to rise. That could be in the oven with just the light on, in the microwave with a freshly boiled cup of water, or on top of the refrigerator. I picked up a seed starting mat and it has been the perfect solution. My breads and starter have been very happy since I've starting placing them on the warm mat during the fermentation process.
3. Inactive starter. Be sure your starter is active and bubbly before using in recipes. You want to have recently fed the starter and noted that it has about doubled in size or become very bubbly before use.
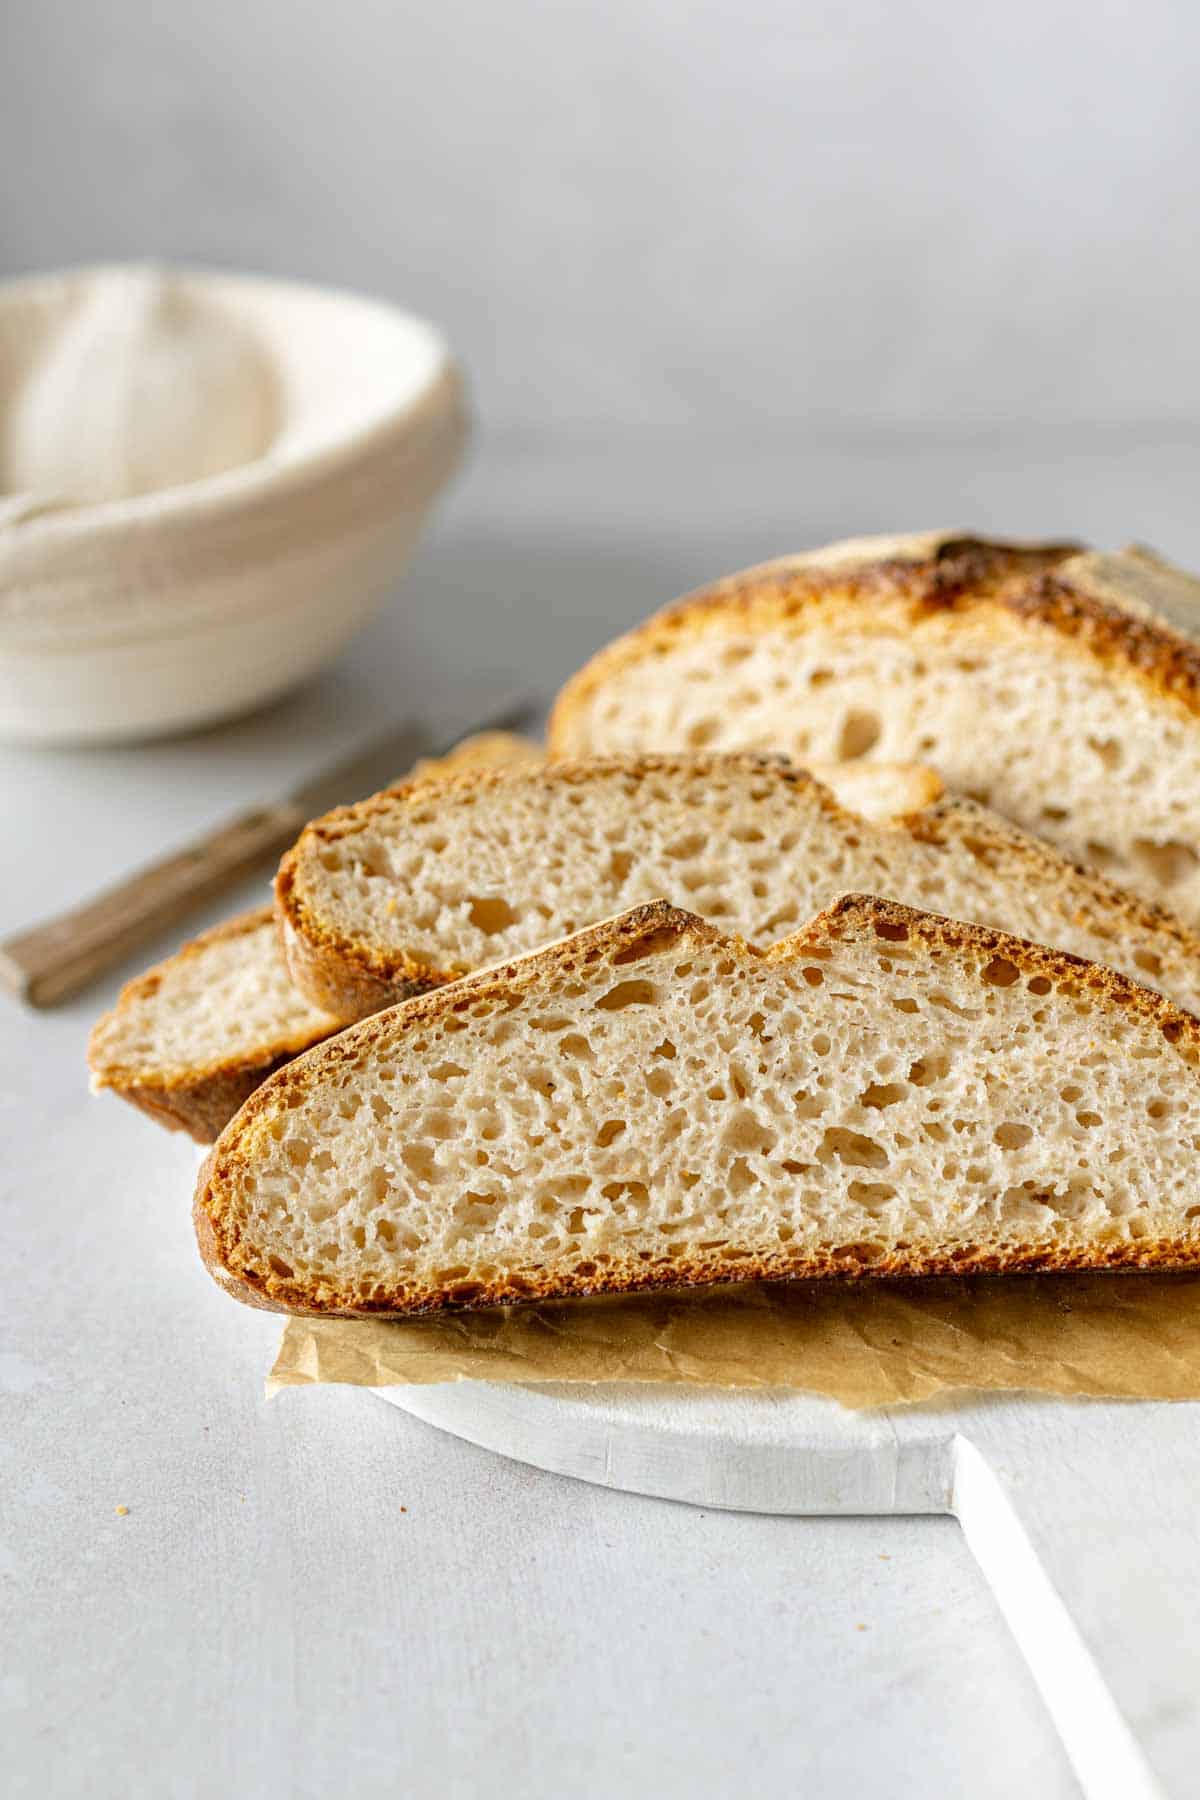
Scoring sourdough bread is a technique used to control oven spring, for aesthetic purposes, and overall quality. As the dough bakes, scoring creates intentional cuts that guide the rapid expansion of the bread as it meets the hot oven, known as oven spring. Scoring also allows for gasses to be released and prevents the bread from cracking unevenly. The result is a beautifully risen loaf with a crisp crust and a light, airy interior.
Top Recipe Tips
- Bulk fermentation, the process of the dough rising and doubling in bulk, will take a long time. Depending on the activity of the yeast and dough temperature, it can take anywhere from 2-5 hours or longer.
- You can refrigerate the dough either before the bulk fermentation or after. Either way, don't refrigerate longer than overnight or the bread will overproof.
- If you like your loaf extra crusty, bake the loaf 10-15 minutes longer with the lid off. Keep an eye on it so it's not too brown.
- If you like a softer crust, let the loaf cool inside the dutch oven with the lid on for about 15 minutes.
- To refresh a loaf that has lost its crisp crust, quickly run the (whole, unsliced) loaf under running water then bake for 15 minutes at 350°F.
More Gluten-Free Bread Recipes
Try my Gluten-Free Detroit-Style pizza or the amazing recipes below!
Got Discard?
Use up some of your discard with my gluten-free sourdough discard recipes:
Need a Gluten-Free Sourdough Starter?
Be sure to read the associated gluten-free sourdough starter blog post!
Join My Newsletter!

Recipe

Gluten-Free Sourdough Bread
Ingredients
- 115 grams active gluten-free sourdough starter
- 280 grams water, warm
- 15 grams oil
- 25 grams honey
- 275 grams caputo fioreglut gluten-free flour blend
- 60 grams superfine sorghum flour
- 7 grams psyllium husk powder
- 8 grams kosher salt
Instructions
Make the Dough
- Whisk together sourdough starter, warm water, honey, and oil in a small bowl.
- In the stand mixer bowl, whisk together the Caputo Fioreglut, sorghum flour, psyllium husk powder, and salt.
- Add the wet ingredients to the dry mixture. Affix the paddle attachment to the stand mixer, blend on low to incorporate, then increase to medium speed. Blend for 3 minutes, scraping the bowl as needed.
- Dust the banneton liner with brown rice flour. Scrape the dough into the prepared banneton basket.
- Smooth out the dough with a spatula or wet hands. Cover with plastic wrap to prevent the dough from drying out.
- Set the basket aside in a warm place to allow the dough to rise until almost doubled or it reaches the top of the banneton basket. This can take anywhere from 2-5 hours.
- Once doubled, bake immediately or refrigerate, up to overnight.
Bake the Bread
- When ready to bake, preheat the oven to 400°F, along with the dutch oven inside, for 30 minutes.
- Place a piece of parchment paper over the bread. Flip the dough out of the banneton basket onto the parchment paper. Dust with a bit more brown rice flour, if desired.
- Score the bread with a bread lame or sharp serrated knife.
- Transfer the bread to the dutch oven, using the parchment paper to help lift. Add two large ice cubes, replace the lid, and close the oven.
- Bake, covered, for 30 minutes. Remove the lid and bake another 30 minutes, uncovered.
- Remove the bread from the oven and let it cool completely inside the Dutch oven with the lid off, at least 2-4 hours before slicing.
Notes
Nutrition
* Nutritional information is provided as a courtesy and should be used as an estimate only. See the nutrition policy for more information.








Melissa says
This recipe is the best. I have made it a couple times but I keep messing something up even though the bread still tastes super good. Practice makes perfect. Is this not supposed to rise so much? My bread is a little flat but not so flat. I keep thinking it should be higher. I wish I could post a picture so you could see it.
Katie Olesen says
I'm glad you're enjoying the recipe, Melissa! My bread doesn't rise too much in the oven either, so I try to get as much rise out of it as I can before I bake the loaf.
Lou Reynolds says
Wow - Thank You!!! I followed the instructions closely, only substituting Teff for the Sorghum flour. (also forgot the ice in the dutch oven). The bread is beautiful and tastes fantastic. Perfect crust. It is my first sourdough loaf and the recipe looked good (and I happened to have some fioreglut - which I used for sourdough pizza last week). My starter is not very vigorous (it is buckwheat) and I did an overnight with my dough in the fridge with a bag on it. It barely rose but it made a fantastic loaf. I rested it for a couple hours (which was difficult as the smell was amazing). Thanks, again!
Michele Heusinger says
I’m new to sourdough and have tried a few other recipes and nothing has compared to yours. I stumbled upon yours and had to try it since every recipe is 10/10. This is no exception. My only issue was the bottom was burnt. I’m wondering if I should have put on a higher rack in my wall oven?
I was also wondering how I would bake this same recipe but divided in two to make bread bowls?
Aside from that one issue and one question this recipe will be a staple in my home.
Katie Olesen says
If you baked in the lower third of your oven, moving to the center could definitely help. I would also recommend you try preheating the oven without the dutch oven inside, therefore starting the bread in a cold dutch oven rather than a preheated one. For bread bowls, I would gather two small bowls the size you'd like the bread to be, line with a tea towel dusted with rice flour, and let them rise in there. Unfortunately, I don't have bake times for this so you'll have to experiment. If you do, please let me know how it works out!
Courtney Wall says
This recipe helped me bake my first successful loaf of Gf sourdough bread!! The flour makes all the difference!!
It looks a bit wet on the inside when I cut it but it didn’t taste uncooked at all though! It was magically delicious
Katie Olesen says
Did you let it cool all the way before slicing? You could try 10-15 more minutes of bake time next time and see if that helps. Glad you enjoyed the recipe!
Melissa Casco says
This was such an easy recipe 💜.
My bread looks so nice I can’t wait till I cut it. The only thing is it didn’t brown so much 🥹. What could I have done wrong? I hope it taste as good as it looks.
Katie Olesen says
That is interesting. I find this bread to get deep golden brown and very crusty every time. I've even baked it just in a loaf pan and it still gets browned and crusty. I would ask these questions to figure out why it may not have browned as much: Did you bake it in a dutch oven and for the specified amount of time? Was your oven set to the correct temperature? Was the Dutch oven preheated inside the oven? Was the lid of the dutch oven on or off?
Melissa says
Does it have to have sorghum flour? It's so hard to find in stores.
Katie Olesen says
You can substitute with an equal amount of Caputo Fioreglut if you'd like to leave it out. It adds a nice flavor and texture but it does work without.
Suzie says
Okay this recipe is awesome!! I will say I tried it with a new starter too early probably and it did not turn out well. The second time I waited until my starter was 8 days along and I omitted the psyllium husk because I didn’t like the taste it gave the first time. This time, I got the most perfect loaf I’ve ever had! I used the gluten free caputo flour for my starter and as the flour in this recipe and it was absolutely delicious. I also followed your starter recipe which helped so much. I tried to make a brown rice flour starter and it didn’t work out for me, but your recipe using the caputo flour instead of brown rice worked out great. Thank you!!!
Katie Olesen says
Thank you so much for the awesome feedback, Suzie! That is good to know that Fioreglut worked so well for your starter and that the loaf worked well for you without the psyllium. Sounds like a great success even with a few modifications!
Elsa says
Okay silly question - I’m using a loaf Dutch oven - where am I adding the ice cubes?
Katie Olesen says
I usually add it between the parchment and the pan!
Charlene says
This recipe is perfection! I will say, I forgot to add the psyllium husk powder and it is still perfect! Just curious, what is the purpose of the psyllium husk? Am I missing out by not including it? Thanks so much for sharing!
Katie Olesen says
I add extra psyllium when I feel like the breads may need more structure or to help make the dough easier to work with. If it worked out fine for you, you're not missing out on too much. Maybe next time you can add the psyllium and see which version you prefer!
Kathy says
Impressive! Glad you did all the trial and error so we won’t have to.