
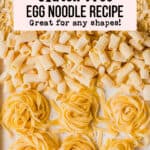
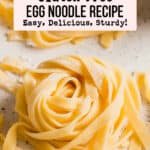


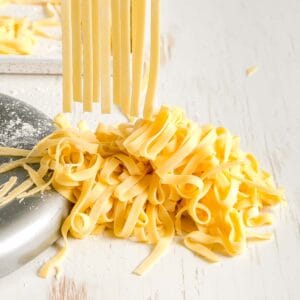
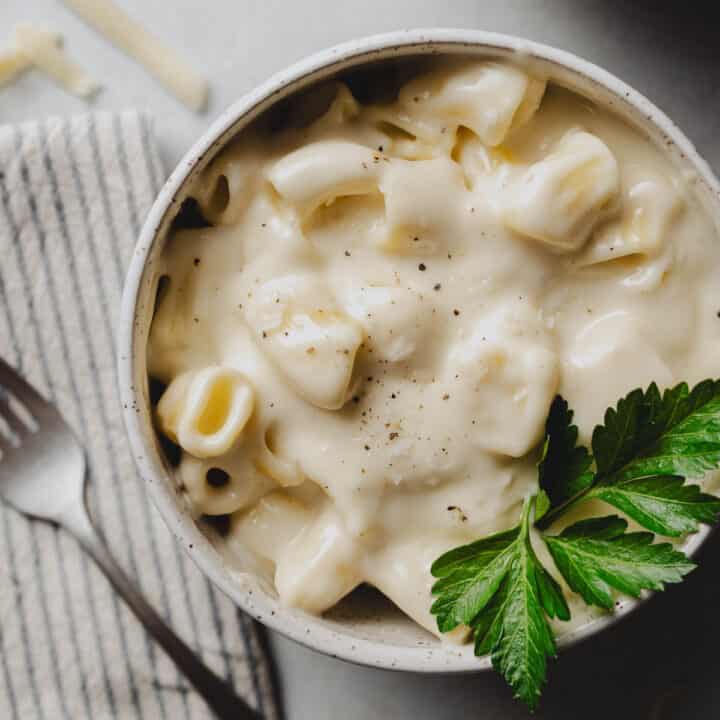
Learn how to make fresh gluten-free egg noodles with only four ingredients. This rich dough is pliable and easy to work with. These fresh egg noodles have a delicious taste and sturdy texture that does not fall apart when cooked! Use the dough to make homestyle egg noodles and any other pasta shapes you like!
Jump to:
- Recipe Review
- Why You'll Love this Recipe
- Four Simple Ingredients
- Special Equipment: KitchenAid Pasta Attachments
- How to Make Gluten-Free Egg Noodle Dough
- Important Tips for Making the Dough
- How to Roll and Cut the Pasta Dough
- Tips for Rolling and Cutting Gluten-Free Pasta Dough
- How to Store Fresh Gluten-Free Egg Noodles
- How to Cook Fresh Gluten-Free Pasta
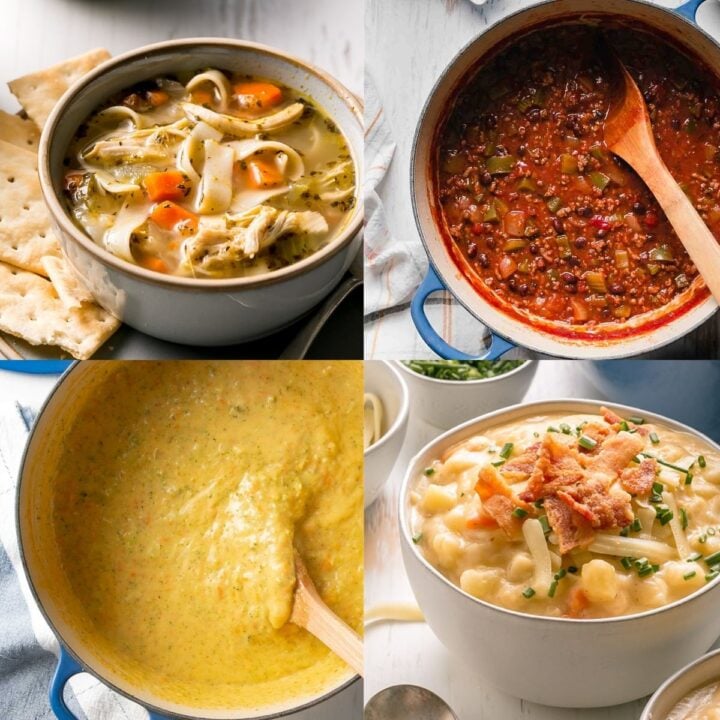
- Sauces to Pair with Homemade Gluten-Free Pasta
- Top Recipe Tip
- Recipe FAQs
- More Gluten-Free Recipes
- Recipe
- Comments and Ratings
Recipe Review
Thank you for this wonderful recipe! I have used this recipe weekly for the past four months to make rigatoni, fusilli, spaghetti & bucatini. I tried several other recipes and did not have good results. Knowing the texture you need is key to using the dough in the extruder. We are a happy gluten free pasta eating household! -Jen
Why You'll Love this Recipe
When you go on a gluten-free diet due to celiac disease or for other reasons, you end up spending a lot of time and money trying to find replacements for your favorite foods. Egg noodles are no exception. They're a the ultimate comfort food!
You see post after post in gluten-free groups with people asking, "where can I find good pasta?" "Which brands taste the best?" "Which ones taste like regular pasta?" All the while, you could have been making it yourself, right at home, without too much effort at all! Here's what you'll love about this recipe:
- Only four ingredients: gluten-free flour, eggs, salt, and water.
- The dough comes together in just a few minutes!
- The taste and texture of homemade egg noodles is much better than store-bought egg noodles.
- This recipe is relatively easy to make, albeit you'll need to make some time for it.
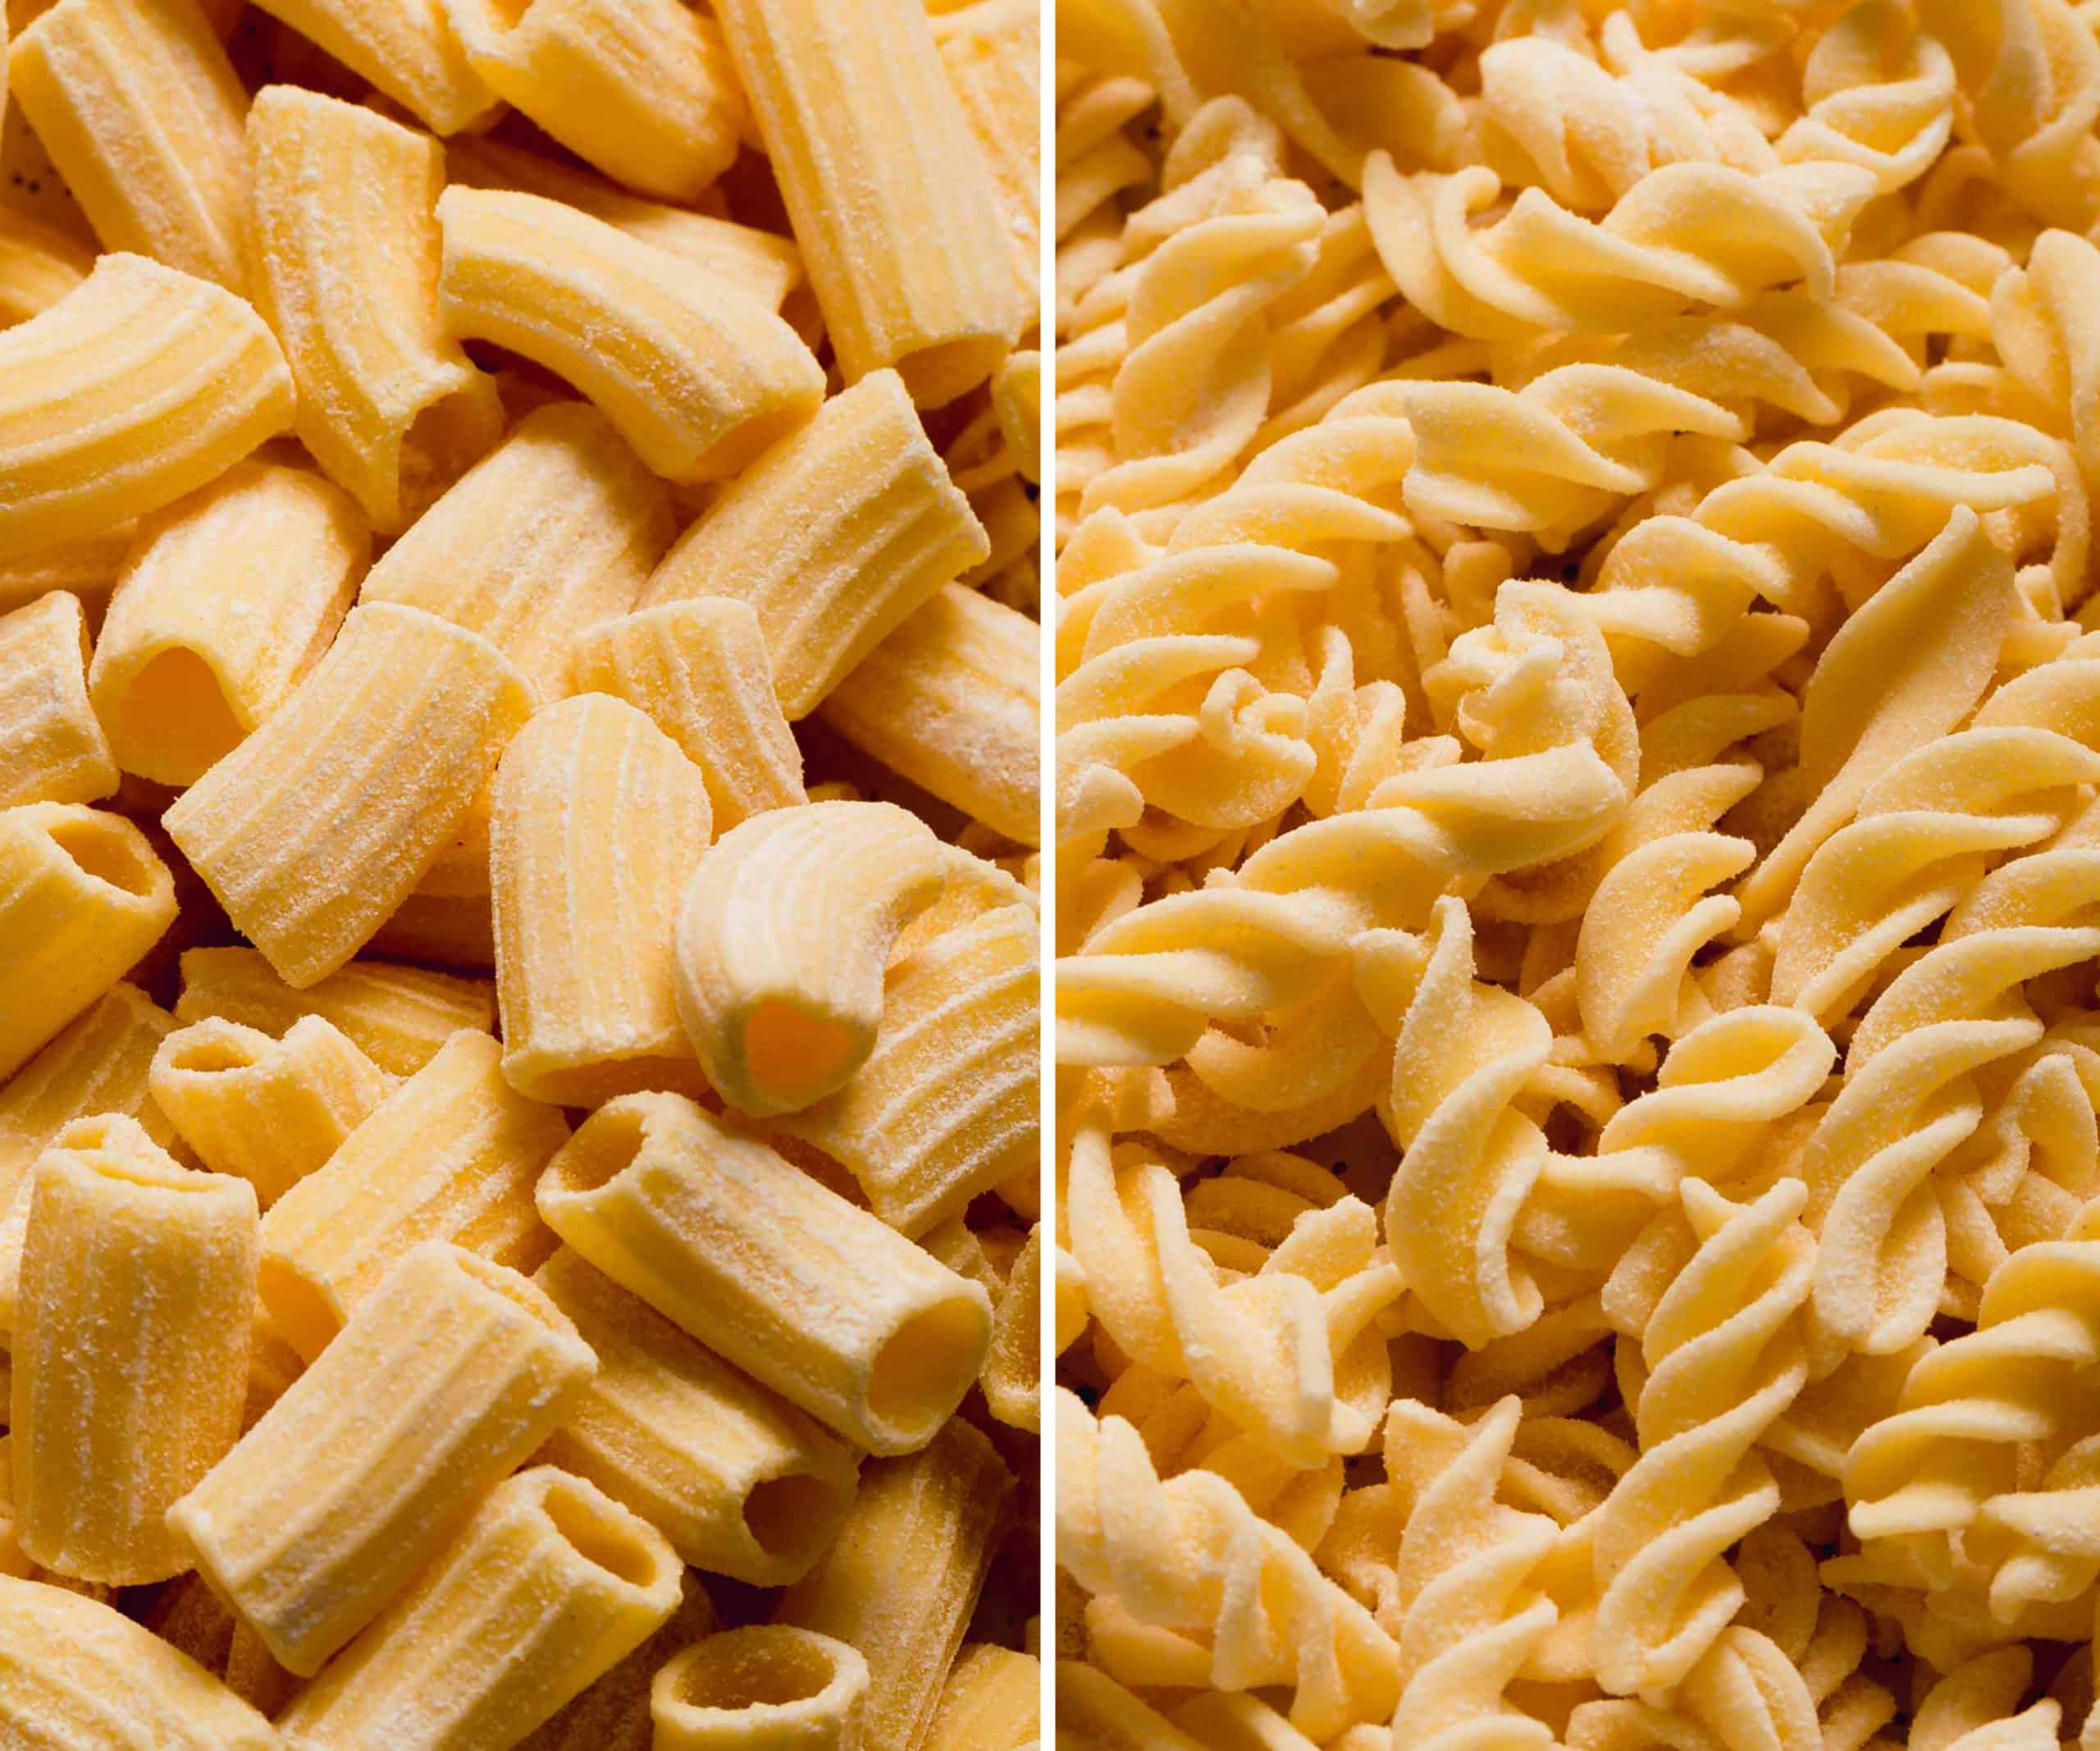
- This gluten-free pasta dough can be used to make pretty much any shape of pasta, including gluten-free ravioli, gluten-free lasagna sheets.
- Perfect for gluten-free chicken noodle soup or gluten-free lasagna.
- No pasta machine or roller required, but the recipe does work well with these tools.
- Also works well with a pasta extruder for shapes like fusilli and rigatoni.
- Freezes beautifully!
Four Simple Ingredients

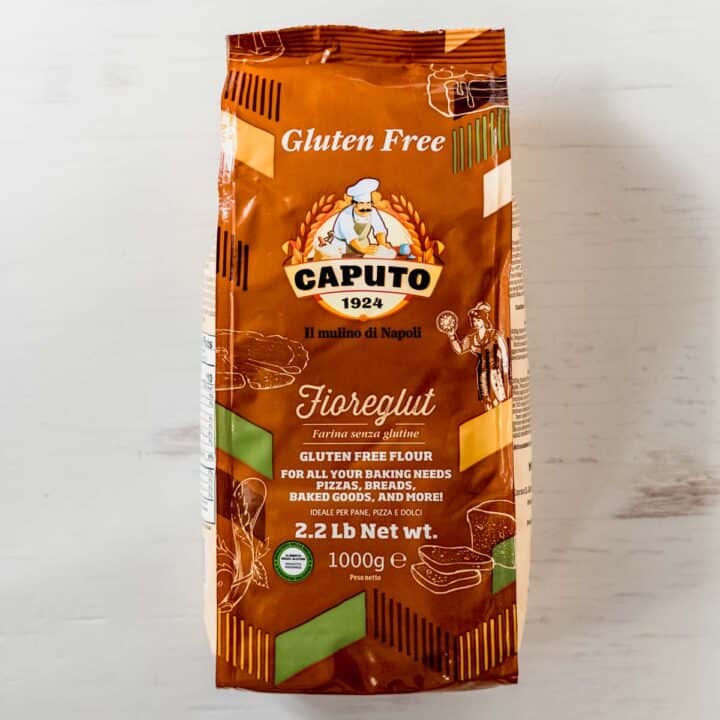
- Gluten-free Flour Blend: For this recipe, I highly recommend using either Cup4Cup Multipurpose Flour** or Caputo Fioreglut.
- **Please note: As of October 2024, Cup4Cup has changed their blend. The milk powder was removed and cornstarch is no longer the first ingredient. It is not performing as well as it used to in this recipe. You will likely need to add a bit more water than the recipe states to achieve the same results.
- King Arthur Measure for Measure will also work, but you may need more water.
- While I have made noodles with other gluten-free flour blends, like Bob's Red Mill, Pamela's, and Namaste, Cup4Cup and Fioreglut are the easiest to work with and make the best pasta.
- My homemade Cup4Cup flour blend also works well here. Your dough may need a bit more water with my homemade blend to achieve the proper consistency of the dough, especially if you plan to extrude the pasta.
- Check the comments for more flours that readers have had success with!
- You do not need extra xanthan gum for this recipe.
- Eggs: This recipe uses a combination of egg yolks and whole eggs for a nice, rich dough. Use high quality eggs for the best flavor!
- Table Salt: A fine salt is best so it doesn't impact the texture of the dough.
- Water: To bring the dough together.
*See full ingredient list and amounts in recipe card below!
Special Equipment: KitchenAid Pasta Attachments
You don't necessarily need to purchase any special equipment to make homemade noodles but you may decide to purchase some equipment if you enjoy making pasta often or want to make other shapes. These tools make the process easier and give you more consistent results.
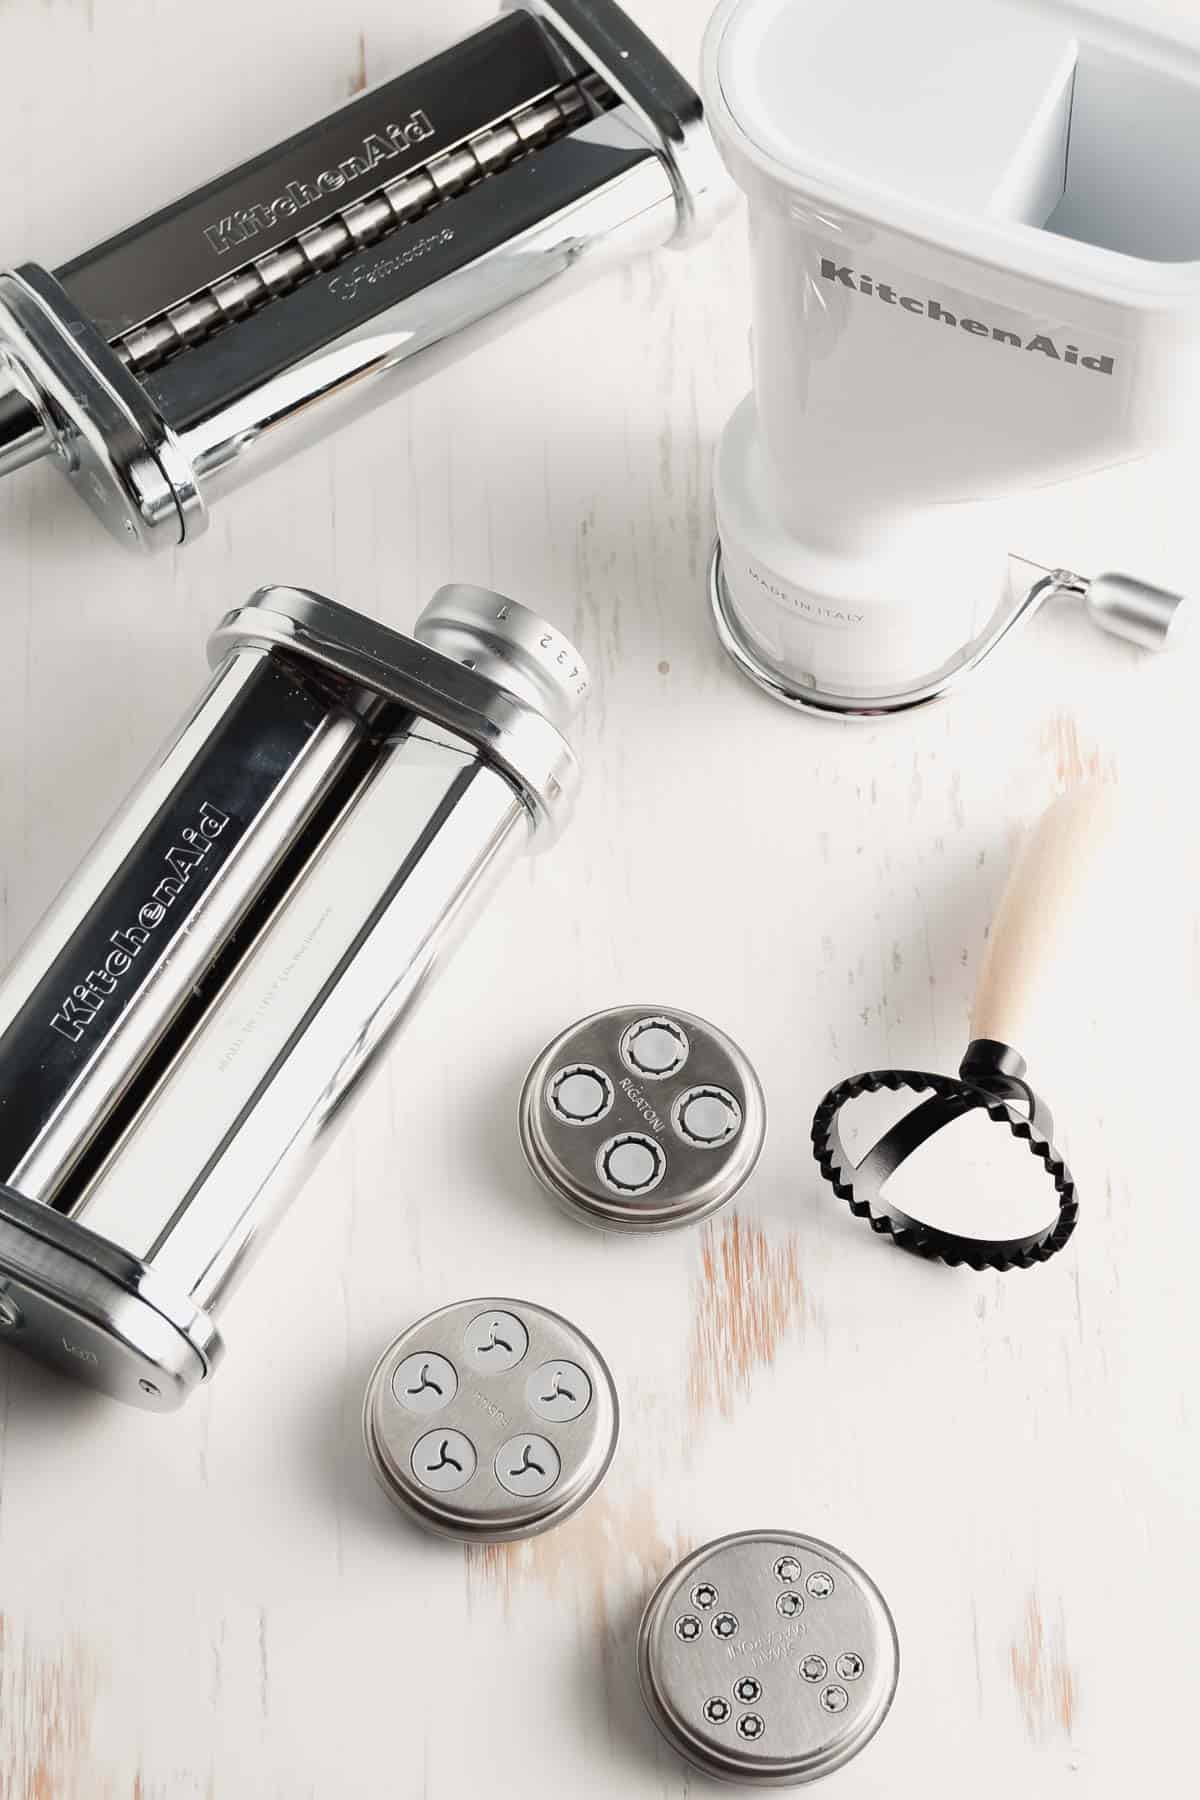
- For basic egg noodles, lasagna, spaghetti, or fettuccini: a pasta machine will give you thinner more consistent results than what you can roll by hand. For this, I have the KitchenAid pasta roller and cutter. This attaches to a KitchenAid stand mixer. If you don't have a stand mixer, you can look into a manual pasta machine.
- To make shapes like macaroni, rigatoni, bucatini, or fusilli: you'll want to look into buying a pasta extruder. I have the KitchenAid Pasta Extruder that also attaches to a stand mixer.
- For ravioli: you can start with a ravioli stamp or a ravioli press.
- If you don't have or want to buy these tools you'll need a rolling pin and a pizza cutter or ravioli wheel.
How to Make Gluten-Free Egg Noodle Dough
You can make the dough by hand or in a food processor. The food processor is quick, easy, and less messy on your hands. Mixing the dough by hand is a bit more work but offers more control which makes it easier to get a feel for the dough.
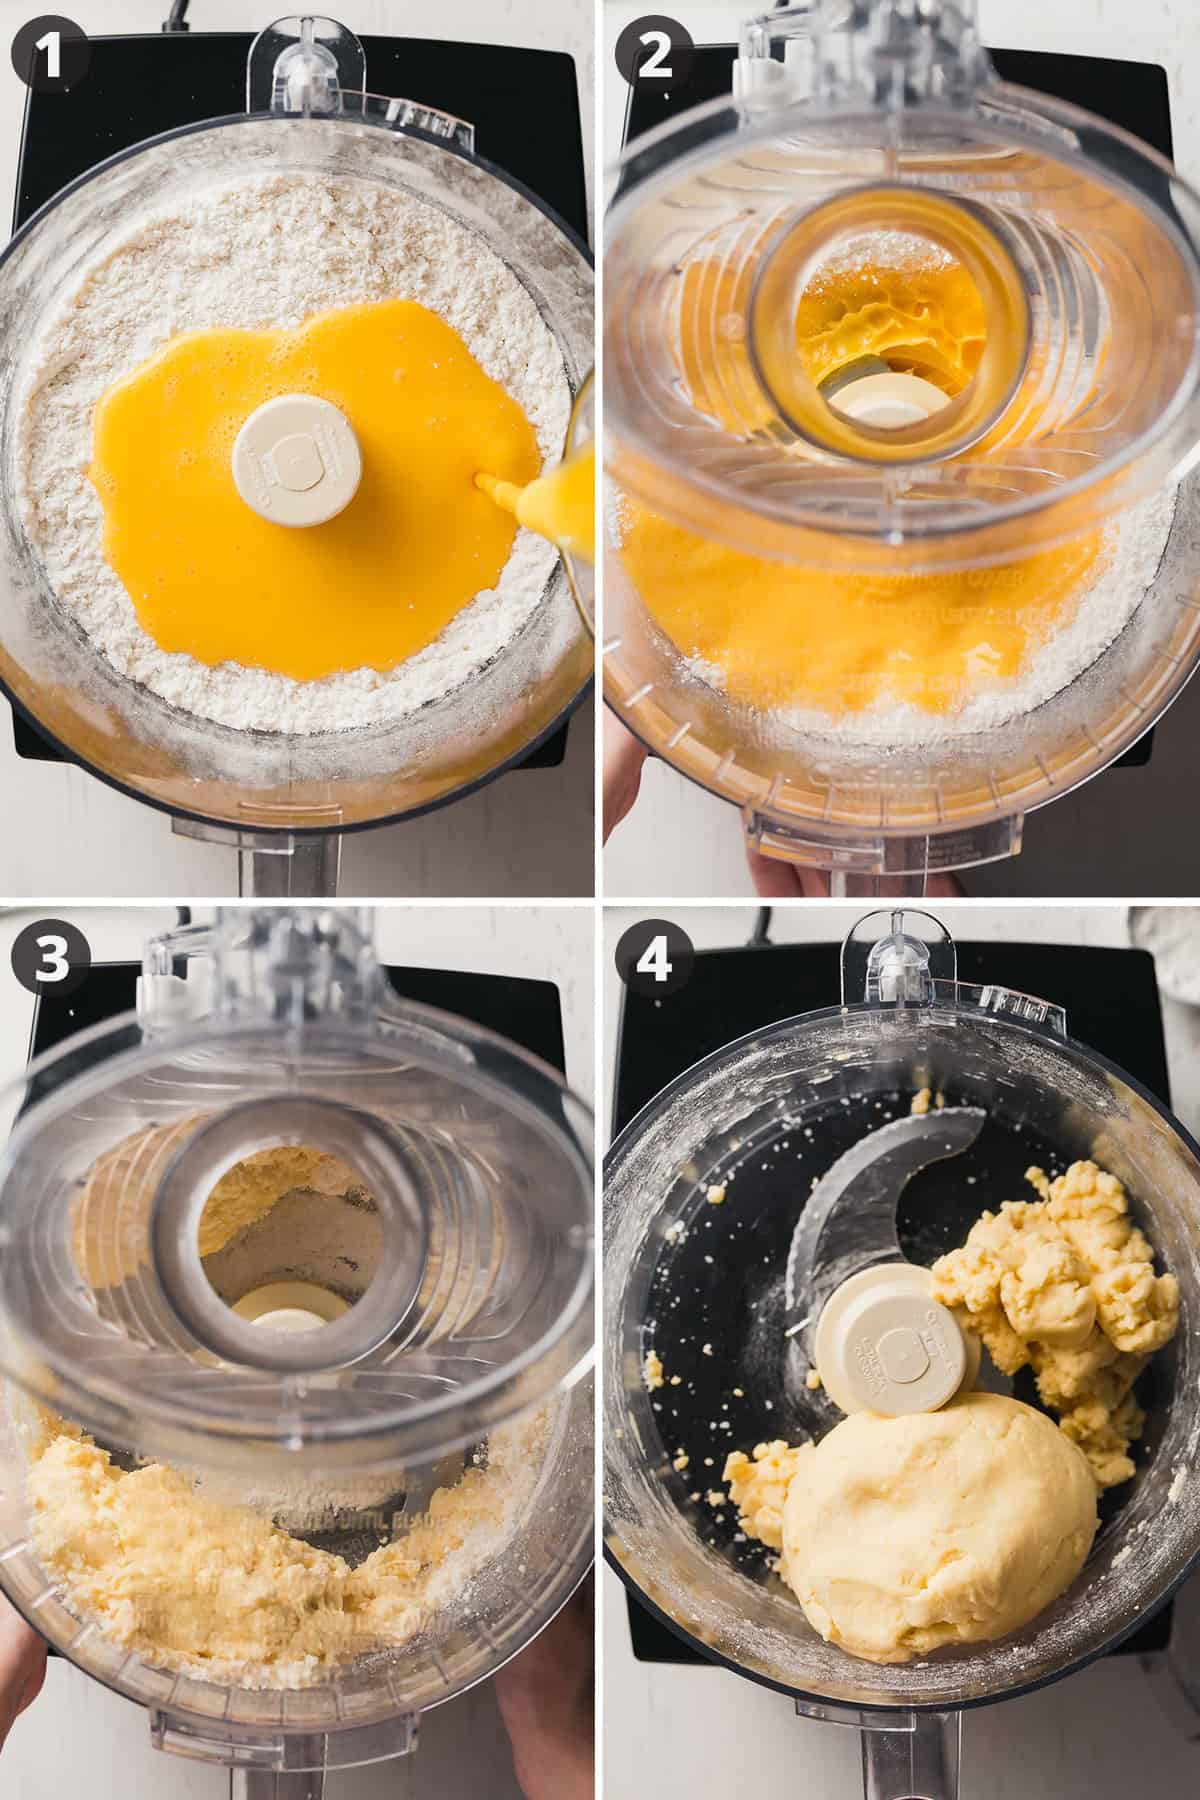
Making the Dough in a Food Processor (Preferred Method)
- Place the flour and salt in the food processor bowl and pour in the whisked eggs and water.
- Turn on the food processor and let it go until a ball of dough forms and pulls away from the sides.
- Check to see if the dough looks firm and smooth or sticky. If it is very sticky, add more flour and mix again.
- Once the dough comes together into a smooth ball, wrap it up and place it in the refrigerator for at least 30 minutes or overnight.
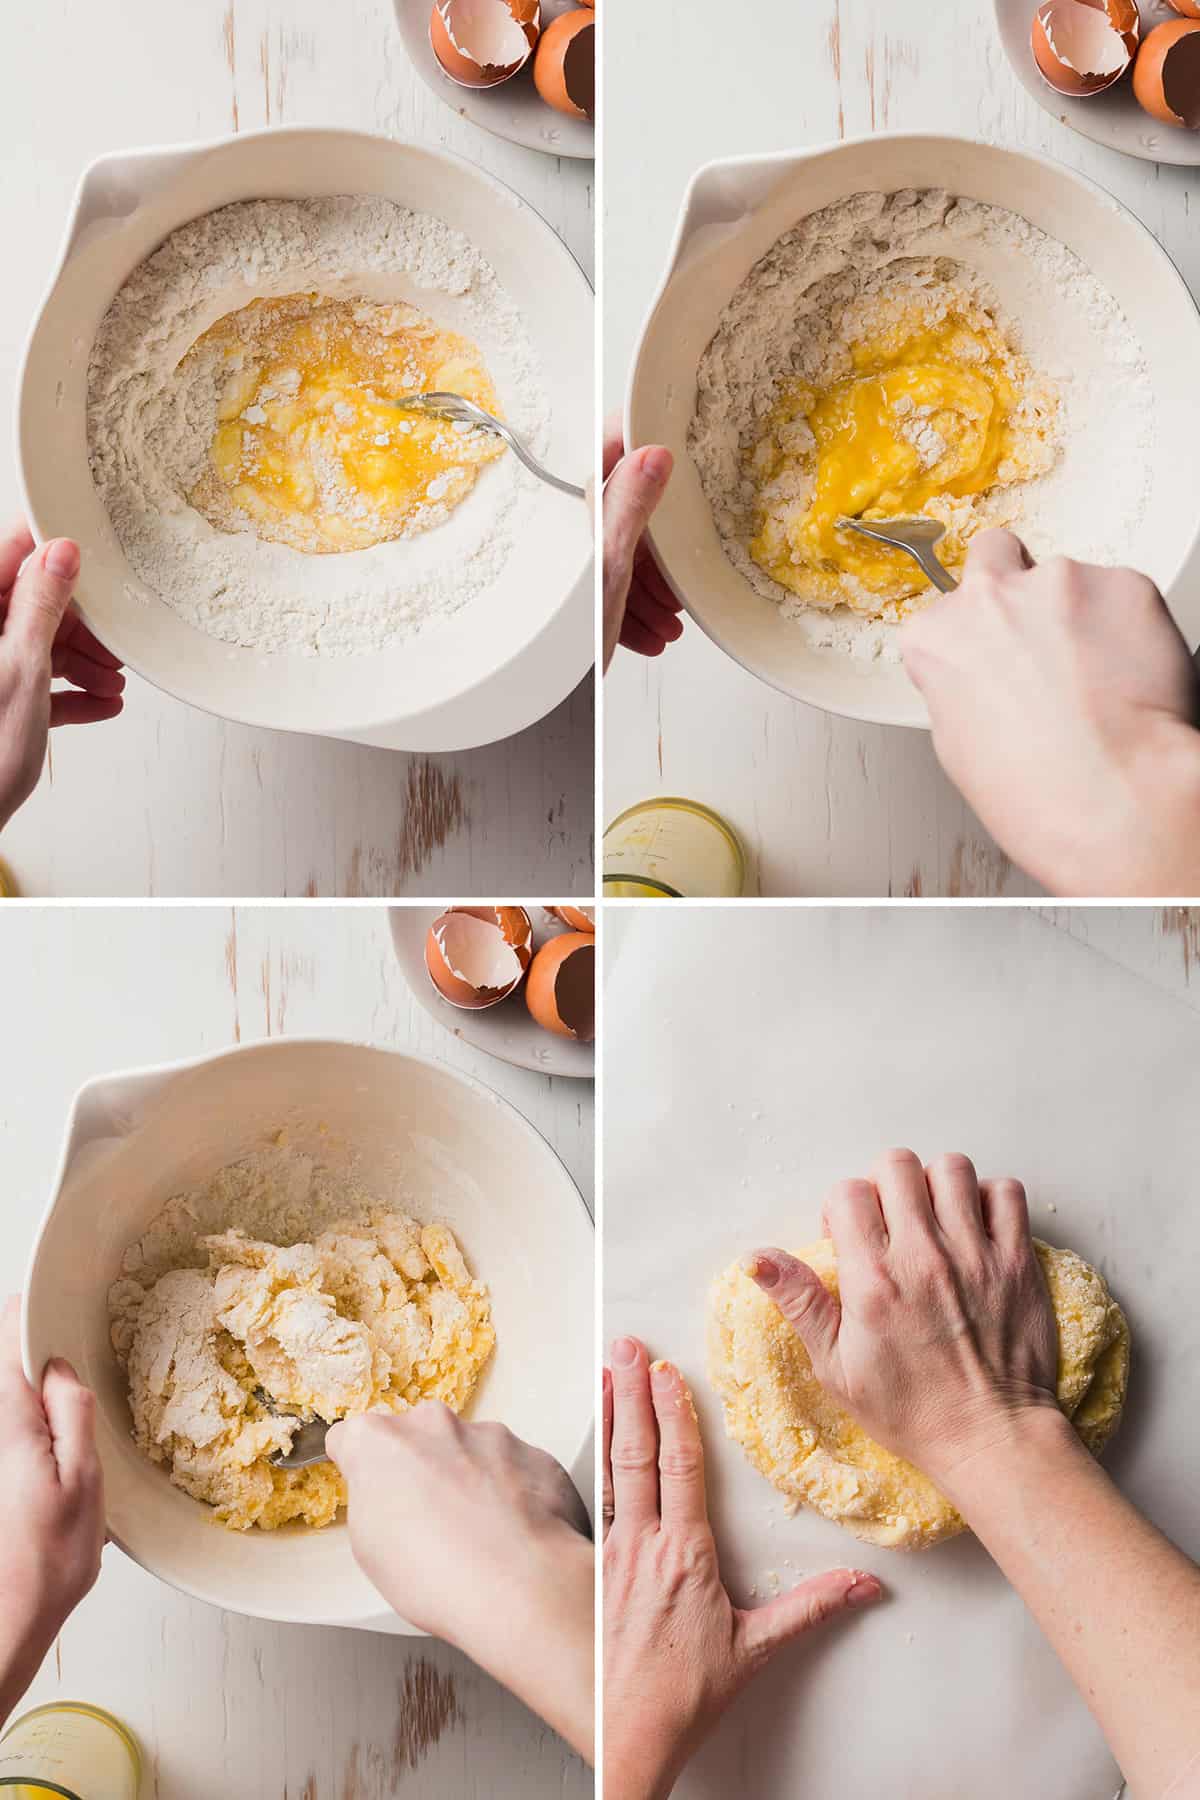
Making the Dough By Hand
- Start by whisking the eggs and water into the flour.
- Continue to mix until you can't get any more flour worked in with the fork.
- Then, dump the mixture out of the bowl onto a piece of parchment paper. Knead until you have a smooth ball of dough.
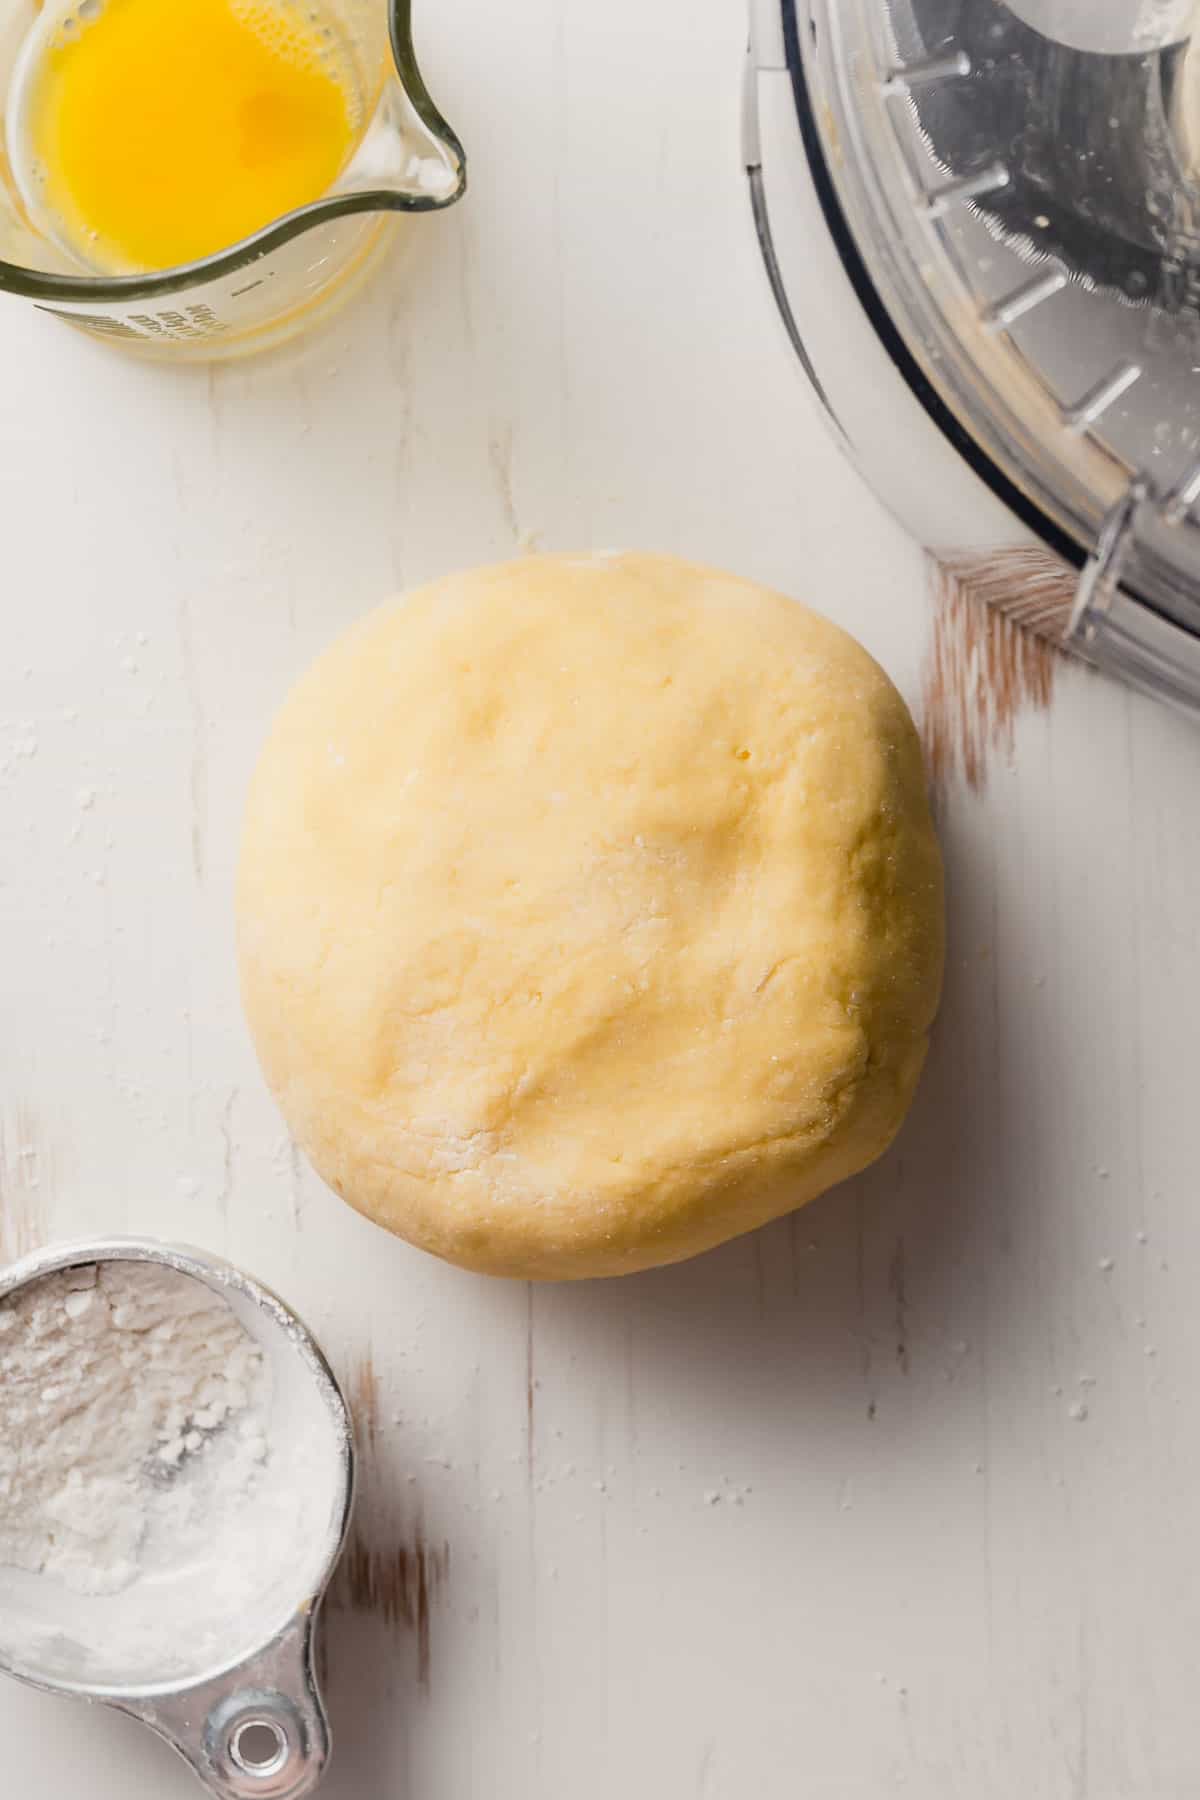
- Once you have a soft, smooth, and firm ball of dough, wrap it up and place it in the refrigerator for at least 30 minutes or overnight.
Yes, It really is that easy to make the dough!
Important Tips for Making the Dough
It is really important to note that making fresh pasta is more about knowing what texture you need to achieve rather than strictly following a recipe.
Many things can affect your dough, from the size of your eggs to all the various types of gluten-free flours. This means you may have to adjust certain elements until you get the right texture. If you don't have the right texture, your dough will be very hard to work with.
So what is the right texture?
The dough should be smooth and firm like a stiff ball of play dough.
- The dough should not be sticky. If your dough is very sticky, knead more flour into the mixture.
- The dough should not be too dry. If after kneading or processing, your dough is still too dry, crumbly, or just won't come together, work in more water.
- If your dough isn't sticky but is still very soft and pliable, you may still need more flour depending on what you are doing with it. The dough needs to be firm enough to hold its shape, especially when using a pasta extruder.
Save This Recipe!
How to Roll and Cut the Pasta Dough
Now that you've made a perfect ball of dough, it's time to turn it into noodles! You can roll and cut the dough with a pasta machine or if you don't have one you can also do this by hand.
How to Make Egg Noodles With a Pasta Machine
*If you are using a pasta machine, follow the directions that come with your particular machine because it might be a little different than my KitchenAid pasta attachment.
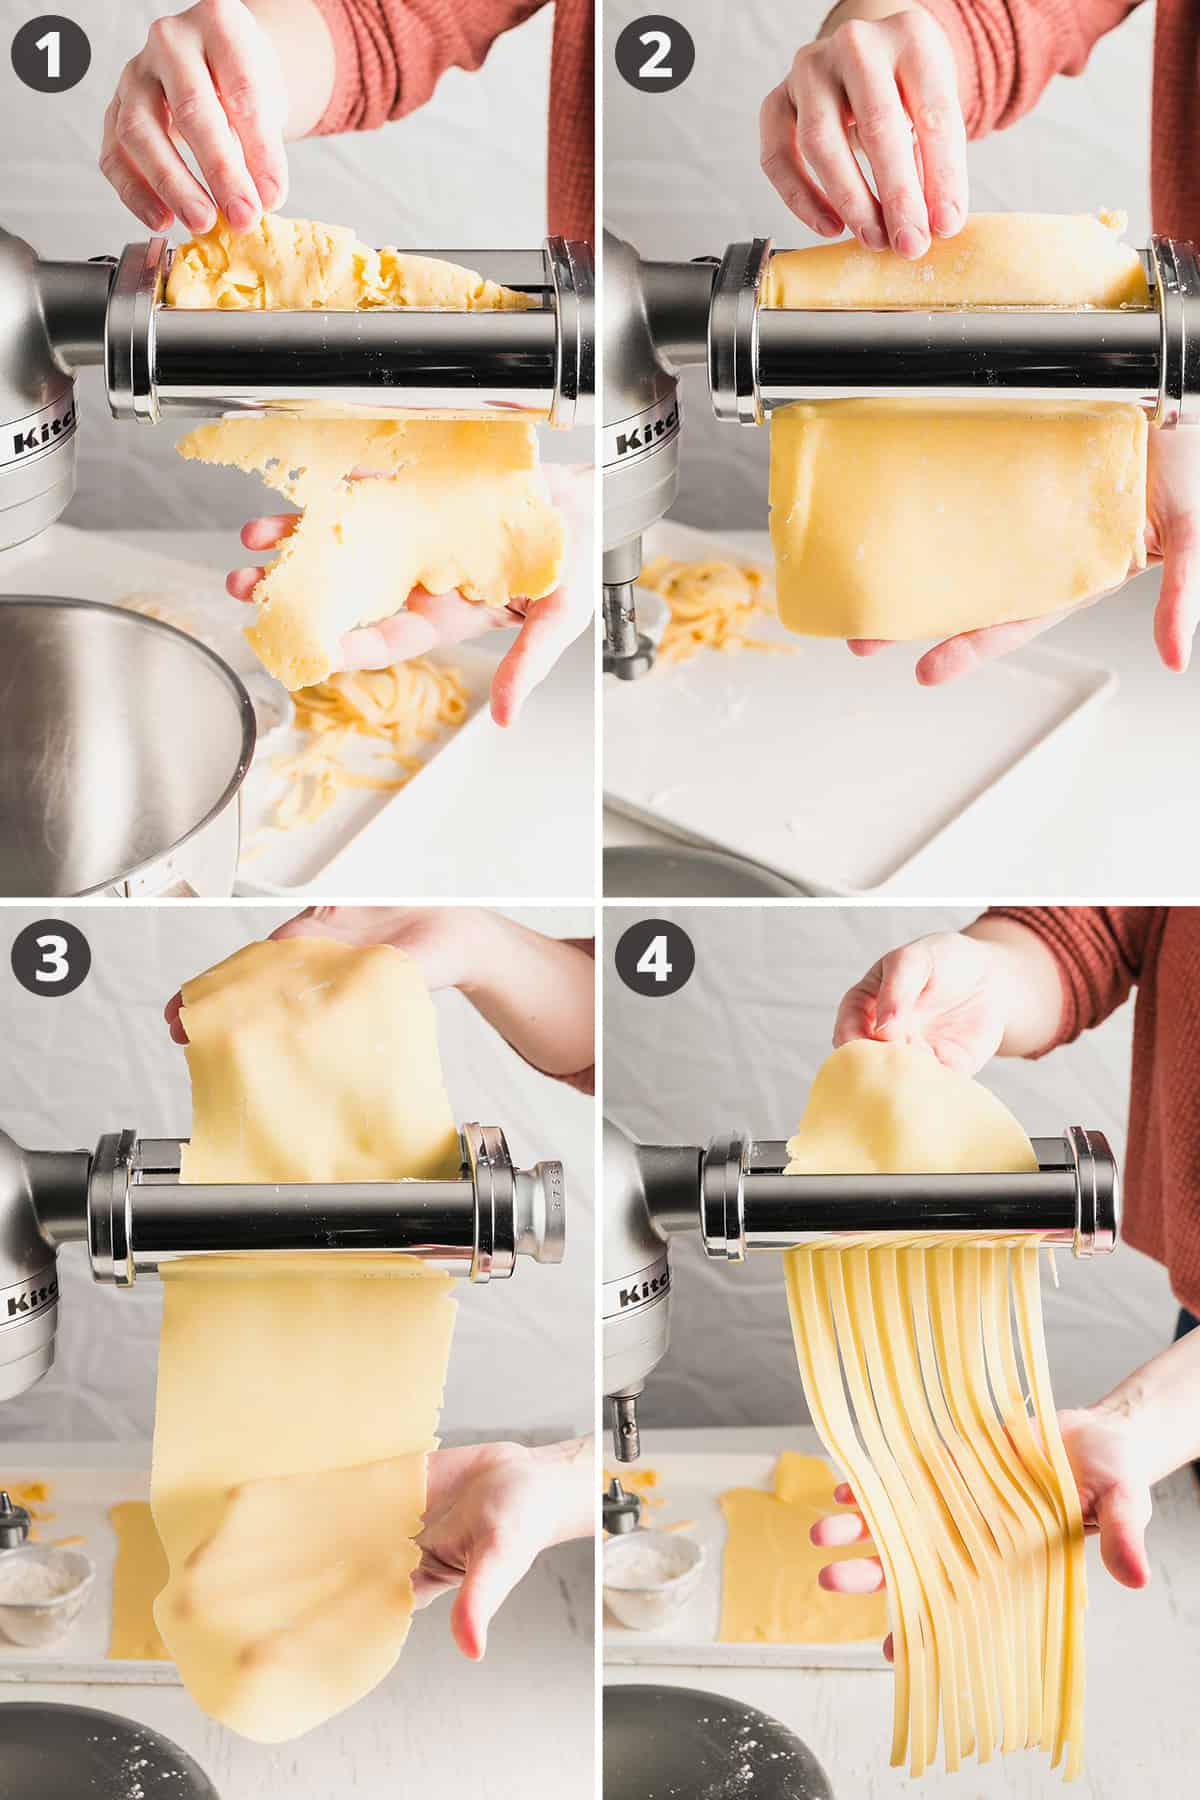
Generally speaking, here's how to use a pasta machine to make egg noodles:
- Start with ¼ of the dough. Run it through the machine on level 1 (or the widest setting). At first, the dough will want to break apart, which is normal.
- Fold the dough in thirds, turn it 90 degrees, and run it through on level 1 again. Do this several times until the dough smooths out into a nice rectangle.
- Once you have a smooth pasta sheet, turn the dial, one notch at a time, passing the dough through one or two times on each level. The dough will get thinner and longer as you go.
- Refer to your instructions for which level to stop at for egg noodles. The recommended setting with the KitchenAid attachment is setting 3, or setting 2 for thicker "kluski" noodles.
- Repeat with remaining dough, laying the pasta sheets flat on a lightly floured baking sheet or work surface.
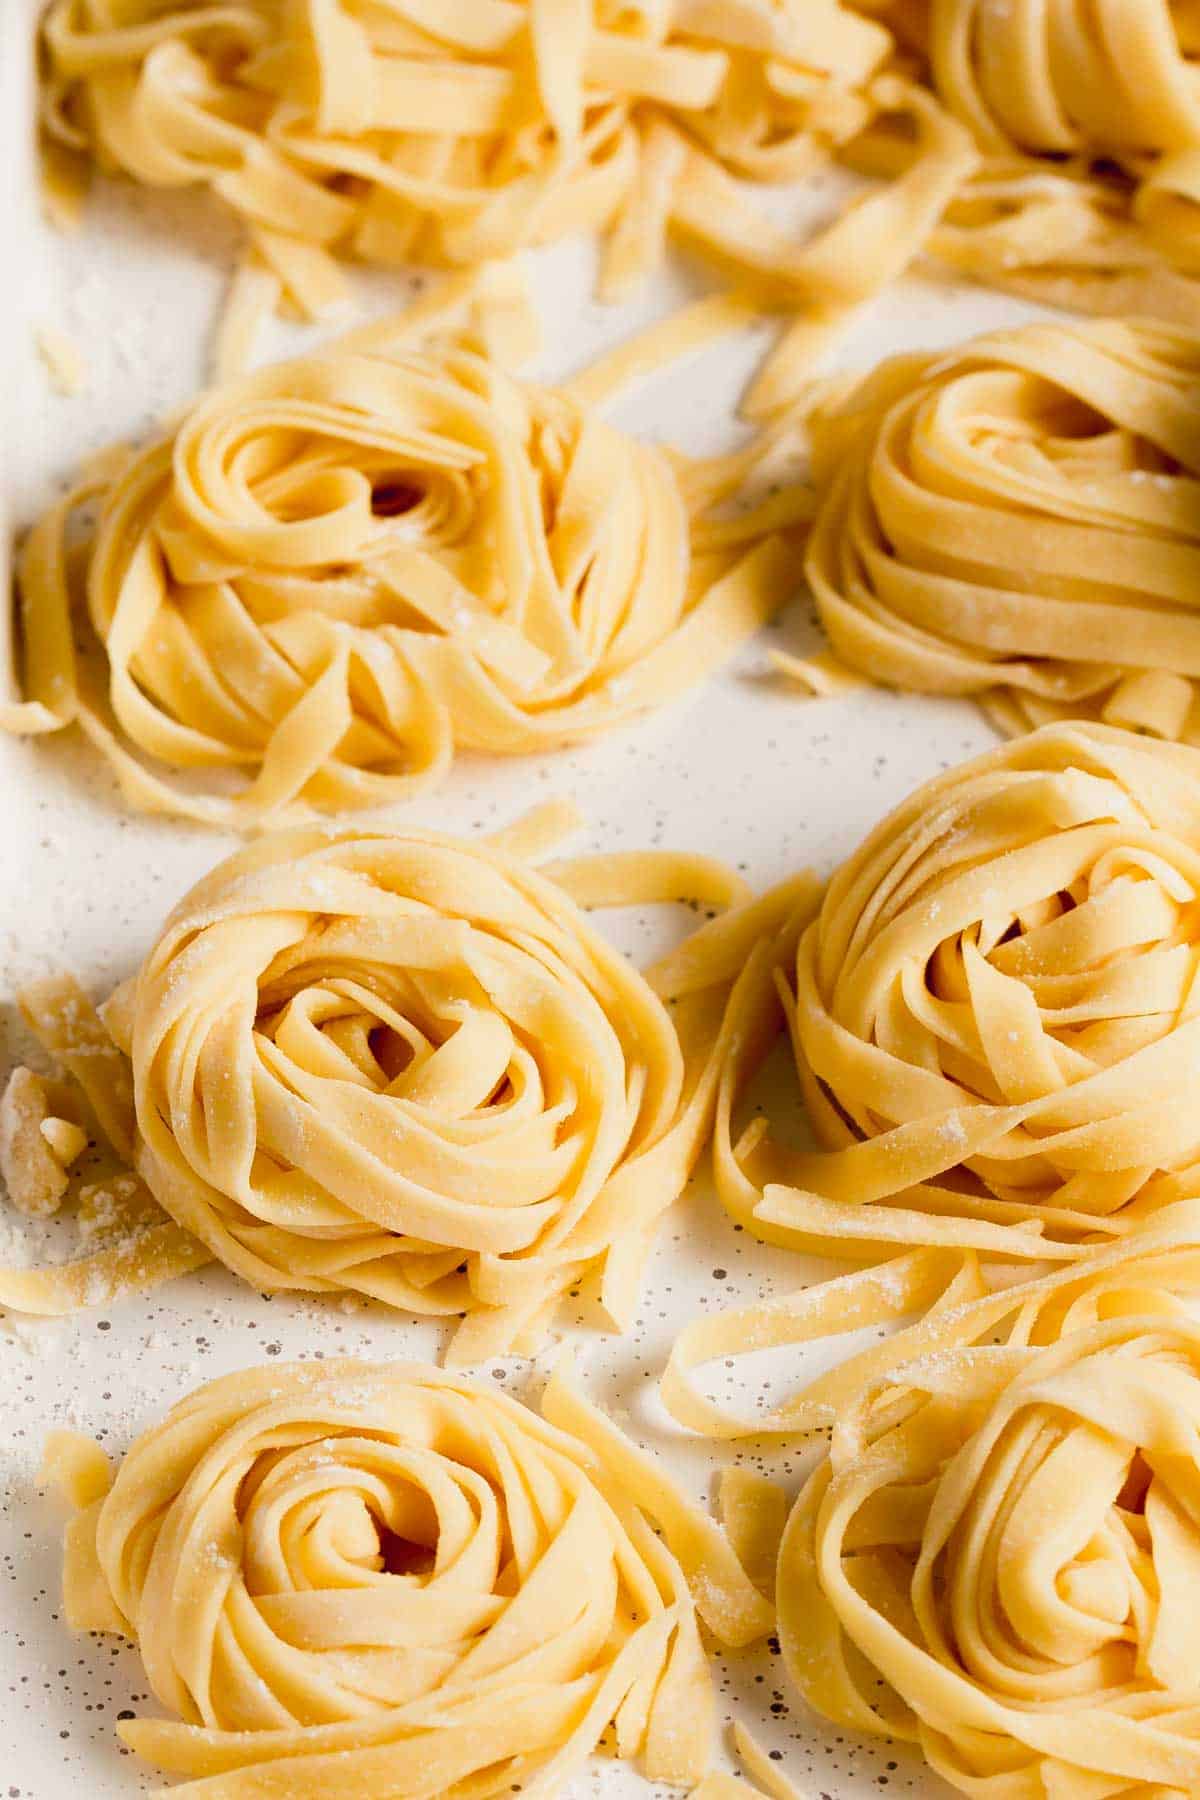
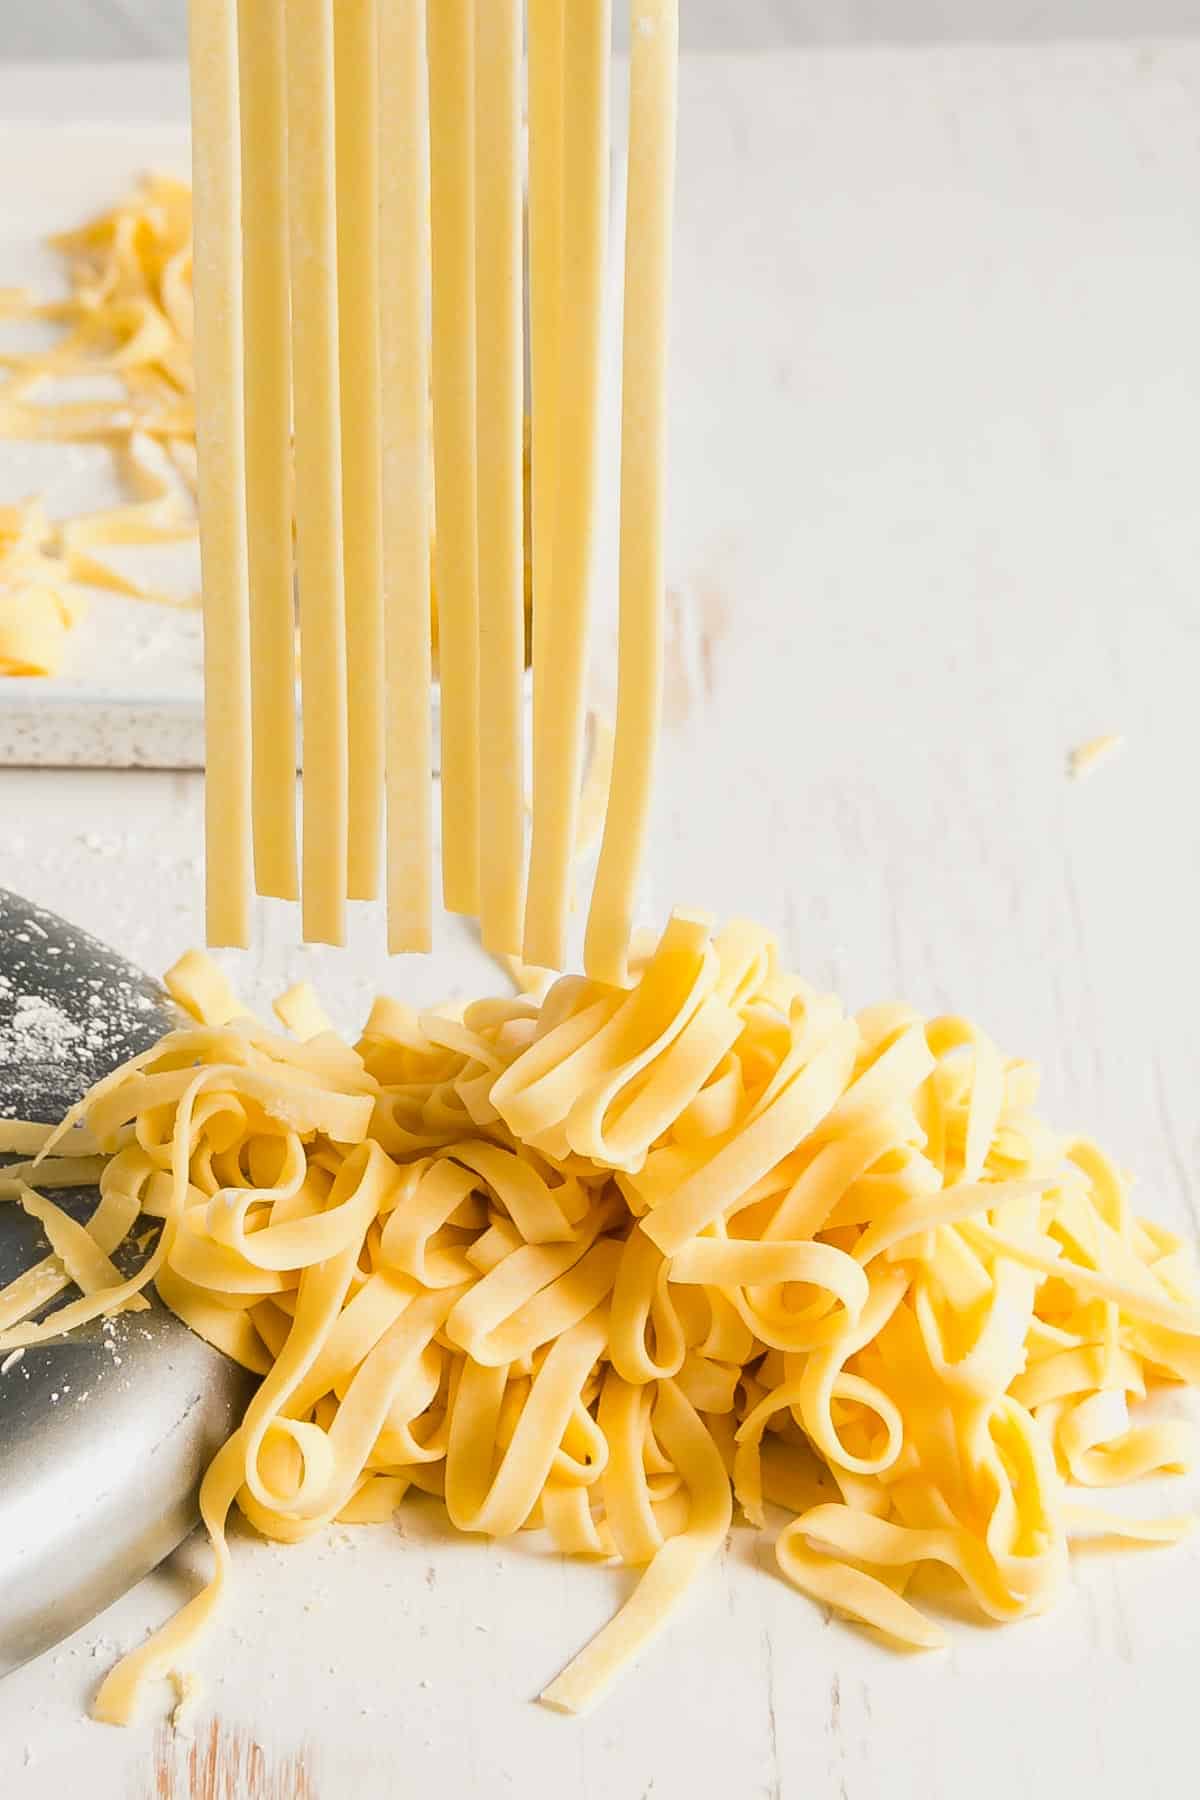
- Now, switch from the roller to the cutting attachment. Use the widest option for egg noodles, which for the KitchenAid is the lasagnette or fettuccini cutter.
- Run the pasta sheet through the cutter. Toss lightly with flour and twist the dough into nests or lay flat on a floured cookie sheet.
How to Roll and Cut Egg Noodles By Hand
Rolling and cutting the dough by hand generally creates a thicker egg noodle with a more homestyle, rustic touch.
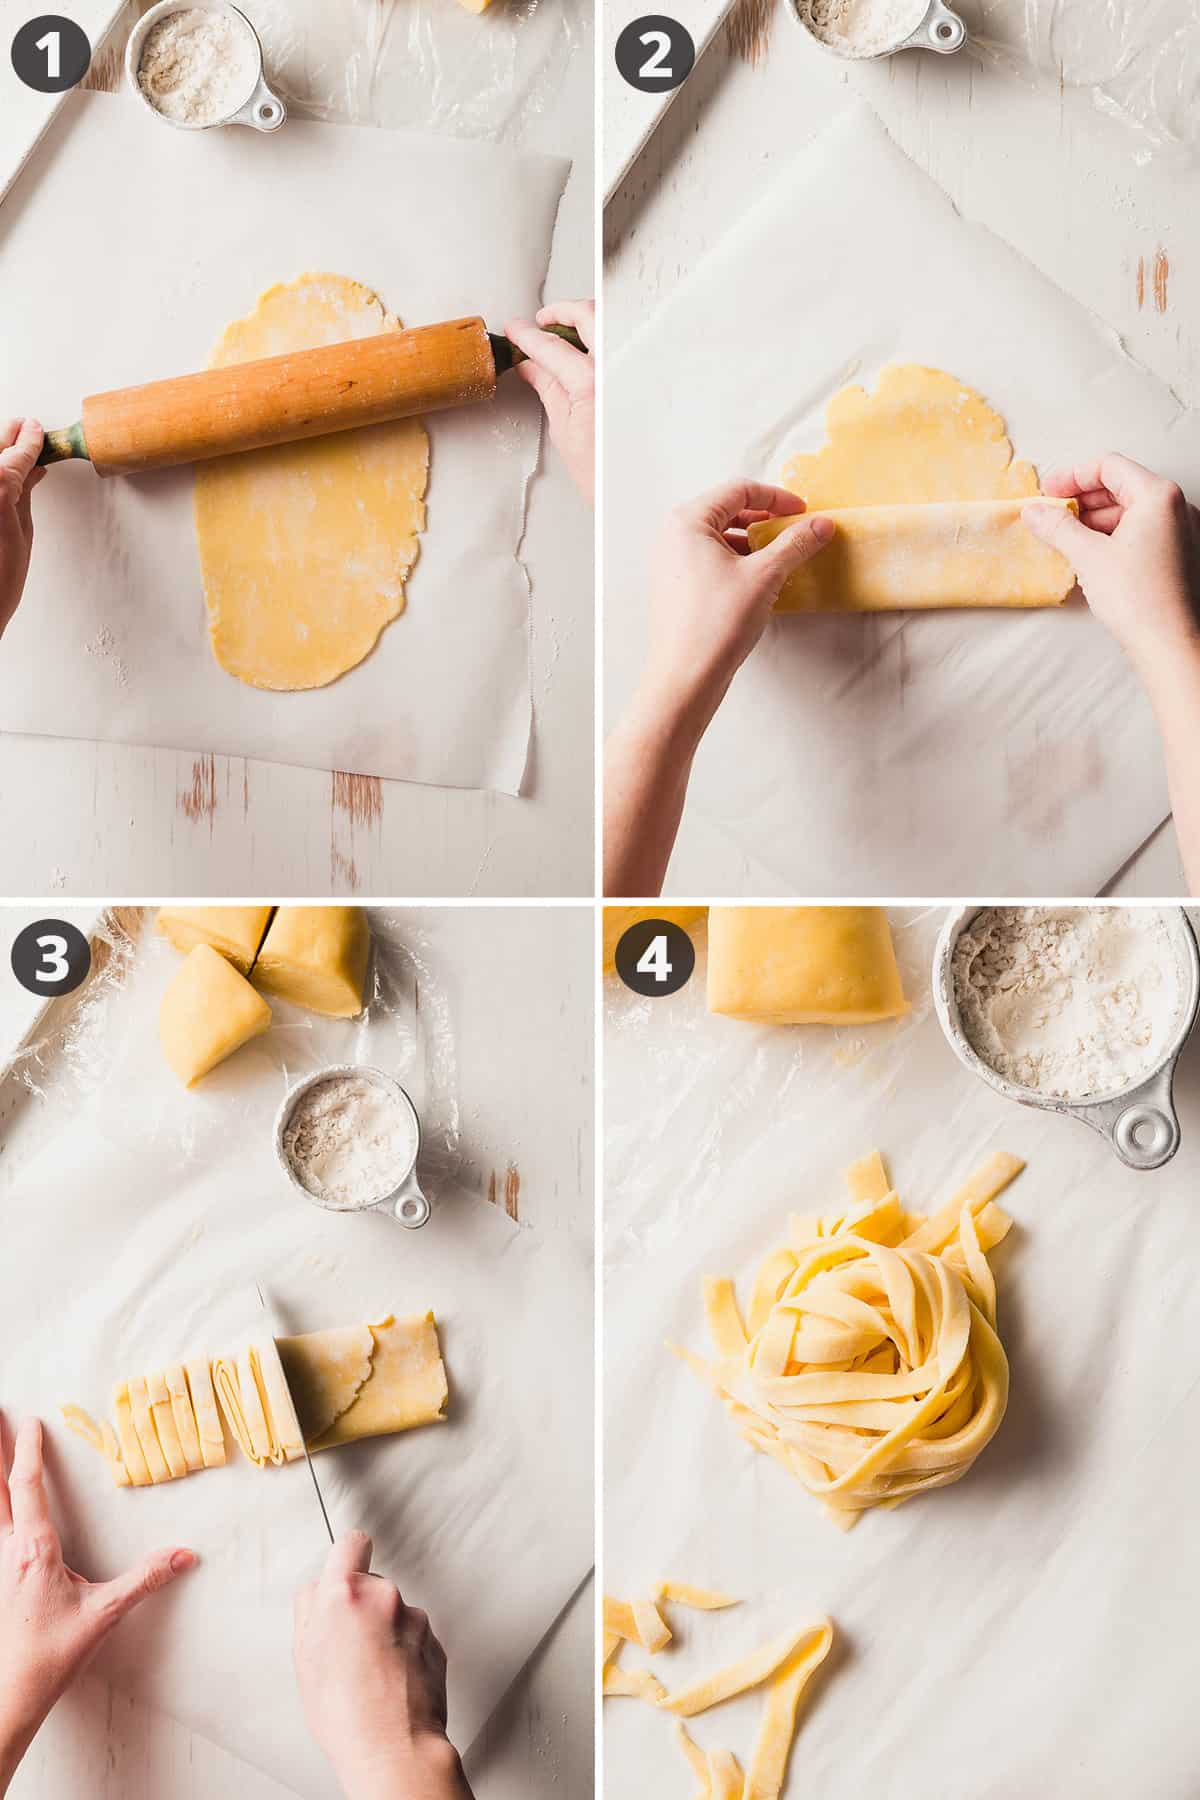
- Use a rolling pin on a lightly floured work surface to roll out a ¼ of the dough as thinly as possible. Keep the surface floured as you work so the dough doesn't stick.
- Once the dough is rolled out, loosely roll it back up into a log shape.
- With a sharp knife or pizza cutter, cut noodles to your desired width.
- Then, gently unroll the noodles and toss with a light dusting of flour to keep them separated.
- Repeat with the remaining dough.
Tips for Rolling and Cutting Gluten-Free Pasta Dough
- Keep the unused dough covered while you work to prevent it from drying out.
- If the dough starts to feel sticky, dust both sides with flour to prevent it from sticking to the pasta maker or work surface.
Using a Pasta Extruder with Gluten-Free Dough
To make shapes you will basically follow the manufacturer's instructions on your pasta extruder. For the KitchenAid Pasta Extruder:
- Slowly feed walnut-sized balls of dough into the hopper.
- Use the tool to push dough down if it becomes caught in the hopper and no longer self feeds.
- Use the cutter to cut pasta at desired length as it exits the press.
You will want a fairly stiff dough for this. If your dough is too soft or sticky, it will not work well in the extruder and your shapes will not hold. If your shapes are not holding up, knead some more flour into the dough and try again.
How to Store Fresh Gluten-Free Egg Noodles
While fresh noodles can be cooked right away, you can also store them for use later!
- After cutting the pasta, toss lightly with flour and spread in a single layer on a cookie sheet.
- Cover loosely and place the pasta in the refrigerator. Use within 3 days.
- To freeze fresh pasta, first freeze the pasta in a single layer on a baking sheet. Once frozen, transfer to an airtight container and freeze for up to 2 months.
How to Cook Fresh Gluten-Free Pasta
Bring a large pot of salted water to a boil. Then add your fresh pasta. Stir to prevent the pasta from sticking.
Generally egg noodles should cook through within 3-7 minutes. Cooking times will vary depending on the size, shape, and thickness of your pasta. The best bet is to use the times as a general guide and taste the pasta to see if it's done.
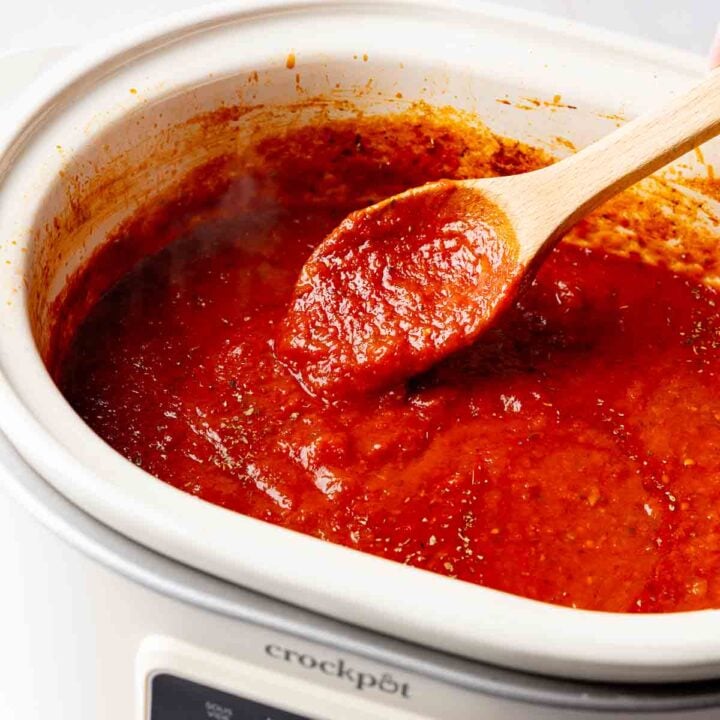
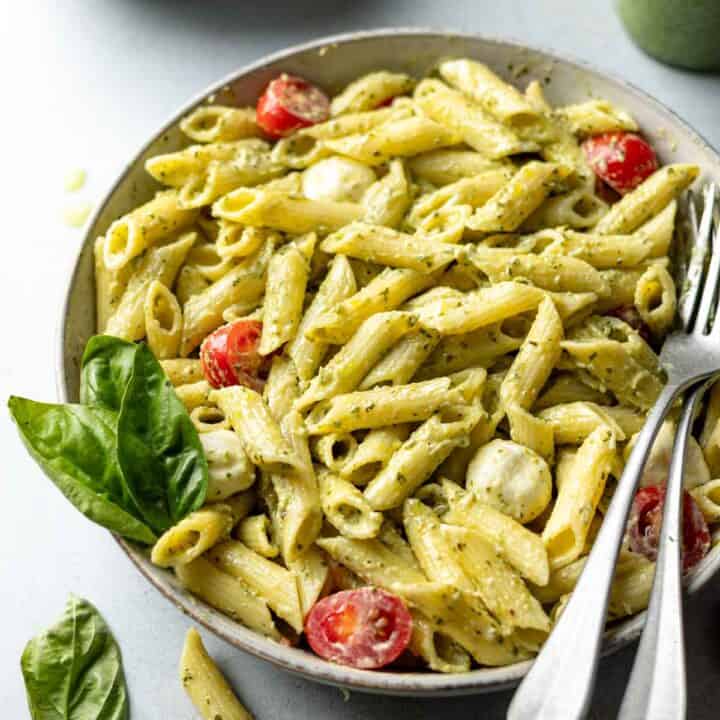
Sauces to Pair with Homemade Gluten-Free Pasta
- Homemade gluten-free marinara sauce, or your favorite jarred version!
- Gluten-free Alfredo sauce
- Burst cherry tomato sauce
- Chicken arrabbiata sauce
- Store-bought or homemade basil pesto
Top Recipe Tip
The secret to this recipe is that it's all about achieving the right texture. Your dough should be smooth yet firm, and only slightly tacky. If your dough is too dry or too soft, it will be hard to work with.
Recipe FAQs
No, I have found these noodles to be very sturdy. They do not fall apart easily like some dried gluten-free pastas do.
Yes, this pasta has a similar taste and texture to regular homemade fresh pasta. Since the main ingredients are eggs and flour, using quality eggs and flour makes a difference. If you notice your gluten-free flour has a distinct "flavor," then that will also be noticeable in this pasta.
Yes, it is important to refrigerate the dough for at least 30 minutes. This allows the flours to hydrate, which results in a smoother dough that is easier to work with.
The dough should not be sticky. If it is, you need to add more flour.
If after kneading, the dough will not hold together and is crumbly, you need to add more moisture to the dough. Knead in a little water until you get a smooth dough.
This happens when the pasta starts to stick to the rollers.
Lightly dust pasta sheets with flour before passing them through the roller to prevent further sticking.


Recipe
Gluten-free Egg Noodles
Video

Ingredients
- 300 grams Gluten-free 1:1 Flour Blend (**Cup4Cup Multipurpose or Caputo Fioreglut recommended.)
- ½ teaspoon table salt
- 2 large whole eggs
- 3 large egg yolks
- plus enough water to equal 185 grams or ¾ cup total liquid.
Instructions
Make the Dough in Food Processor (Preferred Method)
- Place the flour and salt in the bowl and pulse to combine.
- If measuring the liquids by weight, place the measuring cup on scale and tare the scale to zero. Add the eggs and yolks to the measuring cup. Then add enough water to equal 185 grams or ¾ cup of total liquid. Whisk the eggs and water to combine.
- Pour the eggs and water mixture into the flour. Turn on the food processor and let process until the mixture comes together into a ball.
- Open the lid and touch the dough. If the ball is smooth and firm (slightly tacky is ok), you are done.-If the dough is overly sticky, add in a tablespoon of flour and mix again. Repeat until you have a firm, smooth ball of dough.-If the dough won't come together, add a few drops of water and process again. Let it process a bit to see if it comes together. Repeat until you have a firm, smooth ball of dough. Take care not to add too much water.
- Wrap the dough in plastic wrap and refrigerate for at least 30 minutes.
Make the Dough by Hand
- In a large bowl, whisk the flour and salt together.
- Whisk the eggs and water to combine.
- Make a well in the center of the flour and pour in the egg mixture.
- Starting in the center and working out, stir the flour into the eggs.
- When the flour is mostly incorporated, dump the mixture out onto a lightly floured surface or parchment paper. Knead the dough until it comes together into a stiff but smooth ball.
- Wrap the dough in plastic wrap and refrigerate for at least 30 minutes or up to overnight.
Cut Noodles with Pasta Roller and Cutter (Preferred Method)
- **Follow the instructions included with your pasta roller if needed. These instructions are for the KitchenAid Pasta Roller Attachment but a similar method can be followed with most pasta rollers.***At any point, if the pasta gets sticky you can sprinkle with a light dusting of gluten-free flour.
- Divide the dough into four portions. Take one piece and flatten it into a disc. Keep unused dough covered to prevent it from drying out.
- With the pasta roller attachment affixed to your stand mixer, turn the dial to the widest setting, setting 1. Turn the stand mixer on to speed 2.
- Feed the dough through the pasta roller. It may look shaggy and fall apart, this is normal.
- Take the pasta and fold it in thirds, like a letter. Pass the dough through the pasta roller again on setting 1. Do this 2-3 more times or until the dough forms a smooth sheet.
- Turn the dial to the next smallest setting, setting 2. Pass the pasta sheet through the roller 1-2 times. Do not fold the dough during this step.
- Turn the dial to setting 3. Pass the pasta sheet through the roller 1-2 times. Stop here for thicker noodles.
- Turn the dial to setting 4. Pass the pasta sheet through the roller 1-2 times. Stop here for egg noodles.
- By now you should have a long thin sheet of pasta. Lay the pasta noodle flat and divide it half for easier cutting. Repeat with remaining dough.
- Remove the pasta roller and attach the fettuccine or desired cutter.
- Turn on the stand mixer to speed 2. You can go up to speed 5 if desired.
- Feed each pasta sheet through the cutter, catching the noodles as they come out the other side.
- Place the egg noodles on a lightly floured tray and cover with plastic wrap. Repeat with remaining sheets. Once finished, you can cook the egg noodles immediately or store them in the refrigerator, tightly wrapped, for up to 3 days.
Cut Noodles by Hand
- Take ¼ of the dough and place on a lightly floured surface. (Keep the rest of the dough wrapped to prevent it from drying out.) Roll the dough as thinly as possible into a rectangle about ⅛ - ¼ inch thick.
- Loosely roll up the dough into a log shape. With a sharp knife, slice strips of dough into desired width.
- Unroll the noodles and toss with a light dusting of flour. Form into nests or lay flat. Repeat with remaining dough.
- Place the egg noodles on a tray and cover with plastic wrap. Repeat these steps with remaining dough.
Cooking Homemade Egg Noodles
- Cook the egg noodles in boiling, salted water for 3-7 minutes, depending on thickness. Hand cut noodles are usually thicker and may take about 8-15 minutes, depending on thickness.
Notes
Save This Recipe!
Estimated Nutrition
* Nutritional information is provided as a courtesy and should be used as an estimate only. See the nutrition policy for more information.
Lia Masters says
I used gf Bob’s red mill cup for cup and it came out perfectly through my pasta extruder! Thank you so much! I am really excited about making my own gf pasta now!!!
Katie Olesen says
So glad to know Bob's worked well for you! It's amazing how easy and fun it can be to make fresh pasta. And it tastes so much better than the dried pasta!
Stacey says
Made it with Caputo florgut! It turned out perfect! Thank you for the recipe!
I am thrilled to have a solid pasta recipe.
Rose says
Hey I'm a little confused on your flour measurements- how many grams flour to this pasta recipe all together please?
Katie Olesen says
It's 300 grams flour to 185 grams total liquid including the eggs. The dough texture is the more important than the measurements, so if your dough is left with dry flour, feel free to add a bit more water.
Téa says
Do you have an alternative to egg that you can suggest? I don't eat dairy and eggs but, I was thinking about maybe replacing it with a non-dairy yogurt. Do you think that could work?
Thank you!
Katie Olesen says
Hi Téa, I haven't tried an egg replacement for this recipe yet. The recipe is very much dependent on the eggs as well, so I am not confident recommending a replacement I haven't tried myself.
Jen says
Thank you so much for this recipe. First time making GF pasta and it worked brilliantly but best of all it tasted great. I definitely need to practise the technique but I was co chuffed with the result. Thank you 🙂
Dot says
In you recipes, the amount of flour (cups) and water (cups) doesn’t change. We adjusted and the noodles were terrific.
Katie | Wheat by the Wayside says
Thank you for adjusting. I have fixed the recipe card for the flour but since the water is not an exact measurement, the field that I place that amount in is not affected by the buttons.
Denise Pelusch says
I tried this recipe with my new pasta maker machine (Phillips compact) and it is just perfect! It really tasted awesome and it worked seamlessly with the machine. Love your recipes! Thank you!
Laurie Kerschen says
This was sooooo good! I used some almost bad basil and used the food processor method to combine it all. Used my new kitchenaid pasta roller. First one through broke up quite a bit, but after going through a few times it worked beautifully. Cut by hand into pappardelle sized strips. Thank you so much for such an easy, great pasta!!
Katie | Wheat by the Wayside says
So happy you enjoyed it! Yes, the first couple passes are always a bit shaggy but then it starts to come together. That basil addition sounds so good!
Jeanne Monroe says
wow wow wow! these were so good! thank you for giving me back my life, well part of it we really enjoyed these in the homemade turkey soup last nite, and I love that you write the recipe with weighted amounts!! I don't know how other people can be sure if the amounts are correct when they use measuring cups???...Anyhoo, thanks again, these were just like the ole' wheat version, just better cuz no tummy ache. =D
Katie | Wheat by the Wayside says
So happy you loved the recipe! You just can't beat fresh homemade pasta!
Lauren says
This has been my GO TO recipe for pasta for over a year now- I’ve tried multiple others without fail. The cup for cup flour from target/Walmart is definitely the only flour that works for me.
Made ravioli and lasagna with these noodles- I’ll never go back now! Thank you thank you.
chris says
Can you dry this fresh pasta as a way to preserve it just like one can when using wheat flour?
Katie | Wheat by the Wayside says
It will dry out as it sits but I haven't tried this on purpose, if that makes sense. So I don't have recommendations at this time!
Jen says
Thank you for this wonderful recipe! I have used this recipe weekly for the past four month to make rigatoni, fusilli, spaghetti & bucatini. I tried several other recipes and did not have good results. Knowing the texture you need is key to using the dough in the extruder. We are a happy gluten free pasta eating household
Katie | Wheat by the Wayside says
Thanks for the review, Jen! So happy you and your family have been enjoying the recipe so much!
Dawn says
I have been wanting to try making my own pasta (again) for some time. Have you ever made this with another gluten free flour blend? While I hear wonderful things about Cup 4 Cup, I can't do dairy. I have King Arthur flour blend right now (might try the other flour blend you recommended, I'm not familiar with it). My worry is I'll end up with noodles that dissolve when cooked, as that's is what has happened before. I want to add them to stewed chicken. Thanks for sharing your recipe!
Katie | Wheat by the Wayside says
Hi Dawn, you can use other flours! I have made these with Pamela’s and Namaste and they both worked pretty well. They held their shape also. King Arthur was the only one I had trouble with but that may be because I just didn’t work in enough moisture. The dough was crumbly. As I continue to test and become more confident recommending other blends I’ll add them to the post!
Sandy Tassinari says
I also used King Arthur flour one to one and had a little difficulty with it holding together I did work it several times through the rollers. What other flour do you recommend to use? Thank you
Sandy
Katie | Wheat by the Wayside says
Hi Sandy, Cup4Cup or Caputo Fioreglut are my top recommendations here. I too have found KAF to be the most finicky with this recipe. I've used Pamela's in the past and had decent results.